Download
1 / 22
220 likes | 371 Views
Welcome to eDMR. This PowerPoint presentation is designed to show eDMR users how to login and begin using the eDMR system. To access the eDMR system go to http://www.dep.state.pa.us/edmr . Click on the eDMR Login link.

E N D
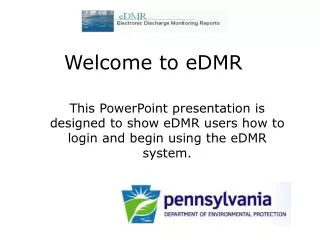
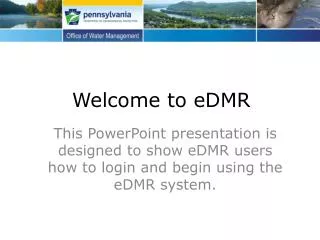
Welcome to eDMR This PowerPoint presentation is designed to show eDMR users how to login and begin using the eDMR system.
To access the eDMR system go to http://www.dep.state.pa.us/edmr. Click on the eDMR Login link.
On the next screen you will be prompted to enter your Username and Password.Keep in mind that they are case sensitive. If this is your first time logging in to the system, you will be prompted to change your password. When you have completed all the fields below, be sure to click the Save button. When you see the message indicating that your password change was successful, you can continue with the eDMR process.
To begin entering data into a new eDMR report, click on Create a New Report.
To find the report you would like to work on, select the facility from the Facility dropdown menu. The page will automatically refresh to display the permit number. Enter the date range of the monitoring period or the report due dates of the report you would like to work on. Click the Search button. A list of all the reports within the date range will be displayed. Keep in mind there may be more than one page of reports. Select the report you would like to work on by clicking on the Online Entry icon. You may also view the report in a html format by clicking on the View Form icon.
If you select View Form, the html version of the eDMR will look much like a paper DMR. This form gives you a preview of what will be expected as you work through the online entry process. If you select Online Entry, be sure the radio button for Online Entry Form is selected. Click on the Continue button to proceed with filling out your eDMR.
After you click the Continue button for the Online Entry Form, you will be able to enter your data into the eDMR fields. Select the desired outfall from the Monitoring Point dropdown menu. As you highlight each parameter, the fields that require entry will be highlighted in red. Be sure to enter the number of violations of effluent limits for the specific parameter in the Excursion No. box at the bottom of the screen. If there was no discharge for a particular outfall, check the No Discharge box. Be sure to save your changes as you go by clicking the Save Changes button.
When you have entered all the data required for each parameter for each outfall, click on the Next button at the bottom of the screen You will now have an opportunity to add comments to your eDMR. Although the comments and the operator information are not necessary, we do encourage that you include these details. Please save any information you have entered by clicking on the Save Current Page button. Click the Next button to proceed.
You will now have the opportunity to attach any supplemental reporting forms that you are required to submit with your eDMR. Click the Browse button. This will allow you to search your computer for the file you would like to attach. The Choose File window should appear. Select the file you would like to attach and click the Open button.
The file information will auto-populate the File field. Give the file a descriptive name and include more details in the Description of the File field. Click the Add button. The attached files will be listed at the bottom of the screen. Follow the same steps to attach all supplemental forms required by your permit. When all forms have been attached, click the Next button.
You will now be given the opportunity to review your report on the Report Summary page. You can view the data you have entered by clicking on the View Form icon, and you can view the attached files by clicking on the file’s icon. At this point, if you are not a certifier, you may click on the Cancel button. As long as you have saved your work, all the data you have entered and the supplemental forms you have uploaded will be available to the next user to login to eDMR. The certifier for the facility will have to complete the submission. If you are a certifier for your facility, click the Next button.
Once you have logged in to eDMR, select Edit an Open Report from the Report Management menu. Just as when you created a new report, select your facility and define the date range of the report you would like to edit. Click the Search button and all the open reports for that facility will be listed Click on the Edit icon to choose the report.
Using the radio buttons, indicate if you would like to edit the Online form or an Attachment. Then click the continue button. You will now be taken to the Online Entry Form and be able to make changes as appropriate. To edit an attachment, select the appropriate radio button and click the Continue button. You must remove the attached document from eDMR, edit it on your own computer, and then re-attach the revised document. To remove the attachment, click the Delete icon.
Once an eDMR report has been submitted, you can view the report, save a copy of the report to your computer, or print out the report. It is also possible to revise a submission. After logging in to eDMR, select Submittals/Revisions from the Report Management menu.
Just as when you created a new report, select your facility and define the date range of the report you would like view. Click the Search button and all the submitted reports for that facility will be listed. Click on the Detail icon.
You will be taken to the Summary page of the submitted report.
To view the report, click the View Report icon. An html version of the report will pop up. This report can be printed or saved to your computer. To save the report to your computer, click on File, then Save As. The Save Web Page window should appear. You can now name the file and indicate where it should be saved. To print the report, click on the Print icon at the top of the screen.
To view an attachment, click on the icon next to the document you would like to view. To make a revision to a submitted report, click on the Revision button in the upper right corner of the screen. You will be asked to give an explanation for your revision. Then, click the Revise button. Follow the procedure for editing an open report as described on previous slides.
Along with your monthly Discharge Monitoring Report, your permit probably requires that you submit supplemental forms as well. Several of these supplemental forms are available for download on the eDMR website. To access these forms, navigate to http://www.dep.state.pa.us/edmr. Click on eDMRSupplemental. Enter your eDMR Username and Password, then click the Log In button.
At the bottom of the page there is a list of all the supplemental forms available for download. These are provided for your convenience. If you have electronic copies of these forms, please feel free to use them. The requirement of any supplemental form is that it includes all the information required by the supplemental forms that accompanied your NPDES permit. Click on the name of a form to start the download process. The File Download window should appear. Click the Save button.
The Save As window should appear. Indicate where you would like your copy of the form to be saved and what you would like to name it. Then click Save. The form will now be available on your computer for you to fill out and attach to your eDMR submissions. Another supplemental form you will need to attach to your eDMR submission is a daily monitoring form. The daily monitoring form will track all of your data points for the month as well as the monthly average for each parameter. Many facilities already have an electronic spreadsheet that accomplishes this. We encourage you to continue to use a spreadsheet that has worked for you in the past and simply attach it electronically to your eDMR.
If you do not have an electronic document that tracks data for your facility, there is a supplemental spreadsheet available to eDMR users online that you might find useful. Once you have logged in to the eDMR Supplemental screen, you will see a list of permits associated to your user account. To download the spreadsheet, click the Get Spreadsheet button. Follow the same steps as for downloading the other supplemental forms.