1 / 43

Implementation of 2 nd Generation NUDECK on Concrete NU I-Girders

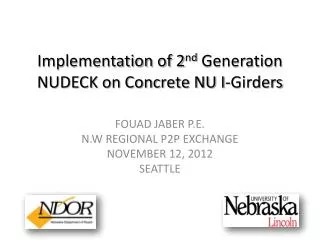
Implementation of 2 nd Generation NUDECK on Concrete NU I-Girders. FOUAD JABER P.E. N.W REGIONAL P2P EXCHANGE NOVEMBER 12, 2012 SEATTLE. 1 St Generation NUDECK. Skyline Bridge Omaha, Nebraska. Continuously open channel, one line of studs, visible strand for longitudinal PT.

dahlia
Download Presentation

Implementation of 2 nd Generation NUDECK on Concrete NU I-Girders

An Image/Link below is provided (as is) to download presentation Download Policy: Content on the Website is provided to you AS IS for your information and personal use and may not be sold / licensed / shared on other websites without getting consent from its author. Content is provided to you AS IS for your information and personal use only. Download presentation by click this link. While downloading, if for some reason you are not able to download a presentation, the publisher may have deleted the file from their server. During download, if you can't get a presentation, the file might be deleted by the publisher.

E N D

Presentation Transcript


  1. Implementation of 2nd Generation NUDECK on Concrete NU I-Girders FOUAD JABER P.E. N.W REGIONAL P2P EXCHANGE NOVEMBER 12, 2012 SEATTLE

  2. 1St Generation NUDECK • Skyline Bridge • Omaha, Nebraska • Continuously open channel, one line of studs, visible strand for longitudinal PT longitudinal PT is concentrated at girder lines

  3. Lessons Learned • Threading post-tensioning strands through the end panels was a time-consuming operation. • Overlay required seven days to cure, which is a major disadvantage to rapid construction and is expensive. • Increasing panel width from 8 ft to 12 ft would significantly speed up construction and reduce number of transverse joints. • Wet transverse joints, haunch forms, and individual strand post-tensioning were very successful

  4. Kearney East Bypass

  5. Kearney East Bypass

  6. Changes • Panel width = 12 ft • No overlay • Covered individual pockets • Threaded Rod Connectors at 48 in. spacing • PT below deck

  7. Panel Arrangement Transverse Panel-to-Panel Connection

  8. Panel Plan

  9. Panel-to-Girder Connection

  10. End Panel

  11. End Panel

  12. End Panel

  13. Detailing of post-tensioning steel guide

  14. Erection of NU 1800 girders, then pouring diaphragms

  15. Attachment of leveling steel bent plates

  16. Laying down of post-tensioning strands

  17. Laying down of post-tensioning strands , cont'd

  18. Erection of precast deck panels

  19. Erection of precast deck panels , cont'd

  20. Erection of precast deck panels , cont'd

  21. Erection of precast deck panels , cont'd

  22. Erection of precast deck panels , cont'd

  23. Grouting of transverse joints

  24. Grouting of transverse joints , cont'd

  25. Raising longitudinal strands to the deck mid-height

  26. Installing Anchor Plate

  27. Installing Anchor Plate, cont'd

  28. Installing Chucks and Tensioning Strands

  29. Grouting deck panel pockets, girder haunch, and anchor block

  30. Grouting deck panel pockets, girder haunch, and anchor block , cont'd

  31. Completed bridge

  32. Panel Plan

  33. Panel-to-Girder Connection

  34. End Panel

  35. End Panel

  36. End Panel

  37. Pullout Testing of Shear Connectors

  38. Pullout Testing of Shear Connectors

  39. Pullout Testing of Shear Connectors

  40. Questions? Thank You

More Related