Download

1 / 44
440 likes | 594 Views
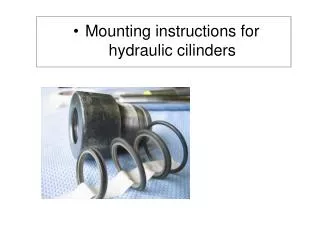
Mounting instructions for hydraulic cilinders. www.all-hytec.be. Cilinder head seals. www.all-hytec.be. Location of cilinder head seals. Piston seals. www.all-hytec.be. Location of piston seals. Piston to rod seal. www.all-hytec.be. Have a clean environment!.

E N D
Mounting instructions for hydraulic cilinders www.all-hytec.be
Cilinder head seals www.all-hytec.be • Location of cilinder head seals
Piston seals www.all-hytec.be • Location of piston seals
Piston to rod seal www.all-hytec.be • Have a clean environment!
Place the first O-ring seal at the outside of the cilinder head www.all-hytec.be • O-ring placed !
Placing the inner seals ofthe cilinder head. Two pieces have to be placed, it is only displayed once. www.all-hytec.be • First place the O-ring seal
Place the seal in the 2 (3) cavity www.all-hytec.be • Gently put te O-ring into the cavity.
Take the Shamban seal and make sure the orientation is correct ! www.all-hytec.be • Be sure to put the seal in the wright direction ! • See drawing
Bend the seal into this shape, so it will fit in te cavity in the cilinderhead www.all-hytec.be • Place the seal into the second cavity in the cilinderhead, ontop of the O-ring.
Now push the seal in the cavity www.all-hytec.be • Press on the seal to fit it in the cavity
Repeat the same handeling for the second shamban seal in the third cavity. www.all-hytec.be • Attention ! • Try to rotate the bulb in the seal 180°.
Two seals are placed now www.all-hytec.be • Place the O-ring in the first cavity
Place the O-ring www.all-hytec.be • Make shure the O-ring is situated in front of the cavity. The shamban seal has to be placed behind the O-ring!
Take the shamban seal and hold it in the wright direction ( foto ) www.all-hytec.be • Bend the seal into this shape, so it will fit into the cavity.
Place the seal in the cavity • Make sure you place the seal behind the O-ring! www.all-hytec.be • Push the seal into the cavity
Press on the seal to fit it in the cavity www.all-hytec.be • Grease up the seals
Grease up the seal fixing tool for the cilinderhead www.all-hytec.be • Put the seal fixing tool in front of the cilinderhead
Gently push the tool into the cilinderhead • Be sure not to damage the seals ! www.all-hytec.be • Push it trough
Keep it like this for at least one minute • The seals will retake their original shape www.all-hytec.be • Retract the tool • Cilinderhead is ready
Grease up again www.all-hytec.be • Grease up the cilinderrod
Place the rod in front of the cilinderhead www.all-hytec.be • Push the rod into the cilinderhead • Make sure not to damage the seals !
Push the cilinderhead over the rod and keep it there www.all-hytec.be • Take the O-ring seal for the rod • This seal tightens the piston to the rod
Place the O-ring www.all-hytec.be • Take the seals for the piston
Take the seal sliding tool for the piston www.all-hytec.be • Place the tool on the piston
Place the O-ring on the tool www.all-hytec.be • Roll it towards the middel cavity in the piston
Place the O-ring www.all-hytec.be • Place the shamban seal on the tool
Slide the seal towards the cavity • Make sure is will not twist ! www.all-hytec.be • Place the seal and remove the tool
Grease up the seal www.all-hytec.be • Place the piston in the seal fixing tool
Gentely help the seal into the tool • Make sure not to damage the seal www.all-hytec.be • Press the piston into the tool • Keep it like this for at least one minute • The seal wil retake its original shape
Push the piston out of the tool www.all-hytec.be • Take the seal sliding tool and place it on the piston
Place the tool as near as possible to the shamban seal www.all-hytec.be • Put the X-like seal on the tool and slide it on the shamban seal
Make sure the seal is not twisted www.all-hytec.be • Remove the sliding tool • Take the piston-guide
Gently put the piston guide into the seal fixing tool www.all-hytec.be • Position it well
Grease up the piston-guide www.all-hytec.be • Push it in the tool • Now the piston-guide is pre-shaed • Repeat this for the second piston-guide
Save the piston-guides in the seal sliding tool www.all-hytec.be • Take the cilinder rod and the piston • Be sure the piston is correct orientated !
Screw the piston on the rod www.all-hytec.be • Place the rod in a bank-wrench
Screw on the piston www.all-hytec.be • Leave about 10 mm open and fill with LocTite
Use LocTit 243 www.all-hytec.be • Screw on the piston
Clean the top and remove the LocTite www.all-hytec.be • Now place the cilinder in the bank-wrench
Position the first piston-guide on the piston www.all-hytec.be • Put the rod in the cilinder and grease up the piston-guide
Push in the piston until you can place the second piston-guide www.all-hytec.be • Grease up the second piston-guide
Push the rod in the cilinder www.all-hytec.be • Place the cilinder in the bank-wrench • Not to tight ! That will reform the cilinder !
Grease up the thread and the O-ring www.all-hytec.be • Push the rod towards the cilinder
Thighten the cilinder www.all-hytec.be • The cilinder is ready for use