Download

1 / 50
510 likes | 537 Views
Access the VIP Portal to place orders efficiently. Identify accounts, select products, and finalize transactions seamlessly with step-by-step guidelines.

E N D
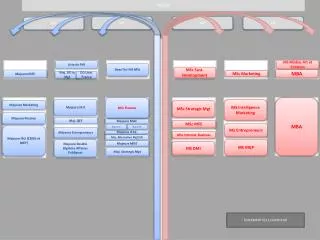
Portal VIP Ordering Functions For Distributors
VIP Portal Shopping Experience • Identify the VIP Agreement Number • Search by Customer Name • Search by Agreement Number • Search by Customer Number • Select the Installation Address • Choose the Reseller • Select the SKUs for the order • Check Out by entering address and contact information • Confirm order details • Receive Web Confirmation Number
Navigating to the Portal Navigate to https://portal.veritas.com. For training, navigate to https://train-portal.veritas.com .
Login Enter Username and Password and click Login.
Portal Home Page View the Portal’s Home Page for a Distributor. Click VIP Program.
VIP Home Page Click VIP Shopping.
Identifying the Agreement Number Enter search criteria by Customer Name, Agreement Number or Customer Number and click Search.
Viewing Agreement Number Search Results Click 3089. Click New Customer if the search does not return the required agreements.
Identifying the Installation Address Select an address from the dropdown, and Click Continue.
Selecting the Reseller Enter a full or partial Reseller name and click Search.
Viewing Reseller Search Results View all matching Resellers and addresses and click INSIGHT DIRECT (UK) LTD.
VIP Main Shopping Page SKUs can be manually entered here and added to Shopping List or to Shopping Cart Select Product Tree or Search to search for SKUs in a Product Family. Click Import to Cart to import a CSV file.
Four Processes to Add SKUs • Quick Shop • enter quantity and SKU in Quick Shop Frame • Search Results • enter partial SKU to generate list of matching results • Product Tree • search through Families, Offerings and Platforms for available SKUs • Shopping Lists • “Sticky Notes” of most often ordered SKUs
Entering SKUs Using Quick Shop Enter 1, A093808-0LA000 Click Add to Cart.
Confirmation Message for SKUs Added Confirmation message displayed that SKU has been added to the Shopping Cart. Click Shopping Cart.
Viewing the Shopping Cart Click Return to Shopping. Contents of the Shopping Cart are displayed.
Selecting Product Info to Find SKUs Click Product Info
Viewing the VIP Product Tree Click + Backup Exec Click 3059906.
Leafing Open a VIP Family Branch Click + Backup Exec
Leafing Open a VIP Offering Branch Click + Windows
Leafing Open a VIP Product Branch Click LICENSE-DIMENSIONS
Viewing SKUs within the Product Catalog Enter quantity to order and click Add to Cart.
Viewing the Shopping Cart Click Return to Shopping.
Selecting Search to Find SKUs Click Search
Entering SKU Search Criteria Enter Keyword string for SKU description and click Search.
Viewing SKU Search Results Enter quantity to order and click Add to Cart.
Viewing the Shopping Cart Click Return to Shopping.
Selecting My Lists for Finding SKUs Click My Lists
My Shopping Lists Click Create New Shopping List.
Creating a New Shopping List Enter a Shopping list name and click Create New List.
Viewing Existing Shopping Lists Click App Home Existing Shopping Lists will be displayed.
Selecting Search to Add SKUs to Shopping List Click Search
Searching for SKUs to Add to Shopping List Enter Keyword string for SKU description and click Search.
Adding SKUs to Shopping List Enter quantity to order and click Add to List.
Viewing an Updated Shopping List Select items from the Shopping list and click Add Selected Items To Cart.
Viewing the Shopping Cart Slide scroll bars to view bottom right portion of Shopping Cart.
Scrolling the View of the Shopping Cart Review contents of Shopping Cart. Click Check Out.
Providing PO Numbers During Checkout Enter PO Numbers for the Distributor, Reseller and End user. Click Continue.
Selecting the Billing Address Select the address from the dropdown. Slide scroll bars to view bottom of page.
Selecting the Shipping Address Enter the Billing Address information. Click Continue.
Selecting the Contacts Select Billing Contact from the dropdown. Slide scroll bars to view bottom of page.
Selecting More Contacts Enter the Shipping Contact information. Click Continue.
Viewing Order Confirmation Review Order Information. Slide scroll bars to view bottom of page.
Scrolling the Order Confirmation If all of the details and Shopping Cart contents are correct, click Place Order.
Viewing the Order Confirmation This page is displayed with the Web Confirmation Number. This is the temporary tracking number until the order is accepted by VERITAS Order Management. Click click heretoview the Web Confirmation Report.
Selecting the Web Confirmation Report The default parameters for the Web Confirmation Report are to select all orders placed for the current day. Usually, these parameters do not need to be modified. Click Generate.
Viewing the Web Confirmation Search Results Click 22899.
Viewing the Web Confirmation Order Details Click Log Out. Report output will be displayed.
Logging Out Click Logout.