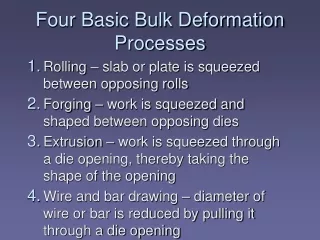
Basic Machine Processes
Basic Machine Processes. Competency D403.00 Identify the basic concepts of the manufacturing processes. Basic Machine Processes. Objective D403.02 Explain the ANSI standards of applying annotations to a drawing that best describes the manufacturing process. Hole Callouts Section I.


Basic Machine Processes
E N D
Presentation Transcript
Basic Machine Processes Competency D403.00 Identify the basic concepts of the manufacturing processes.
Basic Machine Processes Objective D403.02 Explain the ANSI standards of applying annotations to a drawing that best describes the manufacturing process.
How Finish Holes Are Made The drilling of a common drilled hole is done on a drill press. Drilling can also be done on a lathe.
Drilling Is the process used to cut a cylindrical hole with a drill press and drill bit. Blind Hole
BORING Thru Hole Enlarges the hole slightly and makes it rounder and straighter.
Reaming To enlarge a hole to a more accurate size and surface quality.
ANSI Hole Identification Symbols Diameter Counterbore / Spotface Countersink Depth Number of holes
Drill Holes - Size & Location Dimensions Always add dimensions for size and location, to profile of feature Always locate a drill hole by a common corner. (Datum Corner)
Dimensioning Repeated Holes X = Number of holes required. Don’t forget to provide a space
Blind Hole Depth Symbol A blind hole cuts into but does not pass completely through the object. For blind holes always show a 30 degree bevel end to represent the drilling process.
Counterbore Callouts Depth Symbol Counterbore Symbol Counterbore – To enlarge the end of a drill hole to a specific diameter and depth in order to recess a mating part.
Through Holes A through hole is one that passes all the way through the object. The word THRU may be omitted in the annotation of the hole.
Spotface Callouts Counterbore Symbol Spotface – The cutting of a shallow counterbore, usually about .0625 deep (depth symbol is omitted). A spotface provides an accurate bearing surface for the underside of a bolt head.
Countersink Callouts Countersink – To recess a hole with a conically (cone) shaped tool to provide a seat for flat head screws. (Does not need a depth to be specified.) Countersink Symbol Angle of The Chamfer Drawn At 90 Degrees
Knurling Common on thumbscrews and handles of to provide a better gripping surface Straight – parallel groves. Diamond – crossing diagonal groves.
KnurlingDimensioning As Seen The most commonly used diametrical pitches (DP) are 64 DP (coarse), 96 DP (medium), 128 DP (fine), and 160 DP (extra fine). The callouts for a knurl should include the pitch, type, and the diameter. As Drawn
External Chamfers Dimensioning Bevel edges are normally applied to cylindrical parts. OR .25 X .25 CHAMFER
Fillets & Rounds • Sharp corners are weak. They are likely to yield cracks and other failures in the part. • Fillets – are rounded inside corners. • Rounds – are rounded outside corners.
Fillets and rounds are normally found on cast, forged, or plastic parts. Rough Cast
Runouts Conventional methods for representing fillets and rounds
No Line Conventional Edges • If an edge has a small radius, a line should be shown. • If an edge has a large radius, no line should be shown. • Draw lines for edges whenever such lines make the drawing clearer.
Surface Texture Symbols Finish Marks Tells the machinist which surfaces are to be finished or machined.
ANSI Standard Finish Mark (now in general use) H = Standard Letter Height For General Notes.
Rules About Finish Marks • Shown on the edge view of a surface to be finished. • The vertex of the finish mark should point inward toward the solid metal. • Position to read from the bottom of the sheet or from the right side of the sheet.
Rules About Finish Marks It is repeated in every view where the surface appears as a line, including hidden lines and curved lines. Machined Casting
Rules About Finish Marks Finish marks are not required for drill holes or any other holes where machining operations are clearly illustrated.
Rules About Finish Marks • If a part is to be finished all over, omit the finish marks. • Letter as a general note on the drawing, such as FINISH ALL OVER or FAO. General note Should be placed near the title block NOTES: FINISH ALL OVER. FILLETS AND ROUNDS R.125. BREAK SHARP EDGES.