Download
1 / 6
70 likes | 254 Views
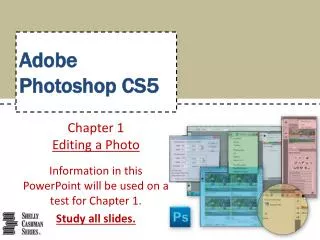
Photoshop is the mostly used and most popular photo editing tool ever. Lots of version has been arrived till now, here a tutorial on Photoshop CS6 version is illustrated with detailed information.

E N D
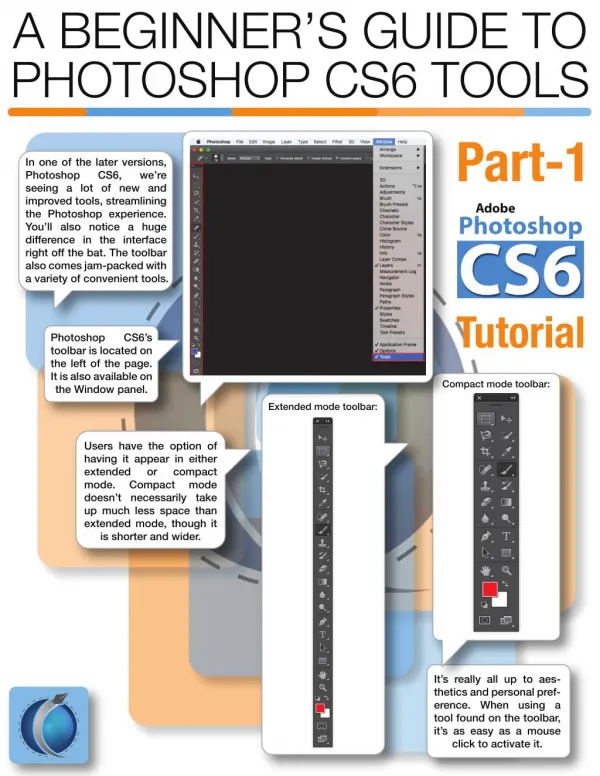
A BEGINNER’S GUIDE TO PHOTOSHOP CS6 TOOLS Part-1 In one of the later versions, Photoshop seeing a lot of new and improved tools, streamlining the Photoshop experience. You’ll also notice a huge difference in the interface right off the bat. The toolbar also comes jam-packed with a variety of convenient tools. CS6, we’re Tutorial Photoshop toolbar is located on the left of the page. It is also available on the Window panel. CS6’s Compact mode toolbar: Extended mode toolbar: Users have the option of having it appear in either extended or mode. Compact doesn’t necessarily take up much less space than extended mode, though it is shorter and wider. compact mode It’s really all up to aes- thetics and personal pref- erence. When using a tool found on the toolbar, it’s as easy as a mouse click to activate it.
Photoshop CS6 Tools: The Move Tool The Move Tool The move tool is located on the very top of the toolbar. For extra clarity, just look for the square icon with a mouse cursor and crop symbol within it. For a bit of added con- venience, noting that the move tool’s keyboard short- cut is the “V” key. it’s worth Using the move tool is as simple selecting it with a left mouse click and then clicking and drag- ging the image you want to move. To use an example, perhaps you have an image of a bicycle in a differ- ent layer over a white background image layer. Clicking and dragging the bicycle will move it without affecting the white image beneath it. as You can also copy or cut the pixel selection and move it to a different window or in the same window.
The Rectangular Marquee Tool The Rectangular Marquee Tool After selecting the rectangular marquee tool, you’ll be able to click and drag your mouse to select a portion of your worksta- tion, highlighting it with marching ants upon release. Upon high- lighting an area, users may impact that area in any way they please through the edit menu. Underneath the move tool on the tool- bar, you’ll notice an icon housing marching ants. Clicking and holding this icon will make a drop menu appear in which you can click on ‘Rectangular Marquee Tool’ to select it. The key- b o a r d shortcut is “M” key. For example, if someone wishes to cut a portion of what appears in their work- station, they would first highlight it with the rect angular marquee tool then select ‘cut.’ the
The Elliptical Marquee Tool The Elliptical Marquee Tool The process of using the elliptical marquee tool is the exact same as its rectangular Simply click and drag your mouse to highlight an area. This time the area will be a circle as opposed to a rectangle. This tool is also used for highlighting areas within your workstation, which can then be modified via the edit menu. This particular marquee tool is found under the same drop menu as the one above. Upon clicking and holding the icon of the marching ants under the move tool, you’ll be able to select the elliptical marquee tool. counter part. The shortcut is once again the “M” key; whichever ellipti- cal tool was last selected through the drop menu is what will selected hitting this key. keyboard Using the same example as that of the rectangular tool, if you find yourself wanting to cut something, simply highlight it with the tool and select ‘cut.’ you be upon
Single Row Marquee Tool Single Row Marquee Tool The single row marquee tool is found the same way as the other marquee tools. The only difference is that this tool has no keyboard shortcut. To use this tool, you’ll want to click once on the screen (as opposed to a click and drag). A row of marching ants will be created across the x-axis of the pixel you clicked on, from one side of the screen to the other. Unlike the other marquee tools, which are gener- ally used to highlight images or portions of the screen, the single row marquee tool is most commonly used to make lines across the screen. For example, if an image you’re creating requires a single-pixel-wide drawn across the screen, this is the easiest way to go about doing so. line be
Single Column Marquee Tool Single Column Marquee Tool After the single row tool, this one should come as self-explanatory. Once again, this tool is found in the same drop menu as every other marquee tool on this list. Like the single row tool, it also has no keyboard shortcut. Once the tool is selected, you’ll be able to click a pixel and have a vertical line appear down the screen across the pixel you selected. The example used for the single row tool also holds true for the single column tool – if an image you’re creating pixel-wide vertical line, this as an easy way to go about creating such a line. demands a Author: Rokaiya Yeasmin Munni www.clippingpathindia.com