Section Tally and Staffing Instructions
170 likes | 317 Views
The Section Tally and Staffing tool is designed to support the building stage in the master scheduling process and will: Help you keep track of the section count for cohorts, departments and school wide Helps you decide where you can cut (or add) sections

Section Tally and Staffing Instructions
E N D
Presentation Transcript
The Section Tally and Staffing tool is designed to support the building stage in the master scheduling process and will: • Help you keep track of the section count for cohorts, departments and school wide • Helps you decide where you can cut (or add) sections • Helps you determine the number of seats per grade to count for sections with students from various grades • Helps you keep track of your staffing allocation • The Section Tally and Staffing tool is an Excel spreadsheet primarily organized by school departments. With the trend of including more cohorts/teams in the school schedule, this by department organization may, at first, seem out of place. Looking at the way teachers earn their credentials, the way they are hired, the way sections are assigned to teachers, the way curriculum is organized, the way mandated testing is organized and the way graduation requirements are listed shows the usefulness of this organization. This by department organization facilitates the section counting and teacher assignment tracking while not impacting the scheduling of cohorts/teams. This tool has evolved over the past 30 years and has served its purpose admirably. Decisions made as a result of the use of this tool are the sole responsibility of the user. Please contact us at the College & Career Academy Support Network if you have questions. Thank You. http://casn.berkeley.edu/ Section Tally and Staffing Instructions
When you open the spreadsheet, this is what you will see. Throughout the entire tool, make entries only in cells highlighted in yellow. Begin by filling in the information in these 9 cells. Special Note: All cells with formulas are unlocked so they can be viewed. This enables one to learn how this tool works and provides an opportunity for modifications/improvements. But be careful, if a formula is changed or deleted, this tool will most likely not function properly.
Next move to the right across the spreadsheet to the cell blocks starting by cell BB9. You will see two blocks of cells for entering additional staffing allocations. For demonstration purposes, the blocks here have been filled in with examples; the blocks on the spreadsheet will be blank. If you are provided additional staffing enter it here as a decimal fraction of a full time teacher equivalent (FTE) If you are provided periods of ROP support, enter it here as the number of periods of support.
The area between columns A through AG and rows 16 through 80 provide summary information after student course request information is entered. There isn’t anything to see in this area yet, so let’s move on to entering the student course request counts.
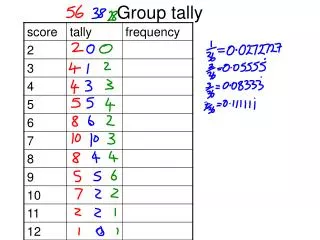
All of the Course Input sections below row 80 are identical in format, some just utilize more rows than others. Remember, only areas highlighted in yellow are for input. Let’s begin by identifying these areas: 4-Course Duration: 1= Full Year Course 2= Course offered 2 times per school year 3= Course offered 3 times per school year 4= Course offered 4 times per school year 3-Course Title 1-Title (change to anything you desire) 2-Course Number 5-Course Tallies by Grade (Enter this information before entering anything in the Number of Sections area) 8- Number of sections taught within this Course Input area by each teacher listed 7- Teacher Names 6-Number of Sections area
Here the full rows of the Course Input section have been divided into two parts so all of the rows can be seen at once. Notice that when student course request counts are entered (here 243 grade 9 students and 174 grade 10 students) other values are calculated and appear in the row. With a total of 417 students requesting this year-long course, this area shows you the number of sections needed at various class size levels. For example, to keep the class size at 30 students, 14 sections are needed. Same cell The next step is to enter a tentative number of sections to allocate to this course.
This is just the right side portion of the Course Input section – when a section count number is entered, there are additional calculations displayed to the right. Here, 14 sections have been entered as a tentative section allocation count for this course. Given 14 sections, the average class size will be 29.79 (AVG column), if you reduce the number of sections to 13 (AVG< column), the class size average will be 32.08, if you increase the number of sections to 15 (AVG> column), the class size average will be 27.80 This “Class Averages” section is very useful when you have completely finished entering all courses and the tentative number of sections to allocate to each. If you have room to add sections or if you need to reduce the number of sections to meet the staffing allocation, you can easily see where adjustments can be made. In the example above, reducing the number of sections to 13 would be a possibility. The Splits are most helpful when counting the number of seats by period by grade level in the master scheduling process. This is especially helpful when balancing classes. The splits are proportionately calculated based on the number of sections assigned and the student course requests by grade level.
Teacher Assignments The next section to fill out is the Teacher Assignment section. Here the names of teachers are entered and the number of sections (in this particular Course Input area) the teacher will teach. An individual teacher can be entered into several Course Input areas, just make sure the teacher’s name is identically entered each time. Here, three teachers have been tentatively assigned; Adams with 5 sections of this course, Jones with 5 sections and Smith with 2. 12 sections have been assigned using 2.4 FTE This summary area shows that 14 sections are needed based on the input in the Number of Sections column and that two more sections need to be assigned (-2.0)
The final input section begins at cell AI33. This is where staffing allocation totals are tabulated. This area is composed of 8 identical blocks of 11 columns extending down 53 rows. This gives sufficient room to enter all teacher names with separations between names for additional entries as necessary. Enter the teachers’ names here exactly as it has been entered in the Teacher Assignment sections. A Position Control Number (PCN) is a unique teacher identifier based on the funding source. A full time teacher may be partially paid from the general fund and from a special grant fund which could give the teacher two PCN’s. It is very helpful to keep track of this for numerous reasons including making sure your general fund allocation is accurate. Here is a teacher with 3 PCN’s for a total of 1 Full-Time Teacher Equivalent (FTE). The number 5 indicates that this teacher has not been assigned to any sections and can be assigned to 5 sections.
Here is the list of teachers as entered in the Teacher Assignment section; Adams with 5 periods, Jones with 5 periods and Smith with 2 periods. All three teachers are full time with 1 FTE. Why does the Teacher Assignment Summary show Smith as having 5 sections assigned? The answer is the column immediately to the right of the Teacher Name column. The number in this column tells how many times this teacher’s name appears in the Teacher Assignment sections; Smith is listed two times. In the other listing Smith is assigned 3 sections. This column shows the number of sections assigned to a teacher This column shows the number of sections remaining to be assigned to a teacher based on his/her total FTE
If you look just above the Teacher Allocation Summary area beginning at cell AI20, you find an overall summary of the information entered. Four teachers are listed, the FTE allocated is 67, the extra FTE is 5.4 giving a total FTE allocation of 72.4, a total of 4 FTE has been used leaving a balance of 68.4 unused FTE. The allocation in number of sections is 362, a total of 20 sections have been accounted for (4 teachers at 5 sections per teacher), there are 342 sections left to place and there are a total of 5 periods unassigned.
Now if you go back to the summary area between columns A through AG and rows 16 through 80 you will start to see some useful information. The next step is to enter all of your data.
Review of the steps to use the Section Tally and Staffing Tool Step 1 – Fill in staffing information Step 2 – Fill in additional staffing information
Step 3 – Fill in the highlighted areas for each of the Course Input sections that you will be using. The first time you do this, it will take a bit of time due to entering all the course numbers/names and the teacher names, but future years will most likely only require minor changes. Enter all of the student course request counts, your best estimate of the number of sections of each course to offer and the number of sections each teacher will teach in this input area. Once everything is entered, the summary charts will guide you to make changes if necessary.
Step 4 – Enter the teacher names in the Staffing Summary area exactly the same as they were entered in the Teacher Assignment section. It is not necessary to enter PCN’s, just sometimes convenient. But be sure to enter the FTE for each teacher. List teachers here only once. This section will tell you how many places a teacher’s name appears throughout the Teacher Assignment sections in the column immediately to the right of the teacher’s name. Review the summary totals and make staffing and section allocation adjustments as necessary.
Step 5 – Review the numbers in the summary charts. Adjust the number of sections allocated in the “N” column of the Course Input areas until FTE allocation is balanced; equal to zero (a zero balance cell will show as blank – zeros have been suppressed) Watch these cells as you adjust the section counts in the “N” column. These now show that 348 sections remain to be assigned. The “N” column
The adjustments you will be making to balance the staffing allocation are: • Section allocations in the “N” column of the Course Input areas • Teacher section counts in column “B” of the Teacher Assignment section Now you are ready to set up your section and staffing allocations. Be sure to include the entire master scheduling team, cohort/team leaders, department chairs and any other interested staff throughout this process. If you have any questions or need assistance, don’t hesitate to contact us at the College & Career Academy Support Network (CCASN) at http://casn.berkeley.edu/ or contact the author of this tool, Phil Saroyan, at jp9@jps.net Happy Scheduling!!