Download
1 / 20
200 likes | 385 Views
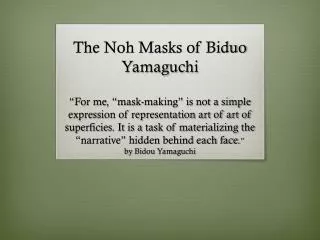
The Noh Masks of Biduo Yamaguchi “For me, “mask-making” is not a simple expression of representation art of art of superficies. It is a task of materializing the “narrative” hidden behind each face. ” by Bidou Yamaguchi. What kind of wood do we use for making the mask?.

E N D
The Noh Masks of Biduo Yamaguchi“For me, “mask-making” is not a simple expression of representation art of art of superficies. It is a task of materializing the “narrative” hidden behind each face.”by Bidou Yamaguchi
What kind of wood do we use for making the mask? • We use cypress wood called Hinoki, typically aged or dried wood for 80-90 years by Timber suppliers who have been supplying the Noh schools for generation.
The first step is called choosing the wood called Kidori • Then we cut off a piece of wood. Usually, I know what type of mask I will make before I choose the wood, but sometime it is only after looking at the character of the wood that I feel what type of mask is appropriate for it.
Here are the types of saws that are used for cutting the wood
These tools are used for the stage of rough carving called Arabori
The completed mask of the first carving steps look like Front View Back View
For the rear, we use a gouge and curved chisels. This stage is calledNakaboriin which we rough out the features of the face We carve out the back of the mask at the same time that we carve our front, so that both sides are worked in tandem.
The next step is calledShiageborimeaning carving the finishing touches Front View Back View
Three piles of wood? From the left to right, you can see the wood chips make with the rough chisel, the medium chisel, and the fine chisel. The pile of shaving on the right is the result of one day’ effort.
Put the metal eyes on mask • We use metals including copper, brass, bronze and even gold leaf. The metal is pounded into the proper shape for the eyes, or sometimes fangs. Then they are attached, usually with glue or sometimes with small metal tacks. Usually the demons, that require them.
The next step called Uranuri • This step is to put lacquer on the back of the mask and to sign it. (Lacquer dry very slowly, and the mask cannot be worn until this lacquer is completely dry.
This step called Shitanuri • This step is applying the first and undercoat of pigment calledShitanuri. This whitewash is made of ground and baked seashell calledGofun, which is mixed with a glue calledNikawamade from the marrow of animal, typically deer.
This step calledNakanuri • The mask is given 4 or 5 inner coatings calledNakanuri, then polished thoroughly. After each coat dries thoroughly, it is polished smooth with chisels, a scouring brush calledTokusa, and the ground leaves of theMukuncalledAphanatheAspera.
The final coat called shiagenuri Pigments are made from various minerals including malachite for the green, and ink Called Sumi, made from lampblack, is purchased in stick form then mixed with water in the ink stone, before being brushed onto the mask. The mask show on the left, that show some color added.
The next step calledKegakior hair painting • This step we use fine brushes to make the lines of the beard. Each line has to be painted with a single stroke. If I stop or lift the brush, the thickness of the stroke will change, so this is unacceptable. Of course the strokes are made one at a time, and several hundred are required to suggest the hair of a beard.
The final step The mask shown on the left look very fresh. But a mask must be make to look aged, as if it had been created 400-600 years old. The final state is aging Called Koshoku-Zuke. A new mask would not fit with the atmosphere of Noh. From the beginning , mask were made so as to seem older. The mask shown on the right corner is completed.