Download
1 / 26
260 likes | 347 Views
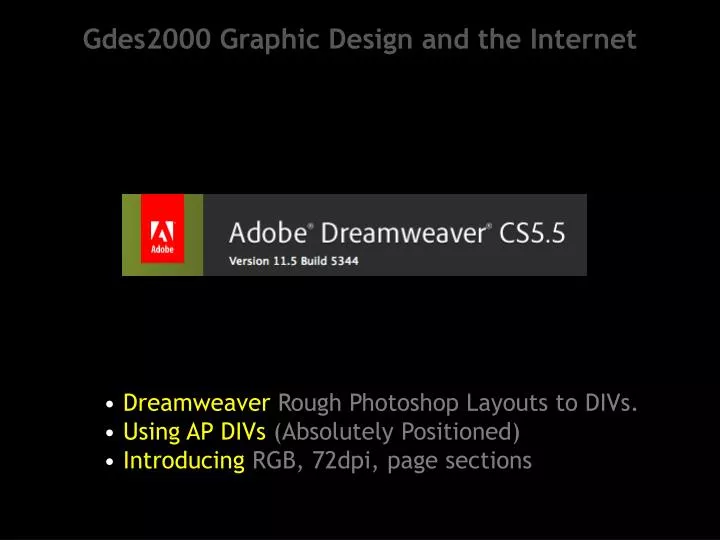
Gdes2000 Graphic Design and the Internet. • Dreamweaver Rough Photoshop Layouts to DIVs. • Using AP DIVs (Absolutely Positioned) • Introducing RGB, 72dpi, page sections. Gdes2000 Graphic Design and the Internet. Last Session : We created a basic DIV Page Layout (Above)

E N D
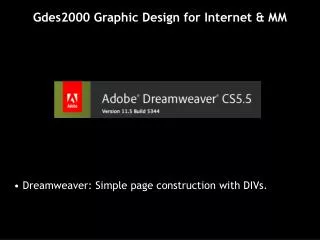
Gdes2000 Graphic Design and the Internet • DreamweaverRough Photoshop Layouts to DIVs. • Using AP DIVs (Absolutely Positioned) • Introducing RGB, 72dpi, page sections
Gdes2000 Graphic Design and the Internet Last Session: We created a basic DIV Page Layout (Above) • We’re going to build on what we did last week (as a reminder, we positioned DIVs, made them the size we required, colour we required, imported imagery into them and created and basically specced text within them). • This week we’re going to look at how to split a photoshop page mockup into elements on the webpage. We’re also going to look into basic rollover graphic buttons in Dreamweaver.
Gdes2000 Graphic Design and the Internet Setting UpCreation of a blank HTML file / folders • IMPORTANT As with last week, I’d like you each to create a folder on your desktop labelled‘PSD to DIVs in Dreamweaver’. INSIDE this folder create the usual ‘images’folder that your images will all live within. • IMPORTANT Now start up Dreamweaver as per last week, then create a blank HTML page, save this as‘index.htm’(all lower case, no gaps in the file name) in your new PSD>DIVs folder on your desktop so all that you can see are (it )and the images folder. • Please also have you layout pads ready and a pen/pencil as you’ll need ‘em.
Gdes2000 Graphic Design and the Internet Setting Up Start Up Photoshop • This section assumes that you’ve opened Photoshop before and know some very basic commands. • Download the psd-divs.psdfile off the web timetable [or off the server] this week. • Open this Pshop file on your workstation, you’ll see that it has a number of ‘layers’ - all describing various things such as suggested DIVs [see pic above], what each section ‘does’, etc.
Gdes2000 Graphic Design and the Internet Setting Up What you’re looking at in Photoshop • Note a few things once you’ve opened up the duck photoshop document.. • See the blue & green pshop guides to simulate a column/grid design. • See also how there are ‘sections’ of the page - identity, links and content • IMPORTANTNote also that there’s 2x photoshop documents that look similar that we’ll use. psdtodivsLAYERS.psdANDpsdtodivsFLAT.psd. As this suggests, one is still in LAYERS and one is FLATTENED in photoshop.
Gdes2000 Graphic Design and the Internet Setting Up What you’re looking at in Photoshop (see psdtodivsLAYERS.psd) • Now make sure that everything in Photoshop’s ‘layers’ palette is visibleEXCEPT the ‘sections of the page’ layer. We don’t need this from here. • IMPORTANTEach of the black boxessuggests a potential DIV for layout + number. • The size in ‘pixels’ (screen measurement) of this document in photoshop (and hence the size we’ll make it in Dreamweaver) is 800x600 pixel (RGB) page mockup (72dpi only as most monitor /screen resolutions are only approx 72dpi).
Gdes2000 Graphic Design and the Internet Getting going Chopping-Up the Page • There are a couple of ways that you can chop-up the ‘Duck’ page, one of them is to use Photoshop’s ‘Save for Web and Devices’ option and create ‘slices’. There’s more about this in Photoshop’s ‘help’ section if you want to follow it up.. • We’re going to chop-up basically & manually though :) • IMPORTANT For starters, scribble a copy of the page design and it’s suggested (Black lined) DIVs + their numbers/names onto your layout pads. You’ll need this as a reference later.
Gdes2000 Graphic Design and the Internet Getting going Creating the ‘container’[also called ‘wrapper’ by some] • First we’re going to make a CONTAINER DIVin Dreamweaver that does as it says on the tin and acts as a container for all of the other DIVs you’ll use. • The size of the document/design in photoshop (as mentioned) is 800x600 pixels. As such, our container in DW will match this size. • To make this, make sure you’re in DW with a blank web page open. Now click once top left in the page and select the AP DIV button/drop-down as you did last week. • Draw the DIV with your cross hair, thenre size it to 800x600 pix in your PROPERTIES palette as you did last week with basic DIVs. • Also in the properties, make sure the CSS-P field says ‘container’ [important]..
Gdes2000 Graphic Design and the Internet Getting going Chopping-Up the Page (see psdtodivsFLAT.psd) • Now make sure you’ve got the FLATdocument to the front in photoshop. • SOME of the DIVs we’re going to make don’t contain any imagery - rather just coloured backgrounds. As such we’ll make these first in DW (DIVs 1,2 and 3). • To get an idea of size in Photoshop, use your square marquee and drag it from the top left of the image to the bottom right of the BANNER only. Make sure via: Windows > Info that you can see how large this selection is in PIXELS. If it doesn’t show pixels than look in Photoshop > Preferences > Units and Rules and turn to pixels as ‘rulers’.
Gdes2000 Graphic Design and the Internet Getting going Chopping-Up the Page & ‘Nesting’ DIVs • IMPORTANTadd DIV1INSIDE the container DIVby selecting: Insert> Layout objects> AP DIV. Then re-size it in your properties palette as measured in pshop (w800 x h131 pix). Make sure you give it a CSS-P name of ‘banner-bg’ or ‘DIV 1’ if clearer for you. • Colour, we also need to know the background colour of DIV1.. Go back to Photoshop and use the pipette tool, click it once on the banner, then double-click the orange square on the tools palette. A colour window should open, make sure it says ‘only web colours’(box bottom right) - this makes sure that this colour will be seen by all browsers ok [otherwise knows as ‘web safe’ colours]..
Gdes2000 Graphic Design and the Internet Page Construction Creating the Background DIVs • The colour that we’ll set this to in DW is it’s ‘hex’ (hexidecimal) colour. This is the only sort of colour ref that web browsers understand. Here this orange is #FF6600. • So now you’ve got both a size to set your DIV to and a background colour. • You should now have created the first layout element. Now create DIV’s 2 and 3 in the same way (measuring in size and colour in pshop)IMPORTANT - remember to INSERT these inside the ‘container’ DIV each time. (suggest names of ‘linksbg’ and ‘contentbg’). • You should have the 3x background DIVs on the page - all various tones of orange..
Gdes2000 Graphic Design and the Internet Page Construction Creating additional DIVs • Now we need to start adding other more specific DIVs nested in the others to help create our intended layout. Identify DIV no.4 on the LAYERS photoshopfile [which is the page’s title text]. • Now move to the FLAT photoshop document for measuring. • In the FLAT Photoshop doc, select around the title on the flattened file (see pic above).Use the ‘info’ palette again to see what the size is. My measurements are w 775 x h 62. • BUT.. We need the new title DIV to sit INSIDE (‘nested in’) the banner-bg DIV.. To do this, click once inside the header DIV and then select: Insert > Layout Elements > AP Div as you did with the navigation options in the last workshop.
Gdes2000 Graphic Design and the Internet Page Construction Creating additional DIVs • Make sure the DIV you create is w 775 x h 62 - check in your DW properties palette. • Now it select it, make sure that the box is surrounded by it’s handles, then drag/nudge it into position - refer to the photoshop file for a visual check if needed (for fine-tuning you can use the arrow keys on the keyboard). • The new DIV should now be sitting INSIDE the header DIV and is ready to accept an image (or text).
Gdes2000 Graphic Design and the Internet Page Construction Creating additional DIVs • Now you’ve set up the DIV ready in DW, we’ll need to save the photoshop slice for the title. • Go back to the FLAT photoshop doc, with the selection around the page title still on, edit>copy. • Now select file>new in Pshop, the dimensions in the box should be exactly the dimensions of your selection and also RGB and 72dpi (screen colours & resolution). • You should now have a slim blank window on screen, now ‘edit>paste’ into thisand the title should magically fit in it!
Gdes2000 Graphic Design and the Internet Page ConstructionCreating additional DIVs • Now save this image for webby selecting in photoshop: file>Save for Weband Devices. A window comes up with the image.. as it’s just ‘flat colour’ (I.e. not lots of blends) then it’s best saved as a .gif image in the file-format drop-down under the ‘save’buttons etc. • Now ‘save’ and it should ask you where you want to save it, IMPORTANTmake sure it goes into the ‘images’ folderyou created inside the psd>DIVs folder on your desktop earlier. • You should now be ready to import the image into the DIV you just created in DW..
Gdes2000 Graphic Design and the Internet Page Construction Creating additional DIVs • Now go back into DW, click once on the new DIV’s perimeter, make sure it has a CSS-P title that makes sense in the Properties palette (mine’s ‘pagetitle’). • Now click inside it an import the pagetitle image into it (as per last week), give it an ‘alt tag’of‘page title image’and a border of ‘0’in the properties palette [remember that we talked about it having a blue outline if made a link otherwise]. • Now go through the same process for DIV5. N.B. This piece of text will change in relation to every web page you create after this one. For the moment it’ll read ‘Duckpond Home’.
Gdes2000 Graphic Design and the Internet Page Construction Creating additional DIVs • Now you should have created DIV4 and 5. Time to create DIV6 now then, this has HTML / CSS specced text in it though and isn’t an image as were the last two.. (This DIV will serve as a backup navigation if there are ever any image display problems and your main nav buttons don’t for whatever reason show momentarily). •Measure-out DIV 6 in photoshop, then create it in DW and nudge it into position (rem to ‘INSERT’ it into the header DIV again). To make sure that DIV5 and DIV6 are level, you can click on the ruler and drag a guide down (or as a vertical guide across) as in photoshop. If the rulers aren’t showing then select: view>rulers>show in DW. • Next we add a type spec to text..
Gdes2000 Graphic Design and the Internet Page Construction Speccing Text • First type-out the 3x text optionsthat form the subnav I.e. ‘Duckpond Home’, ‘Duckpond New’ etc. • Now go back to the LAYERS psddoc and select the same text, go to the colour picker we looked at earlier and jot-down the ‘hex’ colour - it should be ‘#FFCC99’– [a sort of faded orange]. • Also in pshop you should be able to see it’s typeface which is ‘Trebuchet MS and 14pt’ (NOT pixels). You now have all the details needed to set it’s CSS type style in DW. • Now set up the CSS spec for the text via the DW properties palette as you did last week [Properties palette > CSS button > New CSS Style > change font / set as new]. • Now all you need to do is nudge the subnav text down so that it’s baseline is level with the ‘Duckpond home’ text along the green rule (see below).
Gdes2000 Graphic Design and the Internet Page Construction Creating rollover buttons. • Now we’ve got to build DIVs 7,8 and 9 which will form background containers for our rollover buttons. Do this by measuring them out on the pshop FLAT file and creating appropriate DIVs in place in DW. INSERT them into DIV 2, label them ‘homebutbg’, ‘newbutbg’ and ‘issuesbutbg’ in the CSS-P Element section of the properties palette. • Now we need to create BOTH states of the buttons in pshop(on/off). We have one state already (the ones which sit in the pshop image). We need to make slightly altered ones though that will show when the buttons are rolled-over in a browser. • First create separate graphical buttons in pshopand ‘save them for web’ in your images folder. Make sure the file names are labelled as above. Then image>adjust>desaturate in pshop, (they should go grey), save/name them as above.
Gdes2000 Graphic Design and the Internet Page Construction Creating rollover buttons. • Now we’ve got to import the buttons into the relevant button bg containers in DW.. • Click once in the first button container and then to insert>image objects>rollover image. A pop up box appears. Fill it in as above then press ‘ok’. • Your ‘home’ button should now be visible in the container. • Now do the same process for the other 2x buttons in the other containers.
Gdes2000 Graphic Design and the Internet Page Construction Creating Photo and Text DIVs. • Now you might like to test your file so far by dropping the ‘index.html’ file on top of a browser - either Safari or Firefox should be fine. Does it work? Do the colours show correctly? Remember that you need a ‘#’ in front of all colour specsin CSS. • Now to create DIVs 10, 11, 12 and 13.. Firstly measure-out DIV10 in pshop and INSERT it into DIV 3 (I called mine ‘mainheading’). Now type the title words into it and select them. Spec the text in the properties palette as previously.
Gdes2000 Graphic Design and the Internet Page Construction Creating Photo and Text DIVs. • Now measure DIVs 11, 12 and 13 in the FLAT pshop file and INSERT DIV’sto that spec into DIV3. In the CSS-P elements section of the Properties palette call them ‘duckypic’, ‘contentleftcol’ and ‘contentrightcol’ so we can see them in the CSS palette. • Now you’ll need to save the duck image off your FLAT pshop file as you did the titles a while back. Copy, file new, paste, save for web and devices as a JPG (not a .gif as before as jpg is better for showing photos of things). Now import this into the duckypic DIV, add it’s ALT text and make sure it’s got a border of ‘0’ in the properties palette.
Gdes2000 Graphic Design and the Internet Page Construction Adding Bodytext • Now we need to add the bodytext. For the sake of this test, find any old web page with text content, copy some of this and paste/fill up the left and right columns in DW. • [As with last week] spec text as a new inline style‘trebuchet’, 10px, colour #333333 (a sort of grey). • Look at your page in a browser - it should be near complete! • Now we’re going to link/create the other pages that the buttons link to.. • First file>save as in DW and re-name to ‘new.html’. Then do the same but call it ‘issues.html’. Make sure each file is saved alongside ‘index.html’ in your PSD>DIVs folder.
Gdes2000 Graphic Design and the Internet Page Construction Adding Pages • Now you should have 3 identical pages that are all linked by buttons. To distinguish between them, change the main text titles on the ‘new’ and ‘issues’ pages to mirror what they are I.e. ‘Duckpond New’ and ‘Duckpond Back Issues’ • Why not also change the HTML text bg DIV to a slightly different colour too for the 2x new pages. • Remember also to change each new page’s title (top of the DW page above the HTML bit) to mirror their functions too. You can use capitals and spaces in here. • You may also want to try linking the sub nav text links to the new pages too.
Gdes2000 Graphic Design and the Internet Page Construction Using the DW file management system • To date we’ve done things manually when creating new pages. DW offers a function which allows you to save a page as a ‘template’ though (bit like you can save templates in ‘Office’ etc and then use them to create new duplicate files). • If you want to try this on your pages so far then it relies on you keeping all in the same folders etc. If you move a file out of the present order in folders it’ll throw a wobbler though and not play. • I must admit that I’ve had more trouble than anything from this function in the past so I tend to stay working manually to set up basics - it’s personal prefs though and as you get to know DW better you’ll need to make your own decisions.. To find out more about this option look at the DW help under ‘Creating and managing files’.
Gdes2000 Graphic Design and the Internet And Finally So What have you just done/learned? • Logical setting-up of files and folders. • How to take designs in Photoshop and create them in Dreamweaver with DIVs. • How to create Rollover link Buttons.• How to re spec Headings and Paragraphs so that you can use them for your own specs of text. • How to basically link and create new pages from a master page manually. There’s still things to learn from here but master the above and it’ll stand you in good stead for creating basic templates for CMSs or static sites from here onwards.