Download
1 / 61
620 likes | 797 Views
CHAPTER 10. Assessment of the Trauma Patient. Overall Assessment Scheme. Scene Size-Up. Initial Assessment. Trauma. Medical. Physical Exam. SAMPLE History. Vital Signs & SAMPLE History. Physical Exam & Vital Signs. HOSP. Detailed Physical Exam. Ongoing Assessment.

E N D
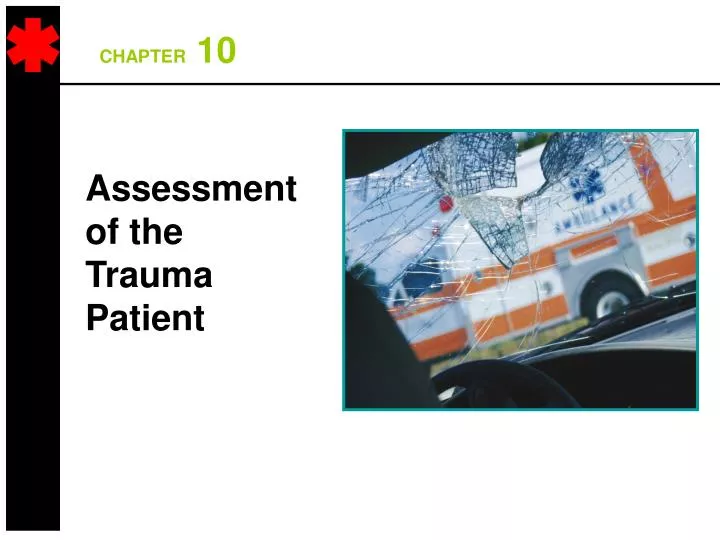
CHAPTER 10 Assessment of the Trauma Patient
Overall Assessment Scheme Scene Size-Up Initial Assessment Trauma Medical Physical Exam SAMPLE History Vital Signs & SAMPLE History Physical Exam & Vital Signs HOSP Detailed Physical Exam Ongoing Assessment
YesPerform a rapid assessment. NoPerform a focused assessment. Assessing the Trauma Patient Is there a significant mechanism of injury?
Significant Mechanism of Injury (Always reconsider or do a double check – it is easy to miss things)
Significant Mechanism of Injury Ejection from vehicle/vehicle with intrusion Death in same passenger compartment Fall of greater than 20 feet or 3 times the patient’s height
Significant Mechanism of Injury Rollover of vehicle High-speed vehicle collision Vehicle-pedestrian collision
Significant Mechanism of Injury Motorcycle crash Unresponsive or altered mental status Penetrating injury of head, chest, or abdomen
Significant Mechanism of Injury Infants and Children Falls greater than 10 ft. Bicycle collision Vehicle in medium-speed collision
Mechanism of Injury: Interior of Vehicle Deformities to a vehicle’s interior may show where person struck the surface and reveal a mechanism of injury.
Consideration of Mechanism of Injury • Mechanism of injury often results in specific hidden injuries • Seat Belts • If buckled, may have produced injuries • If patient had seat belt on, it doesn't mean they do not have injuries • Should injury resulting from harness • Airbags • May not be effective without the seatbelt • Patient can hit wheel after deflation • Arm injury from holding the steering wheel wrong • Lift the deployed airbag and look at the steering wheel • “Lift and look” under the bag after the patient has been removed • Any visible deformation of the steering wheel should be regarded as an indicator of potentially serious internal injury, and appropriate action should be taken • Damage to car body
If Significant Mechanism of Injury Reconsider mechanism of injury/priority of transport. Assess mental status. Continue spine stabilization. Perform a rapid trauma assessment.
Terminology Rapid trauma assessment = a rapid assessment of the head, neck, chest, abdomen, pelvis, extremities, and posterior of the body to detect signs and symptoms of injury Platinum ten minutes = optimum time at a scene with a patient who has serious injuries Golden hour = time for time of injury and surgery at the hospital
Rapid Trauma Assessment • Perform rapid trauma assessment on patients with significant mechanism of injury to determine life threatening injuries. In the responsive patient, symptoms should be sought before and during the trauma assessment. • The rapid trauma assessment is important in order to: • Estimate the severity of injuries (life-threatening) • Make a CUPS status determination • Make transport decision, which is dependent upon CUPS determination • Consider ALS intercept • Consider platinum ten minutes and golden hour
Rapid Trauma Assessment • The rapid trauma assessment should be interrupted to provide life saving interventions: • Airway • Breathing • Circulation • *** These always come 1st in this order*** • ***Life before limb***
Performing a Rapid Trauma Assessment Continue spinal stabilization – somebody holds head Consider ALS request Reconsider transport decision (CUPS) Assess mental status (AVPU) As you inspect and palpate, look, and feel for DCAP-BTLS
= = = = Burns Tenderness Lacerations Swelling B T L S Inspect and Palpate for DCAP-BTLS Deformities Contusions Abrasions Punctures/Penetrations = = = = D C A P *** Symptoms of injury found by inspection or palpation during the patient assessment.***
Rapid Trauma Assessment Head Neck Chest Abdomen Pelvis Extremities Posterior
Head: DCAP-BTLS + Crepitation Do not apply significant pressure to the head if fluid is found coming from ears, nose and mouth (cerebrospinal fluid) Crepitation = the grating sound or feeling of broken bones rubbing together
Neck: DCAP-BTLS + Jugular Vein Distention and Crepitation Jugular vein distention is the bulging of the neck veins Look for stoma, tracheostomy and tracheal deviation You can apply a cervical collar at this point (be sure to check the back of the neck first)
Chest: DCAP-BTLS + Crepitation and Breath Sounds (Presence, Absence and Equality) Look for paradoxical motion (movement of part of the chest in the opposite direction from the rest of the chest Listen to breath sounds at the apices, mid-clavicular line, bilaterally and at the bases, mid-axillary line bilaterally
Listen to both sides of the chest. Is air entry present? Absent? Equal on both sides? Compare left side to right side. Mid-axillary Mid-clavicular
Abdomen: DCAP-BTLS + Firmness and Distention Divide the abdomen into four quadrants – right upper quadrant (RUQ), right lower quadrant (RLQ), left upper quadrant (LUQ), and left lower quadrant (LLQ) Coleostomy/Ileostomy – surgical opening in the wall of the abdomen with a bag in place to collect excretions from the digestive system Look also for softness and distention (appearing larger than normal)
Pelvis: DCAP-BTLS (Compress gently.) If no pain is noted, gently compress the pelvis to determine tenderness or motion (press in and down on pelvic wings) – DO NOT ROCK AND ROLL Priapism – persistent erection of the penis that can result from spinal cord injury or certain medical problems
Extremities: DCAP-BTLS + Distal Pulse, Sensation, Motor Function, and Crepitation Pulse – is it present Sensation – can the patient feel you touching his/her extremities Motor Function – can the patient move his/her extremities
Posterior: DCAP-BTLS Roll patient with spinal precautions and assess posterior body, inspect and palpate, examining for injuries or signs of injury (check spine, sides of spine/body, posterior of extremities and buttocks for injuries
Significant Mechanism of Injury Assess baseline vital signs. Obtain SAMPLE history. Reconsider requesting ALS. Reconsider transport decision.
If No Significant Mechanism of Injury (i.e. cut finger) • Perform focused history and physical exam based on the component of the rapid assessment. Performing the focused history and physical examination permits: • Assessment and treatment of injuries not identified in the initial assessment (DCAP-BTLS for the injured area) • Reconsideration of mechanism of injury • Assess baseline vital signs • Assess SAMPLE history
Vital Signs Respirations Pulse Skin color, temperature, condition Pupils Blood Pressure
Rules of Assessment Explain to the patient what you are doing. Expose areas before assessing. Assume spinal injury.
Cervical Collar Sizing andApplication
Cervical Collars STIFNECK TM Rigid Extrication Collar Philadelphia Cervical Collar TM
STIFNECK TM Collar – Seated Patient Stabilize head and neck manually.
Sizing a Cervical Collar 2 Measure the collar. 1 Measure the patient’s neck.