Download
1 / 25
250 likes | 258 Views
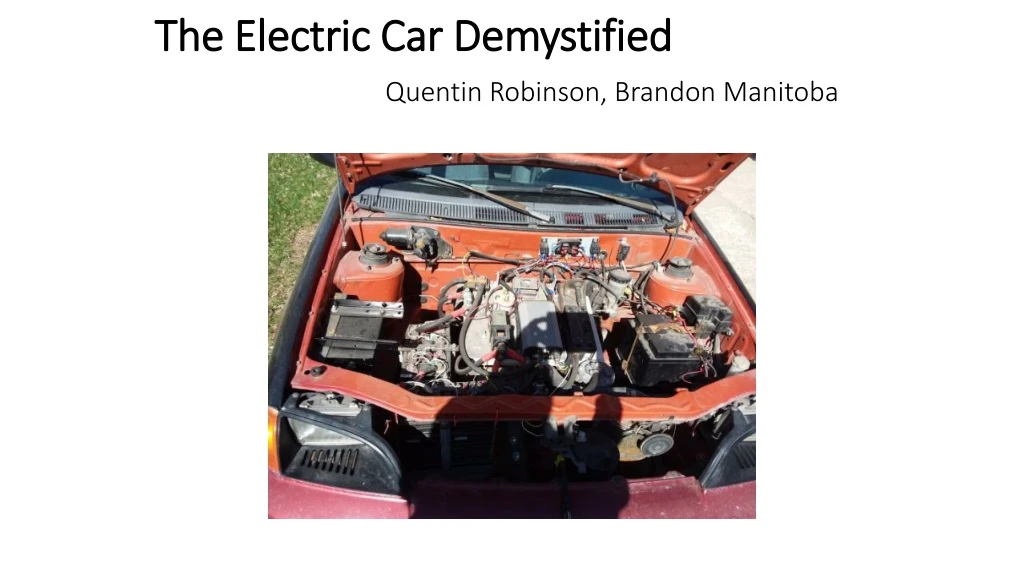
The Electric Car Demystified Quentin Robinson, Brandon Manitoba. The Project Car.

E N D
The Electric Car Demystified Quentin Robinson, Brandon Manitoba
The Project Car • In April 2016, after several years of research (including lots of procrastination ) I finished converting a 1993 Geo Metro from gas power to electric. Thus was born the “2016 Melectro”. I chose to do this because a) I wanted to stop polluting by driving a gasoline powered car, b) commercially available electric vehicles (EVs) were beyond my price range, c) I thought that if I built it, then I would also be able to fix it, d) I thought such a project would be a good challenge!
How it Performs • There are 24 cells all together that make up an 80 Volt battery pack with 100 amp hours of current. This gives my car 8 kilowatt hours of energy. For long term battery health it is best to use only about 70% of this, or about 5.6 kwh. I have driven the Melectro over 90 km/hr. I tested it one day and got 60 kilometers of range on a charge. It was designed mostly as a town/city car, so I have never needed more than one charge cycle per day. No need for “range anxiety”. It is VERY fast off the start too!
Pros and Cons of Electric Vehicles • Most people are very familiar with the major “con” of electric vehicles. It is feared that they may run out of charge too soon, thus stranding the driver. Of course, the average North American drives far less kilometers each day than the average electric vehicle will go. Still, longer trips could be a problem – at this time. It is important to remember that in the early days gasoline cars had exactly the same problem until a broad network of gas stations evolved. The charging network for electrics will come, but is still evolving.
Pros and Cons of Electric Vehicles • The “pros” are many. First, as mentioned, electric cars create far less pollution of many kinds. The fuel for EVs is also far cheaper. My Melectro costs only 1 cent per kilometer to charge! My fuel efficient compact car often costs 8 cents per kilometer. A gas motor has hundreds of moving parts. An electric motor has one rotating shaft. Generally, electric cars have far fewer break downs and practically no routine maintenance on the drive train. So operating costs are very low.
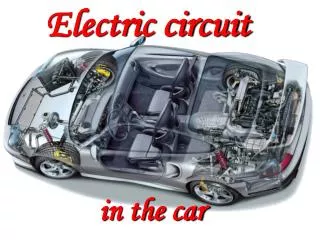
How it Works • In the preceding picture you are able to see almost all the main components that make an EV work. This is my main component “control board”. Besides this there is only the motor, the battery pack and the charger, plus a couple of alterations to the previous heating and braking systems. Compare that to what is under the hood of your gas vehicle and you will start to understand why EVs are thought to be relatively simple.
The Motor Controller • The motor controller is the main electronic component responsible for controlling the speed at which the motor turns. When you press the “gas” pedal, the original throttle cable moves a lever on a variable resistor (potentiometer, or “potbox”). This sends a signal to the controller letting it know how much power to send to the motor and, therefore, how fast it should go.
Square box with the lever is the variable resistor, or “pot box” Main fuse Motor Controller Main breaker, shuts off all power if necessary – for maintenance or emergency The main contactor, allows power to go from the batteries to the controller when the key is turned Round heater relay
The Battery Pack Little circuit boards attached to each battery
The Battery Management System (BMS) • You can see little circuit boards attached to each battery cell. These monitor the state of charge in each cell so that no cell ever gets too much charge or is discharged too much. These are lithium based batteries, which are fairly expensive, so it makes sense to protect them with a monitoring system. You could use deep-cycle lead acid batteries but, long term, lithium are cheaper, safer, give more power per pound and work better in the cold. The next picture is the “brains” of the BMS, including the round black alarm buzzer.
BMS “Brain” Alarm buzzer
The Battery Charger: attached to the bottom left is a relay that automatically shuts off the charger to protect the battery pack when fully charged.
The Motor • Amazing how small it is compared to the gas model, right! This motor is 35 HP maximum, 15 HP continuous. That is all that is needed for a car this size because an electric motor is so much more efficient than a gas motor, especially at low RPMs. • The hardest part of the whole conversion is if you try to make your own adaptor plate and shaft coupler (which I did) to attach the motor to the old transmission. But these can also be purchased or built by a good machine shop.
What Else? • That is pretty much it, as far as the electric drive goes! All that was left was to hook everything up with the existing 12 Volt electrical system so everything starts up when you turn the key. That is done with a little fuse panel and a few small relays that can be bought at the local auto supply store. (See next picture)
Heater and Brakes • Some modifications are needed for the heating system and brakes. There is no gas motor turning most of the energy in your gas into heat, so you need a heat source. There is no intake manifold providing suction to run the power brakes. So a small vacuum pump is needed to run the brake booster. • (see next slide)
Electric Vacuum pump: towards the top-left with a rubber hose coming out. Beside that, to the bottom-right, the old paint can that became the antifreeze reservoir for the heating system. Electric Vacuum pump Antifreeze reservoir for the heating system
The Heating System Part 2 12 Volt, low-flow diesel fuel pump Canister type heating element
The Heating System Part 2 • In the preceding picture, in the foreground, you see the 12 Volt, low-flow diesel fuel pump that moves the antifreeze slowly through the heating system. In the background you see the canister type heating element that electrically heats the antifreeze to keep you warm in the cabin.