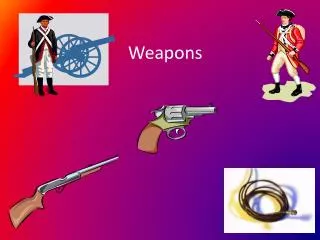
Weapons Orientation
Our goal is to provide students with instructional guidelines for safe handling and operations of a firearm. This course familiarizes students with safety aspects, live fire range, and proper techniques. Upon completion, students will be able to identify safety rules, demonstrate various techniques, and pass written and weapon qualification tests.

Weapons Orientation
E N D
Presentation Transcript
Weapons Orientation Our goal is to provide students with instructional guidelines for safe handling and operations of a firearm. To familiarize you with the safety aspect of the weapon and a live fire range. Provide instruction and guidance in the safe handling and operation of a firearm. Instill confidence in student ability to operate departmental weapons.
Upon Completion • Students shall be able to identify weapon and range safety rules. • Demonstrate how to draw / holster the weapon. • Demonstrate proper loading/unloading techniques. • Demonstrate proper magazine changes. • Demonstrate proper grip technique. • Demonstrate how to clear weapon malfunctions. • Demonstrate verbal definitions. • Pass both written /weapon qualification test.
SAFETY!!! • No personal weapons, or live ammo in any classroom. • Muzzles will always be pointed in a safe direction. • Your finger will be indexed until you are ready to shoot.
SAFETY!!! • You will always verify your target and what is behind it. • Have a comprehensive knowledge of how your weapon operates. • Ensure your ammo matches your weapon.
SAFETY!!! • Never go forward of the firing line until instructed to do so. • Never pick up anything from the ground, until instructed to do so. • Movement on the range is controlled by the instructor.
SAFETY!!! • Alcohol/drugs are prohibited. • You do not feel well, inform the instructor.
SAFETY!!!!!!!!!!! • Shoot only professional targets not cans or glass objects. • If you brought trash to the range take it with you. • The burn barrel is for wood /paper items only. • Brass shall be picked up, placed in a container. • Only Departmental staff are allowed on the range.
SAFETY!!!!!!!!!!! • Wearing jeans, flip flops, sandals, shorts are prohibited. • Eye and ear protection are required at all times. • Drive on the range in a professional manner. • Instructor shall give commands on when to load, unload, and dry fire • Ammo will be carried in magazines, pockets, or fanny packs.
SAFETY!!!!!!!!!! • No horseplay at all allowed on the range. • You are prohibited from stepping over to assist another shooter. • All shooters shall yell cease fire when they hear it and immediately holster their weapon.
SAFETY!!!!!!!!!! • Shooter experiencing a squib load/fire shall raise their non-shooting hand and keep the weapon pointed down range for up to30 seconds or when the instructors gives you assistance. • Any questions? At this time please sign and date your safety rules and return to the instructor.
4 Step Draw The weapon and magazine shall always be snapped in. Thumb breaks the holster snap, as your hand grips the weapon while it is still in the holster, your index finger is along the outside of the holster. Command is called thumb, grip index. Pull the weapon straight up, rotate so muzzle is parallel to the ground and pointing at the target. You are still indexed.
4 Step Draw As the weapon is being extended forward in front of your body the support hand meets to form a two handed grip, you are still indexed at this point and accessing the situation. When the weapon and hands become fully extended, you are still indexed until you have made the determination what action you need to take.
The Draw!!!!!!!!!! • Constantly have a mental command that tells you thumb, grip, index, access, take action. • You index out, and you index in. • Refrain from bowling the weapon or fly fishing the weapon out of the holster. • Don/t be fast, be safe fast and smooth will come with always performing a good presentation.
Re-holstering is done reluctantly after you have scanned. You bring the weapon back to the center of the body with two hands you are still indexed. You holster the weapon with one hand, still indexing. The support hand stays on the body, the strong hand holsters the weapon. Once in the holster snap it in, push, pull, sweep the magazine.
Loading • Muzzle pointing in a safe direction, with finger indexed. • Support hand pulls the slide to the rear, strong thumb locks the slide. • Visually and Physically inspects the weapon. Insert a magazine. • Hand over pull and release slide chambering a round still indexed. • Holster the weapon and snap it in. • Push, pull and sweep.
Unloading • Muzzle in a safe direction, finger indexed, remove the magazine. • Pull the slide to the rear, lock the slide to the rear. • Visually and Physically inspect the weapon. • Hand over pull and release the slide, holster or secure the weapon. • Pick up live round that was ejected. • At no time does your finger ever touch the trigger.
Magazine Changes • Admin load, Tactical Load, and Speed Load. • Admin the weapon never leaves the holster • Tactical the magazine is retained, never falls to the ground and you are always indexed. • Speed load falls to the ground, you are indexed, and maintain muzzle discipline at all times
Proper Grip Techniques • Controls muzzle flip, reduces recoil, allows for better control of the weapon. • Diminishes weapon malfunctions • Prevents injury from slide movement. • Allows for good shot placement on a double tap. • Increases accuracy and improved marksmanship skills
Weapon Malfunctions • Failure to feed/stovepipe Tap the magazine, Rack the slide as you Roll the weapon to the right to dislodge the casing, release the slide, access the situation, take appropriate action. • Double feed Rip the magazine out allow it to fall to the ground, work the slide, insert a magazine, chamber a round, access the situation, take appropriate action. • Always indexing and maintain muzzle discipline.
Marksmanship Fundamentals • Grip, Stance, Sight Alignment, Sight Picture, Breathing, Trigger control, Follow Through. • They are the same for any weapon you shoot. • They are the same for low light and adverse light conditions. • All 7 must be performed for each shot. • The shot fails to hit the target, one of your 7 are out of sync.
Definitions • Indexing – Your trigger finger is always along the slide. The finger does not touch the trigger until you can justify your action and taking the shot. • Press Check – Moving the slide to the rear slightly to see if there is a round in the chamber. • Interview Stance – Slightly bladed, gives you stability, reaction time, and protects the weapon.
Definitions • Scan – Look all around before you holster the weapon. • Administrative Loading – Is conducted while the weapon is still in the holster. • Tac Load – Never falls to the ground, magazine is retained.
Definitions • Speed Load always fall to the ground, indexed and maintain muzzle discipline. • Press – movement of the trigger to the rear in a smooth uninterrupted motion. • Trigger Reset - After the shot, the shooter releases the trigger slowly until he/she feels the reset, allowing for the second shot to be set up. • Thumb, Grip, Index, Access, Take, Press is the mental commands of the 4 step draw.
Definitions • Strong Hand – Is the shooters primary/strongest hand. • Support Hand – Is the other hand that assists the strong hand. • Hand Over Technique – The shooter pulls the slide and lets it release to seat the round better.
Nomenclature • F. Slide Lock allows you to lock the slide to the rear manually. • K. Grip allows shooter to hold the grip firmly. • G. Back Strap is the rear portion of the grip. • J Magazine Well the opening where the magazine goes. • I. Magazine drop free, inserted into magazine well. K G F I J
Nomenclature • H. Front Strap is the front portion of the grip. • O. Magazine Release when depressed allows the magazine to come out. • N. Safe Action Safety is located within the trigger, made up of trigger safety, firing pin safety, and drop safety. • M. Trigger when pressed all the way to the rear allows for a shot to be fired O N M H
Nomenclature • L. Trigger Guard designed to protect the trigger. • P. Frame is everything below the slide, made of polymer and contains metal strip with weapon serial number on it. P L
General Information • Glock22 has 34 parts with the magazine in, 29 with the magazine out • 5 pound trigger pull, drop free magazine from any position. • Holds 15 rounds, magazines and weapon are always snapped in. • Most injuries occur when cleaning the weapon. Weapon will only be cleaned or worked on by certified Glock armor’s. Magazines are cleaned every time weapon is cleaned.
Remington 870 Shotgun The shotgun is the most widely used weapon in the Nevada Department of Corrections. The weapon may be found in every gun post. Our goal is to provide the student with professional instruction and guidance in the safe handling and operation of the weapon. We have students who have never fired a weapon before but we will provide a comprehensive knowledge of the nomenclature so they will be able to operate this weapon with confidence at any time. The weapons are provided for the safety of the institutions, officers, and inmates and safety is always a paramount factor in our weapons program.
Objectives • Upon completion of this period of instruction you will be able to: • Demonstrate proper operation of this weapon. • Demonstrate a proper skip shot. • Demonstrate a proper direct shot. • Demonstrate how to load and unload this weapon. • Identify the nomenclature of this weapon.
Nomenclature • The Remington 870 is the Departments primary weapon. It is not to be babied in any way. This weapon is the only weapon that is armed with a popper or blank round. However if the popper is used in-properly can be lethal.
Nomenclature • Muzzle is where the shot comes out of, smooth bore. • Front sight may be a bb, elevated sight, or ghost ring. • Barrel surrounds the muzzle. • Ejection Port is where shells are ejected from. • Breech bolt contains the firing pin, extractor, and the locking block assembly
Nomenclature • Receiver contains the right/left shell latches, Ejection Port, and the Ejector. • Stock consists of butt plate and recoil pad. • Safety Switch located behind the trigger guard to the right is in the safe position, moved to the left it is ready to fire. • Trigger when pressed the weapon goes POW!!!!!!
Nomenclature • Fore-End consists of the Forward Assembly, Forend Tube, Forward Nut. • Magazine Cap needs to be tight, but not to the point you need tools to take it off. It also requires lubrication. • The 870 can be loaded with 4 shells or with as many as 7, check with your institutions operating procedure’s.
General Knowledge • An inmate that is still aggressively being combative is still considered a threat and shall be treated as such. • Verbal commands shall be used in a loud, clear and direct tone. • Before, during, and after shots verbal commands shall be directed. • Weapons shall be checked as soon as you assume duties of that post. • Babying a shotgun creates a malfunction • Short stroking the fore end slide will cause a malfunction. • All the way forward hard, all the way to the rear hard.
Loading The Shotgun • Discharges occur during the loading/unloading of a weapon. • The trigger finger only does what the brain tells it. • Ensure the weapon is loaded properly. • Report discrepancies. • First round in, is the last round out. • Last round in, is the first round out. • Does the weapon or bullet have a brain? Thank you!!!
Loading The Weapon! • Muzzle pointed in a safe direction, weapon on safe. • Slide the For-end forward, closing the ejection port. • Inspect the ammo, push a round into the feed ramp area and into the magazine tube until you here the click. • Continue with this until you have loaded the weapon with all the life rounds your post requires. • Insert the Popper/Blank round last the same way you did with the life rounds. • Place the weapon in a ready position in your post with the safety on and no live rounds in the chamber.
Unloading The 870 Shotgun! • The muzzle is in a safe direction, weapon is on safe. • One hand on the for-end with the pinky finger under the for-end, with the other hand holding the action bar release in. • Begin moving the for-end rearward until you almost pinch the pinky finger. • Insert your thumb into the fee ramp area depressing the left shell latch, allowing for one round to come out. • Bring the for-end the rest of the way rearward, insert your thumb into the feed ramp are depressing the right shell latch allowing one round to come out each time you depress the shell latch.
Unloading The 870 Shotgun! • The weapon is still on safe, you have not touched the trigger, conduct a visual and physical inspection of the weapon. • Once you have verified all is correct and appropriate, reload the weapon and prepare for your workday. • Once you have inspected the weapon put it where it is suppose to be, with the safety still on, and the chamber empty. • You should not need to touch the weapon unless there is an incident that requires you to do so.
The Ruger Mini-14 223 Rifle • The Mini -14 Rifle like the other weapons is designed for public safety, safety and security of the institutions, staff, and inmates. Again the academy will have students who have never fired this type of weapon. • It is our goal to provide you with professional instruction and guidance so you will be able to safely and with confidence operate and handle this weapon and if need be deploy this weapon for protection of the institution, the staff, and the inmates. • If at any time you have a question or are unsure please ask the instructor to clarify any question you may have.
Instructional Objectives • Upon completion of this period of instruction the student will be able to • Identify safety rules for the range and the weapon. • Obtain a passing score on written exam. • Obtain a passing score on the live fire range. • Demonstrate proper loading/unloading techniques. • Identify the nomenclature of the weapon.
Mini-14 General Information • Mini-14 is a .223 caliber weapon, fired from the shoulder. • Has a ranch or law enforcement front sight. • Magazine fed, gas operated, air cooled. • Magazine holds 20 rounds, towers maintain 18 in them. • Used to stop an inmate • Warning shots are not fired with this weapon. • Point of aim at all times is center mass.
Mini-14 Nomenclature Rear Sight Bolt Bolt Lock Front Sight Receiver Barrel Magazine Feed Stock Magazine Latch Trigger Safety
Mini-14 Nomenclature • Stock- The portion that the shooter uses to maintain stockwell, the back portion of the weapon. Contains the trigger mechanism, safety, magazine release. • Receiver – Contains the bolt, firing pin, ejector, extractor, and is connected to the stock. • Barrel - surrounds the muzzle, front sight is on the end of the muzzle and barrel. • Front sight – located on the end of the muzzle/barrel, can be a single blade, or affixed with a sight guard on each side.
Mini-14 Nomenclature • Rear Sight is a peep hole that you must look through. Located on top of the receiver. • Bolt – is located in the ejection port, works back and forth automatically each time a round is fired. Allow to slam home under full spring pressure. • Trigger – is located inside the trigger guard, must be pressed all the way to the rear to discharge a round, trigger does have play, and a reset. • Safety – Located in front of the trigger guard, functioning properly forward the weapon is off safe, to the rear the weapon is on safe.
Mini-14 Nomenclature • Magazine Latch/Release. When pressed and held forward the magazine will be released from the magazine well. • Magazine – holds 20 rounds, loaded with 18 to keep spring pressure. Inserted at a 45 degree angle until it locks. Comes out at a 45 degree angle.
Loading The Mini-14 • Weapon should be on safe, muzzle pointed in a safe direction. • With the bolt forward and ejection port closed. • Insert a 18 round magazine at a 45 degree angle into the magazine well until it locks in place • Place weapon in the proper area for you are now ready for work. • At no time did your finger ever touch the trigger.
Unloading The Mini-14 • Weapon on safe, muzzle pointed in a safe direction. • Remove the magazine. Depress to see if you have 18 rounds. • Pull the charging handle/bolt back to the rear and depress the bolt lock which will lock the bolt in place. • Visually and physically inspect the weapon. • Close the bolt, with the weapon on safe, muzzle pointed in a safe direction. • Insert a magazine and you are ready for a work day.
General Information • Tip of the front sight is centered in the rear sight, once you have obtained this place this on center mass. • Must be performed after each shot. • Verify target acquisition. • Can be fired from standing, kneeling, prone, sitting, barricade. • Take up trigger slack. • Use trigger reset • Apply all 7 marksmanship fundamentals. • If you are not sure of your target or your actions do not shoot.
Test Summary • Glock 22 is a .40 caliber weapon • The handgun grip is established in the holster. • Magazine out of the Glock it will still fire. • Magazines are cleaned when the weapons are cleaned. • When the weapon is out of battery it will not fire. • Semi-auto weapons run out of ammo the slide will lock to the rear.