Download
1 / 24
240 likes | 427 Views
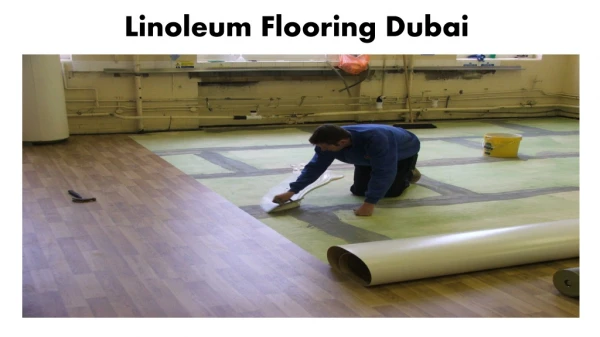
Linoleum Installation System S-780 Linoleum Adhesive S-761 Seam Adhesive . Linoleum Installation System. BEFORE INSTALLING. Plan the layout: Seams should fall at least 6” away from the Subfloor/Underlayment joints. Do not install over expansion joints.

E N D
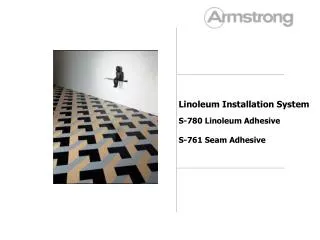
Linoleum Installation SystemS-780 Linoleum AdhesiveS-761 Seam Adhesive
Linoleum Installation System BEFORE INSTALLING • Plan the layout: Seams should fall at least 6” away from the Subfloor/Underlayment joints. Do not install over expansion joints. • Cut pieces to the proper length, allowing enough material at each end to flash 1 ½” up the walls for fitting.
Linoleum Installation System FITTING • Fit piece #1 by Pattern Scribing or Straight Scribing methods and position in the room.
Linoleum Installation System Prepare the seam by trimming the factory seam edge using a straight edge or the S-33 Edge Trimmer. If using a straight edge, hold the knife at a 90º angle.
Linoleum Installation System Using the S-33 Edge Trimmer is quicker, easier and more accurate than hand cutting. S-33 Edge Trimmer
Linoleum Installation System Draw a pencil line on the subfloor at the trimmed factory edge. The pencil line will act as a starting or stopping point while applying the adhesive, and as a guide if repositioning the material is necessary after the Linoleum has been placed into the adhesive.
Linoleum Installation System Overlap Piece #1 with Piece #2 approximately ½” to 1”. Do not overlay too far as it may result in shading issues. Piece #2 Piece #1
Linoleum Installation System Tube or Lap? The shape of the room may dictate whether you Tube or Lap the material to expose the subfloor. TubingMaterial (note location of logo) Lapping Material (note location of logo)
Linoleum Installation System Starting at the lap point and working toward the end wall, apply the S-780 Linoleum Adhesive over the entire exposed subfloor area using the regular notching of the S-891 Trowel. Do Not apply the adhesive past the pencil line. Regular trowel notching 1/16” deep, 1/16” wide, 3/32” apart.
Linoleum Installation System Allow the recommended open time before placing the material into the adhesive. Porous Substrates: up to 10 min. Non-Porous Substrates: 10-20 min.
Linoleum Installation System After placing the material into the adhesive use a 100 lb roller to roll the Linoleum. Start in the center of the Linoleum working toward the edges and roll in both directions. Stay 6” to 12” from the seam. Do Not roll the seam at this point.
Linoleum Installation System Carefully lap Piece #2 back halfway to expose the subfloor. Apply adhesive over the exposed substrate and up to the edge of Piece #1. Piece #2 Piece #1
Linoleum Installation System Lay piece #2 into the adhesive. Starting in the middle of Piece #2 roll the material in both directions using a 100 lb roller (staying approximately 6” to 12” away from the seam area). Do Not roll up to the seam edge at this time. Piece #2
Linoleum Installation System Use the S-83 Recess Scribing Tool to recess scribe all seams net. S-83 Recess Scriber
Linoleum Installation System Insert a piece of scrap material beneath the scribe mark (under Piece #2 and overlaying Piece #1). With the scrap on the same side as the cutting hand, cut the seam at a 90 degree angle. Be sure to hold the knife blade straight up and down. Piece #1 Piece #2 Scrap
Linoleum Installation System Apply a 1/8” bead of the S-761 Linoleum Seam Adhesive along the seam edge of Piece #1 using the applicator bottle. Piece #2 Piece #1
Linoleum Installation System Tuck the edge of Piece #2 into place against Piece #1. Piece #2 Piece #1
Linoleum Installation System As Piece #2 is being tucked into place the S-761 Seam Adhesive will ooze at the seam area. Piece #2 Piece #1
Linoleum Installation System Clean adhesive residue from the surface of the flooring using a clean, white cloth dampened with water. S e a m
Linoleum Installation System Remove burr at the seam by carefully skiving with the back of the S-92 Knife.
Linoleum Installation System Roll the seam into place using the S-77 Hand Roller.
Linoleum Installation System At this point roll the entire floor in both directions, using the 100 lb roller.
Linoleum Installation System Residential Linoleum • Residential Linoleum is not a no-wax floor like vinyl – it requires different maintenance procedures • Wait 2-3 days before beginning maintenance • Damp mop with Armstrong S-485 Commercial Floor Cleaner - do not use Once ‘n Done • When exposed to high-traffic areas and/or staining agents, a stain-resistant sealer is recommended. • After initial cleaning, apply 2-3 coats of Armstrong Shinekeeper Floor Polish
Residential Linoleum • Ongoing floor care: • Sweep or vacuum regularly • Use walk-off mats at outside entrances • Avoid excessive amounts of liquid during maintenance procedures • When necessary, strip the floor and reapply coats of polish • Use Armstrong products specifically designed for Armstrong Genuine Linoleum Genuine linoleum is made from natural raw materials…products with harsh alkalis or high pH (such as ammonia) should be avoided