Download

1 / 46
460 likes | 619 Views
CPR Review. Click for Aid/CPR/AED Manual. Click for Quick reference adult (good for printing out and hanging on your wall). Click for quick references Child and Infant. Why Should YOU Get Certified ?.

E N D
CPR Review Click for Aid/CPR/AED Manual Click for Quick reference adult (good for printing out and hanging on your wall) Click for quick references Child and Infant
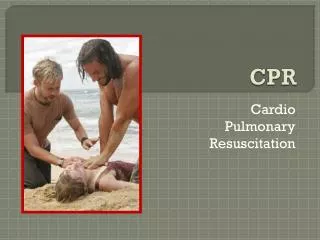
Why Should YOU Get Certified? Being certified in CPR and First Aid doesn’t only benefit yourself, but everyone around you because you never know when CPR will be needed. The American Red Cross has trained millions of people in first aid and CPR. These are the people who are dedicated to making the world a safer place for everyone! I hope you learned some important information about CPR and hopefully you want to get certified!
How Do I renew my Certification? • Certification for CPR and First Aid is easy to obtain! • Just review the CPR PowerPoints to refresh your skills. • Show up to take the test. • You will have your new cards in one week!
Noticing an emergency • Unusual noises • Unusual smells • Unusual appearances • Always use universal precautions to protect yourself and minimize risk of disease transmission
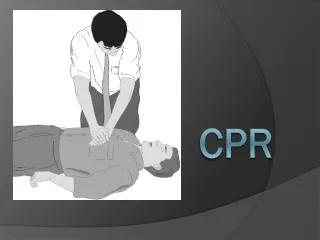
The first important steps in giving CPR are…. The three C’s!! • CHECK • CALL • CARE
Let’s Watch First Let’s watch
CHECK Is the scene safe? • Check for anything unsafe, such as spilled chemicals, traffic, fire, and other hazardous items. • Check a conscious person by: getting their consent, ask them about what happened, and do not touch or move painful areas • If no consent is given, DO NOT give care but do call 911 • Check an unconscious person by: tapping and shouting
CALL Calling for help is often the most important action you can take to help an ill or injured person. • If a person has trouble breathing Call 911 or the local emergency number (If there are other people at the scene, ask someone else to call for you to help!) • If a person is unconscious call 911
CARE Once you have followed the first two C’s, you may need to give care until EMS personnel arrive. Follow these guidelines: • Do no further harm. Move an injured person ONLY if the scene is unsafe, you need to reach someone more seriously injured, or you need to move the person to give care. • If a person is in shock, DO NOT give them water. • Help the person rest in the most comfortable position. • Give any specific care needed. Let’s watch
Chain of Survival Early EarlyEarlyEarly Access CPR Defibrillation Advanced Care Early Defibrillation Early CPR is important because it helps circulate the blood that contains oxygen to vital organs.
Steps for Adult CPR Check the scene for safety Make sure there is nothing around that will cause you harm before approaching the victim. (gas, fallen power lines, etc.)
Is person unresponsive? Are you okay? Check the victim for a response ACTIVATE EMS CALL 911
Open the airway & Maintain the airway open Head tilt and chin lift
Look listen and feel for normal breathing&LOOK FOR SIGS OF LIFE for no more than 10 seconds. Check for breathing
If no signs of life are present START CHEST COMPRESSION 30 / 2 push hard and pushfast
Land mark press down on the sternum 1 ½ to 2 inches Place the heel of one hand in the centre of the victim’s chest. Place the heel of your other hand on top of the first hand.
30 : 2 After 30 compressions open the airway again using head tilt and chin lift give two breaths while watching the chest rise. Rescue Breaths should last for 1 second.
CPR-Adult This Video is from the British Red Cross. It will take you through the important steps of CPR for an adult! Click to watch the video! (you need to do this from your home computer because the web site is blocked on the school computers) I have videos you can barrow if you can’t get the link to work. Let’s watch
Heart Attack • Chest Pain • Discomfort tat lasts for more than 3-5 minutes
Key Points to Adult CPR Were you paying attention? I hope so! Here are some Key point you NEED to remember! • Check the person for consciousness • Call for help! • Open the airway and look, listen, and feel for signs of life for no more than 10 seconds. • Give 30 chest compressions with both hands then open the airway and give 2 rescue breaths each lasting 1 second. • Continue the 30/2 ratio (5 cycles in 2 minutes) until EMT arrives or you are too exhausted to continue. • Do NOT stop CPR to check for signs of life until an AED is ready, a trained responder arrives or the victim breathes on their own.
Child CPR One year of age up to 8 • Ensure the safety of rescuer and child. • Check the child’s responsiveness. Are they alert • Have someone CALL 911 and get an AED • Care: open the child’s airway by tilting the head and lifting the chin. • Keeping the airway open, look, listen and feel for normal breathing (NO MORE THAN 10 SEC) • If the child is not breathing • Give two initial rescue breaths each lasting 1 second • If there is no pulse: The rescuer should provide 5 cycles (a cycle is 30 compressions and 2 breaths) of CPR (about 2 minutes) • start chest compressions (1 to 1 ½ in.). • Early CPR can keep vital organs alive
Land mark • To perform chest compression in children over • 1 year of age, Position yourself vertically above the victim’s chest • place the heel of one hand over the lower third of the sternum ( NIPPLE LINE LEVEL) • with your arm straight, compress the lower third of the sternum. 1 in. to 1 ½ in. (avoid compressing the upper abdomen),
CPR-Child This Video is from the British Red Cross. It will take you through the important steps of CPR for a child! Click to watch the video! http://www.youtube.com/watch?v=IIU6s20w_fE Let’s watch
Key Points to Child CPR Here are some key points to Child CPR in case you missed them! • The same first 3 steps apply for children as adults when giving CPR. (check for consciousness, call for help, care, open airway check for signs of life) • After opening the airway, give 2 rescue breaths (1 every 3 seconds) • Check for signs of life • If there are no signs of life, follow with 30 chest compressions with only one hand. • Check for signs of life every 2 minutes • Continue 30 to 2 ratio until EMT arrives.
Infant CPR • Check the scene safety • open the infant’s airway by tilting the head back ( do not hyperextend the neck ) • Keeping the airway open, look, listen and feel for normal breathing (NOMORE THAN 10 SEC) • If the infant is not breathing • Give two initial rescue breaths (1 breath every 3 seconds) • The rescuer should provide 5 cycles (a cycle is 30 compressions and 2 breaths) of CPR (about 2 minutes) • CALL 911 and start chest compressions (1/2 to 1 in)(100\min). • Stop and check for signs of life every 2 minutes
Land mark 30\2 • Compress the sternum straight down. • Put one hand on the forehead and two fingers. • ½ in to 1 in.
CPR- Infant This Video is from the British Red Cross. It will take you through the important steps of CPR for an infant! Click to watch the video! http://www.youtube.com/watch?v=0ZglCFfzKwA&feature=related Let’s Watch
Key Points to Infant CPR Important things you need to know about Infant CPR! • Checking for consciousness on a baby is different from an adult or child, you must tap their foot. • Check for consciousness, call for help, open airway check for signs of life. • An infant needs CPR if there is no breathing and no pulse. • Give 2 rescue breaths then listen for signs of life. Follow with 30 chest compressions with only 2 fingers and not as much force. • Continue 30 to 2 ratio until EMT arrives.
CHOKING Now we will learn how to treat an adult, child, and infant who are choking and not able to cough, speak, or breathe. Signs of trouble breathing are: Noisy or painful breathing, Wheezing, agitation, pale skin, slow or rapid breathing
Conscious Choking Adult & Child Step 1 Check scene, then check person. Step 2 Have someone call 9111 Step 3 care Obtain Consent to care for the person. Step 4 Lean the person forward and give 5 back blows with the heel of your hand.
Choking Adult & Child Continued… Step 5 Give 5 quick, upward abdominal thrusts. Place your fists just above the navel. Step 6 Continue back blows and abdominal thrusts until- • object is forced out • person can breathe or cough forcefully(encourage them to continue coughing) • person becomes unconscious WHAT TO DO NEXT: If person becomes unconscious- CALL 911
Conscious Choking Infant Step 1 Check scene, then check person. Step 2 Have someone call 9111 Step 3 care Obtain Consent to care for the person. Step 4 Lay the baby face down on your forearm and give 5 back blows with the heel of your hand. (make sure head is lower than chest)
Choking Infant Continued… Step 5 Give 5 quick, chest thrusts. Place your fingers in the middle of the chest. Step 6 Continue back blows and abdominal thrusts until- • object is forced out • person can breathe or cough forcefully(encourage them to continue coughing) • person becomes unconscious WHAT TO DO NEXT: If person becomes unconscious- CALL 911
Conscious Choking Infant Follow the same 1-6 steps of a choking adult for a choking child, and infant. REMEMBER TO CALL 911!!
What does an AED do? • The AED is programmed to analyze the heart’s electrical activity, and decide whether the electrical shock would help. It then builds up an electric charge and deliver to the patient when you push the button. If a victim truly has no pulse, the AED is the only thing that will bring the victim back to life. CPR only keeps blood and oxygen flowing through the body. CPR alone does NOT restart the heart! • Each minute defibrillation is delayed reduces the chance of survival by 10% • Early defibrillation can save the lives of more people in cardiac arrest.
Patient Symptoms when in need of an AED • Unconscious • No Breathing • No Signs of life • Resulting in… No Oxygen to the Brain or Body Organs
Sudden Death Reversal Rates • CPR(only) ……………………… 0-2% • EMS/ER…………………… 5-15% • CPR+AED…….. 30-75%
AED Don'ts • Don’t use the AED to monitor people who are awake or have a pulse • Don’t attach the AED to people in anticipation of arrest. • Don’t defibrillate the patient when both the patient and the defibrillator are in contact with metal or water . • Don’t analyze with the AED while chest compression are in progress.
Electrode placement Adult • Remove electrodes from package (check expiration date). • Apply to victims :upper right chest left lower side of chest • Wet victims should be toweled dry. • Hairy chest may need shaving. • Can be used with pacemaker, electrode on right side should be beneath pacemaker.
AED For Adult and Child This is a video that takes you through the entire process of CPR and use of an AED on an adult. Pay close attention to make sure you remember all this important information! Click here to watch video! http://www.youtube.com/watch?v=6aZxH_J9g_0&feature=related
Steps to Using AED Step 1-3 Turn on AED Wipe chest dry Plug in connector if necessary Step 4 Make sure no one, including yourself, is touching the victim Say “everyone stand clear!” Push shock button if necessary WHAT TO DO NEXT- After shock, give 5 cycles or about 2 minutes of CPR.
WARNING! • Don’t Touch Patient During Analysis • Start chest compressions for 2 minutes immediately after defibrillation. Without pulse check Trainning Section
What We’ve Learned… • The three C’s- Check, Call, Care! • We learned how to perform CRP on an adult, a child, and an infant. • We learned how to treat a choking adult, child, and infant. • We also learned how to use the AED!
Take a look at the “CPR test review” PowerPointFor questions or more information, see Stacey Delpit Room 8, 4th grade(I have CPR books you can check out or purchase for $15) Pacoima Employees
Works Cited • Videos from www.youtube.com • All information about CPR, AED, Choking, and the three C’s from 3rd Edition Participants Manual provided by American Red Cross Title: First Aid/CPR/AED for Schools and Community.