SCRATCH
SCRATCH. Lesson Two – Interactive Concepts Using Sensing, Operators, and Variables. Review of Lesson One .

SCRATCH
E N D
Presentation Transcript
SCRATCH Lesson Two – Interactive Concepts Using Sensing, Operators, and Variables
Review of Lesson One • In Scratch Lesson One, the basics of the programming window were introduced, including the four parts of the programming environment – Command Center, Programming Window, Costume Design, and Display Window • Basic commands from four different command sets were explored – Control, Motion, Looks, and Pen • Simple animation and drawing techniques were demonstrated, and several exercises were provided, including the challenging Olympic Rings!
Objectives of lesson two • In this lesson, three command groups will be explored – Sensing, Variables, and Operators • The goal is to create interactive programs that allow the user to input data while the program is running, and have that input shown or “echoed” in the program. • This requires the use of variables for storage of the input data, as well as operators to “join” the input with other statements to be shown to the display window.
Objectives of lesson two Let’s get started!
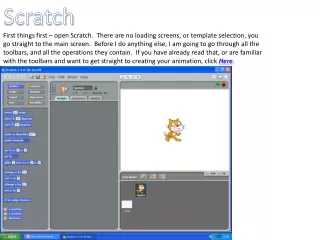
Launch the Scratch Programming Environment, and then get a Green Flag Hat from the Control Command Set to start a new program.
Now click on the Sensing Command Set and get the ask and wait command
Also click on the answer check box to make it show on the display window.
When you run the program, the cat asks the question shown, and waits, just like the command says. An input box appears at the bottom of the screen for you to provide an answer.
After you type in a response and press ENTER, your answer appears in the answer box at the top, and the input box disappears. Nifty, huh?!
The answer box is a storage location in memory, called a variable. It stores whatever is entered into the input box provided by the ask and wait command.
Now let’s do something with this answer to continue the program. Let’s have the cat say “Hello” to you!
Go to the Looks Command Set, get the say for 2 seconds command and add it to your program.
When you run the program, the cat indeed says “Hello!” after you type in your name.
But wait…something is missing! It didn’t include your name!
To include your name in the “Hello!” message, something else is required. You must create the message by joining your name with the word “Hello”.
Here’s how to do that… Go to the Operators Command Set and get the join command.
You probably notice something different about this object…it doesn’t have a “notch” like the other commands you’ve used before.
That is because it is not a command, but a value object that can be placed into a command. Other names for values are arguments or parameters.
Now, click and drag this value object (or parameter or argument) into the say command, replacing the “Hello!” in the white box. Notice how the white box is outlined in white just before you drop it into place.
When you run the program now, it says “Hello” to ….wait, something is still missing! We forgot something! Your name, of course. Hmmm… can you figure it out? Try to think of how to get your name to show up instead of the word “world”, before you go to the next slide.
There are actually two ways to do this… The easy way is to just click in the white box and change the word “world” to your name…that is called “hard-coding”, but not the best way.
The other way is the one that makes the most sense. Hopefully it is the one you figured out. Go back to the Sensing Command Set, and click and drag the answer variable to replace “world” in the second white box of the join command.
Finally, it works! Congratulations! You have just completed your first interactive program!
Now, let’s tweak this a bit. There are two issues in this output. First, the word “hello” should be capitalized. That’s easy to fix…just click inside the “hello” box and delete the “h” and replace it with “H”
The next one is a bit more complex. There should be an exclamation mark after your name. How can we make that happen? Think about it…(Hint: use another join command). Try it before you go to the next slide.
Here’s the fix… Using still another join command, put the answer variable into the first box, and change the second box to contain the exclamation mark. Then put the new join into the second box of the first join, creating a compound, or nestedjoin statement!
Using More Than One Variable • The next step in developing an interactive program is to do something fun, like a Madlibs game, a silly interactive story that asks several questions, and then puts the answers into a predefined story. • Here is an example: • Give me a noun (answer might be “cat”) • Give me an adjective (“brave”, perhaps) • Give me an adverb (“stupidly”, maybe?) • Give me an exclamation (how about “Ouch!”)
Using More Than One Variable • The story could be something like this: • "Ouch!” he said stupidly as he jumped into his convertible cat and drove off with his brave wife.“ • Now the question is…how can we make that work with Scratch? • The problem is that we must remember all of the answers before the story actually happens, then put all the answers into the story. • Luckily, there is a way…here’s how…
Above you see the four questions demonstrated on the previous screens. This will work just fine, but each time a new question is asked, the old answer is destroyed! Not good!
There must be a way to save the current answer somehow… …using variables, of course!
To make some variables to use, click on the Variables Command Set and make four variables called noun, adjective, adverb, and exclamation.
Now get four copies of the set to command and change them as shown.
Then switch to the Sensing Command Set and drop the answer object into each variable…
Now move each set to command into its rightful place in between the ask and wait commands…
Now when you run the program, each variable stores a copy of answer so that all four answers are “remembered” at the end.
When the program is complete, all of the variables contain the answers you entered, and now you are ready to output your story!
Now comes the painstaking process of putting together the story, one step at a time, starting with “Ouch, a joining of the “ symbol and the exclamation variable.
Here we join the “Ouch value object with “, he said and the adverb object and put that part of the output into a say command.
…and it works! Now, build the rest of the story in the same manner.
Now It’s Your Turn!!! • Using the Madlibs example shown in this lesson as a guide, create your own Madlib, with at least five questions, and at least four output screens for your story. • You may use any other skills learned in the previous lesson, and are welcome to use different backgrounds and sprites for your project. • Have fun!