Hypodermic Tissue Building
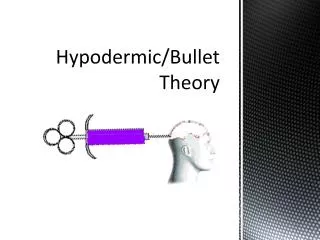
Hypodermic Tissue Building. Conditions Requiring Treatment. Emaciation Concavities Injury or Surgery. Equipment. Syringe Needle: gauge. Precautions. 1) avoid overfilling 2) hidden point of injection 3) tissue builder hardens quite quickly 4) use solvent to clean the needle


Hypodermic Tissue Building
E N D
Presentation Transcript
Conditions Requiring Treatment • Emaciation • Concavities • Injury or Surgery
Equipment • Syringe • Needle: gauge
Precautions • 1) avoid overfilling • 2) hidden point of injection • 3) tissue builder hardens quite quickly • 4) use solvent to clean the needle • 5) when filling the syringe, expel any air
General Procedures • 1) single entry point • 2) keep needle close to the surface • 3) carefully direct the needle • 4) fingers may be used to determine depth and position of the needle • 5) inject slowly • 6) apply digital pressure to the skin
General Procedures (cont’d) • 7) direct needle to adjacent areas without removing it from the point of entry • 8) repeat steps 5,6, & 7 until area is filled • 9) to refill the syringe, leave the needle in place • 10) pull back on the plunger when removing the needle
General Procedures (cont’d) • 11) clean the needle and syringe using solvent • 12) seal the puncture site • 13) wax and cosmetize the puncture site if necessary
Recommended Points of Entry • Eye • Supraorbital Area • Temples • Cheeks • Lips • Hands • Neck
small, localized opaque cosmetics “bleach” the area then opaque cosmetics “feather” the opaque cosmetics use opaque cosmetics sparingly reinstate warm color areas and shadows Cosmetically Conceal Small Discolorations
Methods of Cosmetic Application • 1) undercoat • 2) cosmetize • 3) powder application
Cosmetically Concealing Large Discolorations • Pre-embalming • Embalming • Post-embalming: • surface pack • cosmetize surrounding area • slightly lighter shade of opaque cosmetic • “feather” using a clean brush • shading and highlighting • reinstate warm color areas • powder
Prior to Restoration • Receive written permission if major restoration to be performed. • Tissue must be firm and dry. • Embalming concerns: • Post-embalming concerns:
Large Cavity and Excision Restorations • 1) trim away dehydrated marginal tissue • 2) undercut the margin • 3) chemically dry the deep tissues • 4) apply liquid sealer to the deep tissues • 5) use a deep filler (wound filler) to fill the cavity to within ¼ “ from the surface
Large Cavity and Excision Restorations (cont’d) • 6) suture the margin with basketweave • 7) apply wax into the cross-stitches • 8) apply additional wax to contour and taper wax over the margin • 9) reproduction of pores and wrinkles • 10) cosmetize
Wax and Cosmetics • Cosmetics under: undercoat to cover discolorations • Cosmetics mixed with wax: to match the complexion color • Cosmetics over wax: usually cream cosmetic
Skin Texture • Pores: stipple brush gauze paper towel • Furrows: shallow deep