Download
1 / 57
570 likes | 682 Views
Calipers are among the oldest engineering tools, with origins tracing back over 2,500 years to ancient Greece. Archaeological finds indicate their widespread use by the Greeks and Romans, as well as similar inventions during the Han Dynasty in China. The modern vernier caliper, invented by Joseph R. Brown in 1851, revolutionized precision measurement, making it accessible for ordinary machinists. This presentation discusses the basic parts and operations of calipers, the significance of user error, and the importance of accurate measurements in engineering practices.

E N D
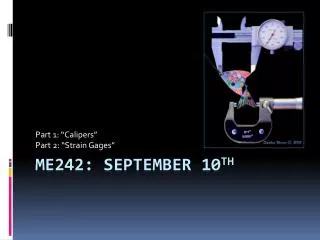
Part 1: “Calipers” Part 2: “Strain Gages” ME242: September 10th
Calipers are one of the oldest engineering tools The earliest caliper has been found in an ancient Greek shipwreck dating back over 2500 years (~500 BCE). The archeologists found a wooden bar with components that featured fixed and movable jaws. These are rare finds but it is believed that the caliper was widely used by the Greeks and Romans. During the Han Dynasty (200 BC – 220 AD) the Chinese also had a sliding caliper. These calipers were typically made of bronze. The modern vernier caliper, reading to thousandths of an inch, was invented by American Joseph R. Brown in 1851. The Brown & Sharpe company inaugurated true precision manufacture in the United States. It was the first practical tool for exact measurements that could be sold at a price within the reach of ordinary machinists. Sources: Mensun Bound: The Giglio wreck: a wreck of the Archaic period (c. 600 BC) off the Tuscany island of Giglio, Hellenic Institute of Marine Archaeology, Athens 1991, p.27 & 31 (Fig.65) Temple, Robert. (1986). The Genius of China: 3,000 Years of Science, Discovery, and Invention. With a forward by Joseph Needham. New York: Simon and Schuster, Inc. Page 86–87.
Calipers are one of the oldest engineering tools • Although calipers may seem simple they offer a profound insight into the level of work the Greek and Roman engineers were attempting: • A universal system of measurement. • An attempt toward a standardized building practice • A culture in which knowledge is passed from one generation to the next for either • Maintenance of existing structures • Construction of similar or more advanced structures.
Caliper Basics • Parts of a vernier caliper: • Outside jaws: used to measure external diameter or width of an object • Inside jaws: used to measure internal diameter of an object • Depth probe: used to measure depths of an object or a hole • Main scale: gives measurements of up to one decimal place(in cm). • Main scale: gives measurements in fraction(in inch) • Vernier gives measurements up to two decimal places(in cm) • Vernier gives measurements in fraction(in inch) • Retainer: used to block movable part to allow the easy transferring a measurement
Calipers are a key tool for the engineer, technician, and machinist… But Calipers are only so accurate. They are also prone to user error.
Measurement Error At other times we might make measurements used in calculations. These are then given to another person, organization, or even a computer. • Sometimes we might build complex systems where our measurements do not always “measure up.” We might notice this only near the completion of a project.
USER ERROR #1…Miscalculation • A Curious Test Failure Jet Engine in Test Cell Accident report conclusion: “Bolts on hold-downs not rated for the forces achieved at a given thrust level. The bolts sheered in a set sequence, releasing the test article.”
And now, back to Calipers… • There is a set sequence to be used when measuring with calipers. • Depending on the design, hold the caliper firmly with the thumb on the dial screw or press-retainer.
How it works… • The vernier consists of a main scale engraved on a fixed ruler and an auxiliary vernier scale engraved on a movable jaw . • The movable auxiliary scale is free to slide along the length of the fixed ruler. • This vernier's main scale is calibrated in centimeters with the smallest division in millimeters. • The auxiliary scale has 10 divisions that cover the same distance as 9 divisions on the main scale. Therefore, the length of the auxiliary scale is 9.0 mm.
You can “zero” the vernier… • When the vernier is closed and properly zeroed the first mark (0) on the main scale is aligned with the first mark on the auxiliary scale. • The last mark on the auxiliary scale will then coincide with the 9 mm-mark on the main scale. This is read 0.00 cm.
Taking a Measurement… • The calipers are typically opened wider than the object to be measured….this sounds funny, but calipers are sensitive instruments and if they are knocked against a surface they can be misaligned.
Taking a measurement… • Once the vernier is positioned to make a reading, make a note of where the first mark on the auxiliary scale falls on the main scale. • In the photo we see that the object's length is between 1.2 cm and 1.3 cm because the first auxiliary mark is between these two values on the main scale. • The last digit (tenths of a millimeter) is found by noting which line on the auxiliary scale coincides with a mark on the main scale. • In this measurement, the last digit is 3 because the third auxiliary mark lines up with a mark on the main scale. Therefore, the length of the object is 1.23 cm.
Basic vernier operation applet • An applet is provided here: • VERNIER CALIPER ANIMATION • It shows the basic operation of a vernier caliper…
If the vernier is not zeroed… • You must be careful that the vernier caliper is properly zeroed! • As stated before, the caliper is a delicate instrument. Any bumps or misuse can cause it to misalign. • The vernier below is improperly zeroed. To correct this, a zero correction must be made. A correction may be either positive or negative. • If the first mark on the auxiliary scale lies to the right of the main scale, then the reading is too large and the error is positive. The “zero” reading is actually +0.05 cm and should be subtracted from any measurement reading. • Also, if the first mark on the auxiliary scale lies to the left of the main scale zero-mark, then the error is negative and the correction should be added from the measurement reading.
The micrometer “caliper…” • Another tool in the ME242 labs is the micrometer caliper.
The micrometer “caliper…” • Micrometers use the principle of a mechanical screw to amplify small distances. • Typically these distances are too small to measure directly into large rotations of the screw that are big enough to read from a scale. • The accuracy of a micrometer derives from the accuracy of the thread that runs the length of the screw. The basic operating principles of a micrometer are as follows: • The amount of rotation of an accurately made screw can be directly and precisely correlated to a certain amount of axial movement (and vice versa), through the constant known as the screw's lead. A screw's lead is the distance it moves forward axially with one complete turn. • With an appropriate lead and major diameter of the screw, a given amount of axial movement will be amplified in the resulting circumferential movement. • For example, if the lead of a screw is 1 mm, but the major diameter (here, outer diameter) is 10 mm, then the circumference of the screw is 10π, or about 31.4 mm. • Therefore, an axial movement of 1 mm is amplified (magnified) to a circumferential movement of 31.4 mm. This amplification allows a small difference in the sizes of two similar measured objects to correlate to a larger difference in the position of a micrometer's thimble. • In older micrometers the position of the thimble is read directly from scale markings on the thimble and shaft. A vernier scale is usually included, which allows the position to be read to a fraction of the smallest scale mark.
Micrometers are easy to read: • The increments on the spindle give a “gross” measure. • The scribe marks on the vernier attached to the thimble give the secondary or finer measurement. • Example: 0.276”
Micrometers are easy to read: • Example: 5.78 mm
Micrometers are easy to read: • Example: 5.783 mm
Uncertainty is a Certainty! • The pointer moves up and down so as to display the measured value on this scale. • What number would you write in your notebook when recording this measurement? • Clearly, the value is somewhere between 130 and 140 on the scale, but the graduations enable us to be more exact and place the value between 134 and 135. • The indicator points more closely to the latter value, and we can go one more step by estimating the value as perhaps 134.8, so this is the value you would report for this measurement. • Now here’s the important thing to understand: although “134.8” is itself a number, the quantity we are measuring is almost certainly not 134.8— at least, not exactly. The reason is obvious if you note that the instrument scale is such that we are barely able to distinguish between 134.7, 134.8, and 134.9. • In reporting the value 134.8 we are effectively saying that the value is probably somewhere with the range 134.75 to 134.85. In other words, there is an uncertainty of ±0.05 unit in our measurement.
Uncertainty is a Certainty! All measurements of quantities that can assume a continuous range of values (lengths, masses, volumes, etc.) consist of two parts: • the reported value itself (never an exactly known number), and • the uncertainty associated with the measurement.
RANDOM ERROR • When you measure a volume or weight, you observe a reading on a scale of some kind. • Scales, by their very nature, are limited to fixed increments of value, indicated by the division marks. • The actual quantities we are measuring, in contrast, can vary continuously, so there is an inherent limitation in how finely we can discriminate between two values that fall between the marked divisions of the measuring scale. • CAN WE ELIMINATE THIS WITH A DIGITAL DISPLAY? • NO! The same problem remains if we substitute an instrument with a digital display; there will always be some point at which some value that lies between the two smallest divisions must arbitrarily toggle between two numbers on the readout display. This introduces an element of randomness into the value we observe, even if the "true" value remains unchanged.
RANDOM ERROR • WHAT IF WE USE A “MORE SENSITIVE” INSTRUMENT? • Actually, the more sensitive the measuring instrument, the less likely it is that two successive measurements of the same sample will yield identical results. • In the example we discussed above, distinguishing between the values 134.8 and 134.9 may be too difficult to do in a consistent way, so two members of the same lab team may record different values even when viewing the same reading. • OTHER FACTORS…Each measurement is also influenced by a myriad of minor events, such as building vibrations, electrical fluctuations, motions of the air, and friction in any moving parts of the instrument. These tiny influences consititute a kind of "noise" that also has a random character. Whether we are conscious of it or not, all measured values contain an element of random error.
RANDOM ERROR • Key: • Discrepancy or uncontrolled variation between an observed (measured) value and the value predicted by a specification, standard, or model. • Where numbers are sufficiently large (as in repeated measurements or mass production), random errors tend to cancel each other out, and their sum approaches zero. • Also called chance error or statistical error.
Systematic Error • Systematic error are those things that are inherent to the measuring tools we opt to use. • Suppose that you weigh yourself on a bathroom scale, not noticing that the dial reads “1.5 kg” even before you have placed your weight on it. • Or you use an old ruler with a worn-down end to measure the length of a piece of 2x4 wooden beam. • In both of these examples, all subsequent measurements, either of the same object or of different ones, will be off by a constant amount. • Random error is impossible to eliminate, however…. • Systematic errors are usually quite easy to avoid or compensate for, but only by a conscious effort in the conduct of the observation, usually by proper zeroing and calibration of the measuring instrument. • However, once systematic error has found its way into the data, it is can be verydifficultto detect.
Accuracy & Precision • With every measurement, no matter how carefully it is made, there is an associated error inherent with the measurement. • No one can ever exactly measure the true value of a quantity. • The magnitude of the error is due to the following: • precision of the measuring device • the proper calibration of the device • and the competent operation of the device. • This is different than a gross mistake or blunder. A blunder is due to an improper application of the measuring device, such as a misreading of the measurement. Careful and deliberate laboratory practices should eliminate most blunders.
Accuracy & Precision • Most people believe accuracy and precision to mean the same thing. • DON’T BE FOOLED! THEY ARE DIFFERENT! • To determine the error associated with a measurement, engineers often refer to the precision and accuracy of the measurement. • To understand the difference between these two properties, let’s use the classic example of the marksman who uses a gun to fire bullets at a target. • In this analogy, the gun is the instrument, the marksman is the operator of the instrument, and the results are determined by the location of the bullet holes in the target.
Accuracy & Precision • The precision of an experiment is a measure of the reliability of the experiment, or: how reproducible the experiment is. • The biathlete shoots at the target. We see that the marksman was quite precise. Her hits were uniform due to the use of a sighting scope. • However, the sighting scope did not provide accurate results since the shots were not centered on the target's bull's eye. • The fact that her results were precise, but not accurate, could be due to a misaligned sighting scope, or a consistent operator error. • Therefore precision tells us something about the quality of the instrument's operation.
Accuracy & Precision • The accuracy of an experiment is a measure of how closely the experimental results agree with some true or accepted value. • If the biathlete adjusts the sighting scope we see a different result. • Here, the shots are centered on the bull's eye but the results were not uniform, indicating that the biathlete showed good accuracy but poor precision. • What might cause this? It could be the result of a poorly manufactured gun barrel. In this case, the marksman will never achieve both accuracy and precision, even if she very carefully uses the instrument. • If she is not satisfied with the results she must change her equipment. • Based on this accuracy tells us something about the quality or correctness of the result.
Accuracy & Precision • As working engineers, we always want our results to be bothprecise and accurate. • As shown on the target below, the shots are all uniform and centered on the bull's eye. • This differs from the prior result in that the biathlete has compensated for the poorly aligned sighting scope.
Accuracy & Precision • In any experiment one benefit of taking many measurements of a single property is that blunders are easily detected. • In the figure below we see that the results are both accurate and precise with the exception of an obvious OUTLIER. • Because several measurements were made, we can discount the suspicious data point as an obvious mistake, probably due to operator or experimental error.
Quick Reminder… • Accuracy refers to how closely the measured value of a quantity corresponds to its “true” value. • Precision expresses the degree of reproducibility, or agreement between repeated measurements.
Accuracy & Precision • Accuracy, of course, is the goal we strive for in scientific measurements. • Unfortunately, there is no obvious way of knowing how closely we have come to the “true” value. • This is true whether it be of a well-defined quantity such as the mass of a particular object or some average that represents the measurement of some set collection of objects.
Accuracy & Precision 4 Possible Scenarios…. With only a few points we cannot determine the accuracy or precision, however, the mean can help.
Accuracy & Precision • Statistical theory tells us that the more samples we have, the greater will be the chance that the mean of the results will correspond to the “true” value, which in this case would be the mean obtained if samples could be taken from the entire population of light bulbs.
Accuracy & Precision • This point can be better appreciated by examining the two sets of data shown below. • The set on the left consists of only three points (shown in orange), and gives a mean that is quite far removed from the "true" value, which is arbitrarily chosen for this example. • In the data set on the right, composed of nine measurements, the deviation of the mean from the true value is much smaller. Deviation of the mean from the "true value" becomes smaller when more measurements are made.
Error Management • All data is suspect… • Data should be reviewed carefully. • Is it logical? • Does it make sense in terms of the capabilities of a given instrument. • If an error is found in a data set it should be reviewed carefully and systematically. • Sometimes errors occur because of mistakes in the procedure. • When this happens the procedure should be carefully reviewed.
USER ERROR #2: Organization Satellite Processing September 6, 2003: 1. Functional Step in the NOAA PRIME-N satellite build occurs when the payload structure must be positioned on its side for integration and test. 2. Normal, standard procedure 3. However, personnel resources were thin and the project was behind schedule. There was also some competition for resources on similar projects within the plant.
NOAA PRIME-N Mishap 9/6/2003 • EARTH SCIENCE DIRECTORATE • MISSIONS ANOMALY REPORT TO: GSFC: 100/A. Diaz, 100/W. Townsend, 100/ 400/D Perkins, NASA HQ: Y/G. Asrar, Y/M. Luther, Q/B O’Connor • FROM: GSFC/POES Project/480/K. Halterman • DATE: September 6, 2003 • PROGRAM/PROJECT: GOES/POES Program/POES Project • DATE OF ANOMALY: September 6, 2003 • LOCATION OF ANOMALY: Lockheed Martin, Sunnyvale CA • DESCRIPTION OF EVENT: • As the NOAA-N Prime spacecraft was being repositioned from vertical to horizontal on the "turn over cart" at approximately 7:15 PDT today, it slipped off the fixture, causing severe damage. (See attached photo). The 18' long spacecraft was about 3' off the ground when it fell. • The mishap was caused because 24 bolts were missing from a fixture in the “turn over cart”. Two errors occurred. First, technicians from another satellite program that uses the same type of “turn over cart” removed the 24 bolts from the NOAA cart on September 4 without proper documentation. Second, the NOAA team working today failed to follow the procedure to verify the configuration of the NOAA “turn over cart” since they had used it a few days earlier. • IMPACT ON PROGRAM/PROJECT AND SCHEDULE: • The shock and vibration of the fall undoubtedly caused tremendous damage. Significant rework and retest will be required. NOAA-N Prime is planned for launch in 2008. • CORRECTIVE ACTION: • Lockheed Martin formed an Accident Review Team in which GSFC is participating. The immediate actions concern safety (preventing the spacecraft from rolling, discharging the batteries, and depressurizing the propulsion system). NOAA-N Prime is under guard, all records have been impounded, and the personnel interviewed. After the safety issues are addressed, attention will focus on assessing the damage to NOAA-N Prime.
Try to avoid mistakes by being as thorough as possible..But…Learn from Mistakes…Return to the task and try to do better…
Strain gages • 1938: Invented by engineers Edward E. Simmons and Arthur C. Ruge. • Typically the strain gauge consists of an insulating flexible backing which supports a metallic foil pattern. • The foil pattern is made up of a series of parallel metal wires. • The gauge is attached to the object by a suitable adhesive, such as “Crazy Glue (cyanoacrylate). • As the test article is deformed, the foil is deformed, and this causes its electrical resistance to change. • The strain gage is used as one arm of a Wheatstone Bridge. • This resistance change can be translated to a measurement of strain.