Download
1 / 1
10 likes | 195 Views
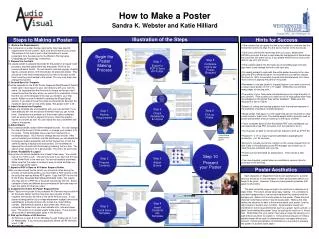
How to Make a Poster Sandra K. Webster and Katie Hilliard. Illustration of the Steps. Steps to Making a Poster. Hints for Success. Review the Requirements

E N D
How to Make a Poster • Sandra K. Webster and Katie Hilliard Illustration of the Steps Steps to Making a Poster Hints for Success Review the Requirements The conference or poster display opportunity may have specific requirements for the content, style, size and format of your poster. The sample to the right is part of the instructions to poster presenters from the web-site for the Western Pennsylvania Undergraduate Psychology Conference. 2. Prepare the Contents It’s usually easier to prepare the words for the poster in a regular word processor and then paste them into the poster. Don’t be too concerned about format. You will need to reformat anyway. Graphs, figures, pictures and so forth should also be prepared ahead. They should be in the final format because you may not be able to edit them once they are inserted in the poster. You may crop them and change the borders. 3. Get and Save the Template Find the template on the R:\AV Poster Requests\Staff[Student]\ Submit, folder open it and copy it to your own directory with your own file name. It’s important that the file name is unique so that you don’t overwrite another file later when you submit it for production. Check that the size of the template is the size you need for your final poster. Adjust the size if needed by altering the [Page Setup] options. If you plan to have the poster produced at AV Services the maximum size is 44” on one of the sides. This poster is 48” x 36”. 4. Insert Contents into Template Replace the template title and headings with your own content. If you have difficulty with the text boxes remember that you can format them. Sometimes the problem is in the format options selected, such as where the text is aligned in the box. Insert the graphs, figures or pictures as well. You can adjust the size, placement and order of the figures. 5. Adjust Boxes Your content probably doesn’t fit the template exactly. You can change the size of the boxes to fit the content, or change your content to fit the boxes. These templates have a text box inserted into a rectangular shape. You’ll have to change the size of both. After you’ve inserted your contents into the text boxes you can delete the rectangular shapes altogether and format the text box to look the same by adding a background and borders. Do not attempt to squeeze the contents into the boxes by reducing the font size. You need a clear, large font for a good poster. This font is 24 point Arial. 6. Check Readability & Layout Your poster should be readable from at least 3 feet away. You should look at it at 100% zoom. This will only work if you have set the size of the PowerPoint to the final size. You should carefully proofread. Make sure that the order of content is easy to follow and that you have enough white space. 7. Export to PDF & Save to AV Poster Request Folder After you have saved the file (which you should do often during the process of making the poster) you must make a PDF version of the file using the save as Adobe PDF option. Copy the PDF file into the R:\AV Poster Requests\Staff [Student]\Submit folder. The reason why they ask for a PDF file is because it preserves the font. Every computer’s fonts are different and sometimes AV Services may not have the same font that you used. 8. Complete the Online AV Poster Request Form Allow 7 days for the poster to be produced. AV Services may be able to do the poster faster, but they may also have dozens of other requests that need to be done at the same time as yours. If your poster is being paid for by a college department budget it should be submitted by a faculty member who knows the correct billing number. Departments receive a discounted rate. When you complete the poster form you must indicate color, size and paper type. This poster is on double weight matte paper. There are also other variety of different paper styles in AV Services. 9. Pick up the Poster at AV Services AV Services is open 8 to 4:30 Monday through Friday and 6-7 p.m. on Wednesday. If you have any questions please call AV Services at ext. 7188. 10. Present Your Poster • If the content that you paste into the boxes seems to overflow use the format text options to align it to the top not center of the text boxes. • If the boxes behind the text boxes drive you crazy, delete them AFTER you’ve put the text in and make the background of the text box the color that you want it to be. If you delete them first you may not be able to see your text boxes. • If the content pastes into the boxes at an incredibly large font size, just select it and change the font to the right size. • It’s usually easiest to work with the entire poster showing in the view using the [Fit to Window] option, but sometimes you need to change the zoom to 100% to see what it would look like afterward, or to have more control in aligning the parts of the poster. • Remember to choose [scale to fit paper] option if you want to print out a copy of your poster on 8.5” x 11” paper. Otherwise you will have many pages of very big print. • The quality of your final poster will depend upon the original quality of your artwork. If the pictures you insert are not a high quality when they are enlarged on the poster they will be “pixilated.” Make sure the resolution is 300 or higher. • Beware of cutting and pasting graphics from the internet because of the problems of pixilation mentioned above. • Single weight matt paper is a thin paper that can be mounted on other poster board or foam core. The double weight matt is typically used for poster presentation and can stand up to the rigors of travel. • If your computer doesn’t have the [Adobe PDF save as] feature you can download a free PDF converter from the internet to do so. • You may also be able to use the print as feature to print as a PDF file. • Posters 11” x 17” or lower must be submitted to duplicating for production, not AV services. • Be sure to include your phone number on the poster request form so that Katie or the publications and PR manager can contact you in case there are problems with your file. • Posters can be laminated for preservation. There will be a little crease. • If you are traveling, poster tubes are available in various sizes for purchase in AV Services. Katie Hilliard produces the poster Poster Aesthetics Each discipline or department has its own aesthetics for a poster and you should try to see examples of other good posters before you begin to do yours. However, there are some general guidelines that apply to all posters. The print should be large enough to be read from a distance of at least 3 feet. The colors should allow easy reading. It is a mistake to use dark backgrounds or low contrast between the contents and the background. Allow a lot of white space on the poster. Place the most important information where it can be easily seen. Make a title that invites the observer to want to know more about your poster. Use the right visuals to explain your contents. Good posters usually are centered on some visual element(s) such as a graph, figure, picture, or table. Avoid making the poster “busy” by putting too much on it. Avoid frills. Remember that your poster may have a longer life hanging on a wall without you there to explain it. It should have enough on it that a patient reader will be able to understand your concepts without you present. If photo presentation is important you may want to produce the poster on a photo luster paper.