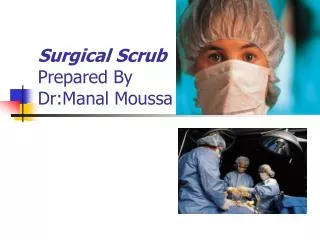
The Surgical Scrub
The Surgical Scrub. Today’s Topics. Surgical Scrub Drying hands Donning surgical gown Closed gloving Turning Open gloving. The Surgical Scrub. You must scrub your hands and arms up to inches above the elbow rendering them surgically clean

The Surgical Scrub
E N D
Presentation Transcript
Today’s Topics • Surgical Scrub • Drying hands • Donning surgical gown • Closed gloving • Turning • Open gloving
The Surgical Scrub • You must scrub your hands and arms up to inches above the elbow rendering them surgically clean • Transient microorganisms are removed and resident flora are reduced • Occurs by two actions: • Mechanical friction brings microorganisms to the surface • Chemical action of antimicrobial soap which also provides a film that lasts several hours after the scrub • See Technique, pg. 333-339
Equipment • Scrub sink • Scrub brush with nail cleaner • Antiseptic solution • PPE • Proper OR attire
Scrub Techniques • Brush Stroke • Each surface is scrubbed a designated number of times • We will use this • Timed Method • Scrub for a designated time (5 Min) • Not used here.
Each stroke consists of one back and forth motion You will perform 30 strokes to your nails You will perform 10 strokes to each plane of your fingers (4 planes) You will perform 10 strokes to each of your web spaces as you progress to each finger You will perform 10 strokes to each of the four planes of your hand Your arm is divided into three sections Each section has four planes or more You will perform 10 strokes to each plane of your arm beginning at your lower forearm, proceeding to your upper forearm and ending with your lower upper arm STOP at 2”above your elbows Please measure at home so you know how far this is Not as far as you think Counted Brush Stroke
Bunch up your nails and apply 30 counted strokes to your nail tips with bristle side of brush Switch hands and apply 30 strokes to the other hand Begin with thumb, apply ten strokes to lateral side and progress to each of the four planes, web space between index finger and thumb, moving to index finger, etc. Ten strokes to hand’s four planes Move to lower forearm, apply ten strokes to each of the four planes Move to upper forearm, apply ten strokes to each of the four planes Move to lower upper arm, apply ten strokes to each of the four or more planes Stop at 2” above elbow DO NOT TOUCH your scrub sleeves KEEP YOUR fingers up, arms away from your body and hands in front of your face AVOID touching spigot or sink Proceed to other hand beginning with fingers and progress in same manner described Counted Brush Stroke
Counted Brush Stroke • Keeping your hands up in front of yourself and away from your body, turn to the side you intend to rinse first • Beginning with your fingertips, place them under the water, wiggle them and rotate hand to thoroughly rinse, progress up your arm • KEEP your arm in an arc (U), fingers pointed at the ceiling • DO NOT GO BACK • Once you have rinsed an area, you can’t go back down • Once you have reached your elbow, step away from the water, turn body to other side and rinse using same technique • Turn off water with your hip or leg • DO NOT SHAKE your hands, can drip a minute • KEEP HANDS up in front of you! • Putting them out to the side endangers you being run into by someone and having to start over! • Progress to OR suite door and open with your hip or buttocks (BACK IN!)
Hand Drying and Donning Surgical Gown • Keep arms above waist and hands up • Open door with the back, hip, or rear end (back in the room) • Avoid touching anything with hands and arms • Avoid dripping on the sterile field when grasping drying towel • Grasp gown on outside and lift up and away from the sterile field it is on (the gown is packaged for you to do this without readjusting the gown/grab it as where it lays just below the collar) • Step away from sterile field when donning gown to avoid touching unsterile areas • Be aware of surroundings so you do not inadvertently touch anything around you or above you • Only touch the item you are retrieving, one at a time! • See technique, pg. 335-339
Self-Gowning • Fasteners at the shoulders and waist are secured by the circulator • Circulator will assist in pulling gown over the shoulders • Do not turn your back to the sterile field • Use the closed glove technique to put on gloves • Hand the Ticket to the circulator to turn gown and tie • Do not spin around • Do not pull the tie strap from the ticket vigorously • See technique, pg. 335-339
Closed Glove Technique • Used for donning gloves after the sterile surgical gown is put on • Should NOT use a back table to don the surgical gown and gloves • Use a mayo stand or other clean, flat surface such as a prep stand • See technique, pg. 338
Open Glove Technique • For sterile procedures that need to be performed by a non-sterile OR team member • Used in skin preps, catheterization, or any procedure that does not require a surgical hand scrub • You should always wash and dry your hands before and after using the open glove technique • See technique, pg. 198 and 340
Summary • Surgical Scrub • Drying hands • Donning surgical gown • Closed gloving • Turning • Open gloving