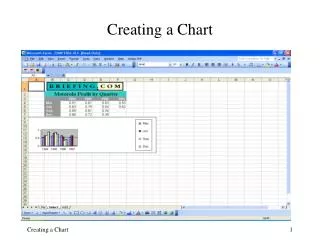
Entering a Chart
Entering a Chart. Using emsCharts Series # 1.4. Entering a Chart. Log into emsCharts From your Home Page choose “Patient Records” on the left Menu On the Right side of the Screen click the button “Create Blank Chart”

Entering a Chart
E N D
Presentation Transcript
Entering a Chart Using emsCharts Series # 1.4
Entering a Chart • Log into emsCharts • From your Home Page choose “Patient Records” on the left Menu • On the Right side of the Screen click the button “Create Blank Chart” • A New Chart will be created. Any defaults set by your company will be completed to start the chart. • The following screens will vary from your company screens as many fields are configurable. This will be a sample configuration.
Page 1 This is page one of a chart entry. We will break this down into various sections.
Page 1 - Menu • This menu is available on all pages as you work through a chart. • The “Home” at the very top will take you to your Home Page. This will close the chart. • You may proceed through the pages as desired once the record has been created. • The chart automatically saves when you change to a different page.
Page 1 – Top Entry • You will enter any ID’s requested by your company. Two are available. These may be required. They may be numbers, letters, or symbols. • The Patient Record ID is created automatically by emsCharts • The Import Button is only available if a CAD import has been purchased.
Page 1 - General • Complete the fields to the best of your knowledge. • Review all fields that have been pre-filled. • The level of care (ALS,BLS, etc) is important as it will close or open areas of the program further along. • All pull down fields are configurable
Page 1 – Crew Members • Up to 4 crew members may be shown • Letters in the front represent their Role. • D = Driver • P = Primary • S = Secondary • T = Tertiary • O = Other • Other people may be entered in the box below
Page 1 - Referring • Where you Picked Up your Patient • May choose by Search or Pull Down • Pull Down is most common places patients are taken This box may be edited in configuration to eliminate fields not needed by your service. Fields may also be added if desired.
Page 1 - Receiving • Where you took your Patient • May choose by Search or Pull Down • Pull Down is most common places patients are taken Comment Box! Replaces end Narrative by placing comments where they belong. This avoids confusion about a comment as well as having to repeat information in a second location. This also prevents you from forgetting about this at a later time. This type of box will hold 256 characters!
Page 1 - Times • May be Active X or Text boxes • May turn off un-needed boxes • Will automatically warn you if they are out of sequence • Only use what you need • Some may be set as “Required” by your service • Time Zone indicated at top
Page 1 - Mileages • Fields may be turned off in configuration if not needed • Will calculate Loaded and Total if entered • Your company needs to set protocol for # of digits entered • May show Loaded Miles Only • May be made mandatory Out of County Miles This box may be displayed if required in your state This does not calculate, but would be entered manually
Page 1 – Add Patient • Button on Bottom of Page 1 • Click to Add Patient Info to the Chart • Will Bring Up New Page with Various Options • These Options will vary according to configuration settings
Page 1 – Choosing No Patient • This choice may not be available according to Configuration • Will skip all Patient Information, Assessments, and Treatments • Will allow closing of chart without any further information
Page 1 – Choosing Patient • If either of these are chosen you will be taken directly to the Patient Info Section • The Unknown choice will automatically complete the Unknown check box • The screens that appear when these are chosen will be shown and explained in future slide
Page 1 – Choosing Search • This is the most popular choice of buttons • Program may be configured so that this option is required for all Transport/Patient calls • Clicking will result in being taken to a Search for an existing Patient • Helps avoid patients being entered several times into your system with different spellings, birthdates, etc. • Saves time for “Frequent Flyer” calls by bringing up all information already on file • Information may be changed as needed
Page 1 – Search Info • Enter Patient Info as known • % is our wild card, as shown here this would find patient if name entered as Kathy, Katherine, Kathleen, etc. • Not all fields need be completed • Click search button to perform search • If Patient found, Patient information will be shown with 4 fields if completed • If more than one is available you may choose • If Patient not shown you may create new patient • If Patient is shown choose their name to bring over all stored data
Page 1 – Patient Demographics • Not all Fields MUST be completed • Service may configure required Fields as desired • Icon beside address will bring over address from referring location • “Sex” field will drive fields in assessment area as to Obstetric field availability. Un-entered will assume male. • “Age” field will control many features in assessments and treatments. Un-entered will assume “Adult”. • Enter DOB will calculate age • Save to continue
Page 1 – Patient Demographics • Once saved additional Fields may appear • Immunizations • Employer • Physician Page 1 – Patient Demographics
Page 1 – Billing Information • This section is for “Responsible Party” Information • May enter multiple guarantors if needed • No limit on this field area • List all Insurance available in this section • No limit to number of entries • Area for Insurance numbers also • Payor list may be pre-populated with most popular insurance companies if desired
Page 1 - PMHx • Red Circle with line indicates NONE • Red X allows you to delete incorrect choice • Scroll Icon allows you to make entry into box • May search by using mouse and choosing letters • May begin typing to bring up choice • May add free form for items not in existing list • Most items already exist in choices • Request to Add checkbox will send request to emsCharts to have non-existing item added to list • This may or may not happen depending upon request • May add unlimited # of entries • “Obtained From” indicates who you received information from directly
Page 1 - Medications • Medications simple list includes only name • Extended Configuration will add fields for Dosage and Method • These are for Medications they are taking at home • Box works as prior boxes by either mouse or typing • May request addition if desired • May add Custom just to this chart if needed
Page 1 – Current Allergies • Allergies listed by Name only • May use mouse or type to narrow choices • May enter by typing a Custom Entry • May Request to Add also
Page 1 – Replace Patient • On bottom of Patient Page • Will return you to Patient Search • To be used if the Patient you choose is not the correct Patient
Page 2 – PT,CC,HPI • May not have top 4 fields, these are optional • Chief Complaint box limited to 50 characters in NEMSIS states • box indicates Spell Checker available. This must be clicked to run. • will take entries from top four fields and write a chief complaint. Does nothing if top four fields are disabled • CMS Condition is set list by Medicare. This is used by Billing. Complaint System
Page 2 – PT,CC,HPI • Free form box • Will hold 4000 characters (about 2 typed pages) • May be used as a “Narrative” type field if so desired. (One of 2 areas recommended if “Narrative” is requested) History of Present Illness
Page 2 – PT,CC,HPI • For Special Situations • Category of Call on Page 1 will determine which buttons may be available Additional Information Buttons
Page 2 – PT,CC,HPI • Important for Work Related Injuries • Important for Falls • May be needed if suspect intentional injury Add’l Injury Details
Page 2 – PT,CC,HPI • Who Witnessed • CPR Information • Defib Information Cardiac Arrest
Page 2 – PT,CC,HPI • All Fields are self-explanatory Drugs/Alcohol Motor Vehicle Incident
Page 2 – PT,CC,HPI Exposure Button Details Scene Description is 4000 character field with spell checker Other EMS may be other trucks of your company or other services on scene Other Agencies will insert optional agency numbers if chosen
Page 2 – PT,CC,HPI Allows you to track all belongings patient may have with them at time of transport 4000 Characters with spell checker Allows you to check any forms you may be given at first facility and need to give to second facility. May not be needed for 911 services.
Page 2 – PT,CC,HPI These are all optional fields and may not appear on you charts Complete only if needed Simply check desired response as in example shown is Dispatch Factor
Pages 2 thru 7 Are for Assessment Only!!! If you perform a task of any type it is an ACTION and belongs on page 8! Actions listed in Comment Boxes will not be sent to your State and MAY NOT be picked up by your Billing Agency! This could result in loss of Revenue for your Company!
Page 3 – Neuro/Airway • Will be completed with Defaults if available • If patient is immobilized when you get there, the fields will appear as needed when field is changed to Yes • Comment field for Neuro assessment,256 characters
Page 3 – Neuro/Airway • GCS will auto calculate for you • GCS will automatically adjust by age of the Patient • If age is not entered it will assume they are an adult
Page 3 – Neuro/Airway Comments Field is 256 characters Defaults will enter any default values set by your Command Facility Cancel Changes will remove any changes just made
Page 4 – Resp. Cardio • Respiratory Assessment • Ventilator Button Optional • Comments: 256 characters
Page 4 – Resp. Cardio • Comment: 256 characters • For Temperature be sure to set C or F first then enter actual temp. or it will calculate change
Page 5 – Secondary Survey • Click on body part • Complete box that will appear • Save • As many as desired Observe optional Buttons Obstetrics only available for Female Patients! You may want to be specific in your findings as NEMSIS does not always break down specific body parts!
Page 5 – Secondary Survey If the Anatomical Exam option is turned off you will have a chart to complete such as the one below. Obstetrics button will only be available for Female Patients
Page 6 – Labs, Fluids May be required for Critical Care transports! This page may be turned off if not needed!
Page 7 – Meds,IVs PTA Attention: These are PTA, meaning PRIOR TO ASSESSMENT! These are NOT what you do but what is already in place! The Add button will add the function completed and add a new line so an additional entry may be added if needed! These are optional fields and entry. This page may be turned off if not required!
Page 8 – Activity Log This is where you will enter EVERYTHING you DID! These are your actions during the call.
Page 8 – Activity Log Things to Remember • Times from page 1 are listed at top of page for your reference • Each item entered MUST have a time entered • Every action entered will have a full 4000 character comment area with spell checker • You may edit any action until chart is locked • Entry will automatically go into correct order if entered out of sequence
Page 8 – Activity Log Vital Signs: • Date will default to date of dispatch • Time must be entered, but : not required between • Complete all fields as needed • Screen may vary by configuration settings • Repeat Vital Sign Button will complete fields with last set of vitals • No Change Button will enter “No change in patient status” in Comments box • Click Add Line Button to complete Vital Sign Entry
Page 8 – Activity Log If Vital not done but another action is completed you will pull down the Add Action list to complete! Time must still be completed!
Page 8 – Activity Log • All actions possible by EMS is included in these options • Each Action will bring up a specific box for that Action • Several options may be available under each Action • Actions are determined by Level of Care listed on Page 1 in Dispatch
Page 8 – Activity Log • Medication Fields • Titrate Fields
Page 8 – Activity Log • Intubation Fields • Airway - Other Fields
Page 8 – Activity Log • Initiate IV Fields • Cardiac Fields