Biochemistry
This biochemistry lesson plan covers the essential topics of energy content in food and protein structure. Designed to facilitate interactive learning, the slide show provides structure while encouraging adaptability to various teaching styles. Key experiments involve calculating energy content from food using bond enthalpies and understanding protein structure through amino acids. Students are invited to take notes on shared electronic resources and highlight important figures to enhance understanding. The plan includes a comprehensive assessment strategy and real-life applications of biochemistry concepts.

Biochemistry
E N D
Presentation Transcript
Biochemistry Mr Field
Using this slide show • The slide show is here to provide structure to the lessons, but not to limit them….go off-piste when you need to! • Slide shows should be shared with students (preferable electronic to save paper) and they should add their own notes as they go along. • A good tip for students to improve understanding of the calculations is to get them to highlight numbers in the question and through the maths in different colours so they can see where numbers are coming from and going to. • The slide show is designed for my teaching style, and contains only the bare minimum of explanation, which I will elaborate on as I present it. Please adapt it to your teaching style, and add any notes that you feel necessary.
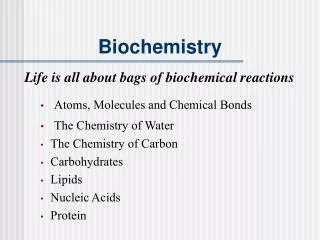
Menu Lessons 1-10: • Lesson 1 – Energy Content of Food • Lesson 2 – Protein Structure • Lesson 3 – Protein Analysis • Lesson 4 – Carbohydrates - Monosaccharides • Lesson 5 – Carbohydrates - Uses • Lesson 6 – Lipid Structure • Lesson 7 – Saturated and Unsaturated Lipids • Lesson 8 – Lipids in the Body • Lesson 9 – Micro- and Macronutrients • Lesson 10 – Nutrient Deficiencies
Menu Lessons 11-20: • Lesson 11 – Hormones • Lesson 12 – HL – Enzymes and How They Work • Lesson 13 – HL – Enzyme Kinetics • Lesson 14 – HL – DNA Structure • Lesson 15 – HL – DNA Uses • Lesson 16 – HL – Respiration • Lesson 17-18 – Internal Assessment • Lesson 19 – Test • Lesson 20 – Test Debrief
Lesson 1 The Energy Content of Foods
Overview • Copy this onto an A4 page. You should add to it as a regular review throughout the unit.
Assessment • This unit will be assessed by: • An internal assessment at the end of the topic (24%) • A test at the end of the topic (76%)…around Lesson 19
Lesson 1: Energy Content of Foods • Objectives: • Reflect on prior knowledge of biochemistry • Experimentally compare the energy value of foods • Calculate the energy content of foods using bond-enthalpies • Explain the difference in the energy content of fats and carbohydrates
Reflecting on Biochemistry • Write down everything you already know about biochemistry: • You have 1 minute
The Energy Content of Foods • In our cells, some of the molecules we derive from food are reacted with oxygen to release useful energy • We will look at the process of respiration in the HL part of the topic. • The energy comes from breaking relatively weak bonds, such as C-H and C-C and making relatively strong bonds such as H-O and C=O. • We can compare the amounts of energy in foods by burning them in the lab.
Comparing Energy Content • Design and conduct an experiment to determine whether peanuts or crisps contain the most energy per gram. • Calculate a value in terms of J/100 g and kcal/100g (1 kcal = 4186 J) • Compare your results to ones found online
Explaining Energy Content • Use bond enthalpies to calculate and determine the energy released on combustion of 100 g of a typical carbohydrate and 100 g of a typical fat. • Sucrose (a carbohydrate): • A fat:
A Ridiculous Question • Use your answer to the previous question to answer this (frankly silly) question: • If you were trapped in this room and it was made completely airtight, would you survive longer if you had only fat to eat or carbohydrate? • How many days of difference would it make to your lifespan? • Assume: • The air starts at 21% O2 • You die once the O2 content drops below 10% • If you are a girl, assume you need 1800 kcal per day • If you are a boy, assume you need 2000 kcal per day
Key Points • The energy content of food can be determined using enthalpy of combustion data • Lipids store more energy than carbohydrates as they are less oxidised (and so ‘more’ combustion happens)
Lesson 2 The Structure of Proteins
Refresh • What would expect to release the most energy upon combustion: 100g of wheat flour or 100g cooking oil? Why?
Lesson 2: The Structure of Proteins • Objectives: • Understand the structure and nature of amino acids • Understand the four degrees of protein structure • Use ‘Jmol’ to view real-life proteins
Amino Acids • General structure of an amino acid: • Amino the -NH2 bit • Acid the -COOH bit • R A ‘residue’ that can be a range of things • Different R means a different amino acid, for example: • Glycine – R is an ‘H’ atom • Alanine – R is a ‘-CH3’ group • Amino acids are given a three letter short hand to save writing their names all the time: • Glycine gly • Alanine ala
Zwitterionic Nature • In the solid form, and when dissolved in water, amino acids exist as zwitterions. • A zwitterion is an ion with both a negative charge: • The amine group is basic so can gain a proton: • If you increase the pH of the solution by adding OH- • The amine group the amine group will return to its initial ‘-NH2’ form generating a negative ion • The acid group is acidic so can lose a proton: • If you decrease the pH by adding H+, the acid group will return to it’s initial ‘-COOH’ form, generating a positive ion
Zwitterionic Properties • Amino acids act as buffers as they can respond to changes in pH • Draw appropriate equations to demonstrate this • Isoelectric point: • This is the pH that is just the right level to protonate the amine and deprotonate the base, to form a zwitterion • This is important in electrophoresis which we will look at next lesson • The isoelectric point is slightly different for each • This, for various reasons you do not need to know, is generally around pH 6
Meet Some Amino Acids • There are 20 amino acids in the proteins of our bodies • Check Table 19 in the Data Booklet • Try to categorise their side-chains into 4 appropriate groups: • Write the names of the amino acids in the group • State the characteristics of the group • Hint: focus on their chemical properties
Amino-Condensation • The –NH2 group joins to the –COOH group via a condensation reaction. • For example, if three amino acids join together you get: • A chain of three amino acids is called a tri-peptide • A chain of many amino acids is called a polypeptide
Your Turn • Draw displayed formulas for the following polypeptides • gly-gly-ala • gln-cis-his • phe-pro-ser-met
Protein Structure: • Proteins are made of carefully folded and arranged strings of amino acids. • Go to the interactive tutorial here: http://cbm.msoe.edu/includes/jmol/SOJmols/protienStructureHome.html • Make notes on 1o, 2o, 3o and 4o structure of proteins • Use diagrams where necessary • Visit: http://proteopedia.org/wiki/index.php/Main_Page • Look at a variety of different proteins and try to get a feel for them • Try to identify the different aspects of their structure • Right click and use the Measurements menu in Jmol to take various measurements of the proteins
Homework: • Research and give an example of proteins in each of the following roles: structural, enzymes, hormones, immunoproteins, transport proteins and as energy source. • Read through the experiments for next lesson
Key Points • Amino acid structure: • Zwitterionic: • Join by condensation reactions • Proteins: • 1o structure: order of amino acids • 2o structure: folding of amino acid chains • 3o structure: 3-D arrangement of amino acid chains • 4o structure: assembly of individual sub-units to form whole protein
Lesson 3 Protein Analysis
Refresh • Individual 2-amino acids have different structures depending on the pH of the solution they are dissolved in. The structure of serine is given in Table 19 of the Data Booklet. • Deduce the structure of serine in • A solution with a pH of 2. • A solution with a pH of 12. • Deduce the structure of serine at the isoelectric point.
Lesson 3: Protein Analysis • Objectives: • Understand the principles of protein electrophoresis • Understand the principles of paper chromatography • Conduct electrophoresis to identify an unknown amino acid • Conduct chromatography to identify an unknown amino acid
Amino Acids • General structure of an amino acid: • Amino the -NH2 bit • Acid the -COOH bit • R A ‘residue’ that can be a range of things • Different R means a different amino acid, for example: • Glycine – R is an ‘H’ atom • Alanine – R is a ‘-CH3’ group • Amino acids are given a three letter short hand to save writing their names all the time: • Glycine gly • Alanine ala
Electrophoresis • A sample of polypeptides (or amino acids) is placed in a well in a polyacrylamide gel • A current is passed through the gel • Molecules migrate towards the positive or negative electrode depending on their charge • Molecules migrate at speeds determined by their attraction to the gel. • Buffers can be used to change the ionisation of the proteins, and thus their rates of movement. • The molecules can be shown up by spraying with ninhydrin • Used to analyse many macromolecules including DNA (fingerprinting)
Chromatography • In chromatography, a sample dissolved in solvent makes its way through a substrate such as: • Paper • Silica • Resin • An alumina coated tube • Different compounds in the sample move through the substrate at different speeds depending on: • Their solubility in the solvent • Their attraction to the substrate • Rf is the distance travelled by a substance divided by the distance travelled by the solvent. • Rf is unique for a given compound/solvent/substrate so can be used to identify unknown compounds
Experimentally • You will be expected to complete an electrophoresis and a chromatography experiment. • Follow the instructions here and here • This will require very careful time management • Start electrophoresis • Do the chromatography • Finish the electrophoresis
Key Points • Electrophoresis use electric fields to separate components of a mixture • Chromatography uses solubility/attraction to a substrate to separate the components
Lesson 4 Carbohydrates - Monosaccharides
Refresh • Explain how a sample of a protein can be analysed by electrophoresis.
Lesson 4: Monosaccharides • Objectives: • Understand the features of monosaccharides • Understand the straight-chain and ring forms of glucose and fructose • Describe the formation of disaccharides and polysaccharides
Carbohydrates • General formula: CnH2nOn • Includes: • Sugars • Starches • Form the bulk of the energy content of most people’s diets
Monosaccharides – ring form • A ‘single sugar’ • Contain a carbonyl group • Yes really • At least two –OH groups • Empirical formula: CH2O Glucose, C6H12O6 Fructose, C6H12O6
Straight-chain form • The rings exist in equilibrium with straight-chain forms: • They only spend about 0.2% of the time in this form • The carbonyl (C=O) is clearly visible • The ring is formed by a condensation reaction in which the –OH lone pair on the fifth carbon (from top) attacks the carbonyl carbon, forming an O-C-O bond and reducing the carbonyl to –OH • Using molecular modelling kits, try this for glucose and see if you can produce alpha and beta glucose.
ChemSketch Part 1 • In ChemSketch, open the Templates Window (F5) • In the left-hand drop down, select ‘Sugars: alfa-D-pyr’ • In the right-hand drop down, explore the various different ways of representing the sugars. • What do you think is the value of looking at the sugars in these different ways?
Condensation Reactions • Disaccharides: • Made from two monosaccharides (in the ring form) joined by a condensation reaction • Lactose: galactose/ α -glucose, 1-4 link • Maltose: α -glucose/ α -glucose, 1-4 link • Sucrose: α -glucose/fructose, 1-4 link • Polysaccharides: • Made from many monosaccharides joined by condensation reactions • Starch – α-glucose • Glycogen – α-glucose • Cellulose – β-glucose Note: Start counting carbons at the C to the right of the ring-O, and work round clockwise.
ChemSketch Part 2 • Use the sugars templates in ChemSketch to help you draw: • Lactose • Maltose • Sucrose • Three unit lengths of: • Starch • Cellulose • Label them (use the Draw menu) and export them as an image file.
Homework • Watch this: Sugar: The Bitter Truth, https://www.youtube.com/watch?v=dBnniua6-oM • Consider changing your dietary habits!
Key Points • Carbohydrates: CnH2nOn • Monosaccharides: • Empirical formula: CH2O • Carbonyl group • At least two -OH groups • Disaccharides: two monosaccharides joined together • Polysaccharides: many monosaccharides joined together
Lesson 5 Carbohydrates - Uses