Download
1 / 54
600 likes | 1.67k Views
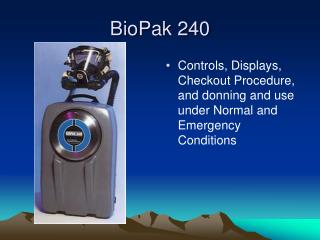
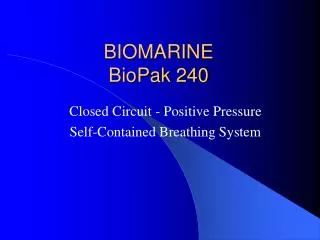
BIOMARINE BioPak 240. Closed Circuit - Positive Pressure Self-Contained Breathing System. This Presentation Developed Using the Biopak 240 Operation and Maintenance Manual . Closed Verse Open Circuit.

E N D
BIOMARINEBioPak 240 Closed Circuit - Positive Pressure Self-Contained Breathing System
This Presentation Developed Using the Biopak 240 Operation and Maintenance Manual
Closed Verse Open Circuit • Open circuit – Compressed air (79% Nitrogen and 21% Oxygen) is regulated into a face piece for breathing. Exhaled gases are vented to the atmosphere. • Closed circuit – Exhaled gases are recycled with 100% Oxygen make up gas added. All CO2 is absorbed with LimePak.
Warnings • All users of the BioPak 240 self-contained breathing apparatus must be trained by qualified instructors in donning, operation, inspection, and emergency use procedures. • All repairs to the BioPak 240 must be performed by Biomarine Inc, or certified Technician
Warnings Cont….. • Medical qualification to wear a respirator is required prior to using the BioPak. • A quantitative fit test with the Scott or Interspiro AGA face mask must be passed prior to use of the BioPak.
Warnings Cont….. • Warning symptoms that require immediate evacuation from contaminated area are: • Nausea, Dizziness, or Illness • Severed pressure gauge line • Difficulty inhaling or exhaling • Over actuation of the demand valve • Leaks of any kind
Compressed Oxygen Hazard • Always handle oxygen cylinder with care to prevent rupture. • Do not permit oil, grease or other combustible material to come in contact with the cylinder or cylinder valve to prevent ignition. • Do not open the cylinder valve in the presence of open flame or sparks to prevent ignition. • Failure to heed this warning may result in personal injury or death due to sudden release of high pressure oxygen and/or fire. • BioPak 240 unit will vent, & may create an enriched O2 atmosphere in close spaces. Do not use in open flame environments.
Oxidizing Agent Hazard • Oxygen is a non-flammable gas: however, it enhances the combustion of other materials. • Oxygen enrichment decreases the energy necessary for ignition of materials.
Introduction • The BioPak 240 is a positive pressure, closed circuit SCBA. • The system removes carbon dioxide through LimePak absorption system. • An 92db audible alarm will sound for 30-90 seconds when there is approximately 1-hour of breathing time left.
Components • The following are the major components of the BioPak 240. All users need to be able to identify and understand the major components prior to use.
O2 Cylinder • Cylinder fill pressure 3,000 psi. • Only Medical grade oxygen. • Hydrostatically tested every 5 years. • Ensure tank is never completely emptied. Maintain at least 200 psi, to prevent ambient air & moisture from entering the cylinder. • Cylinders at 0 psi must have vacuum pulled to eliminate contaminates.
On/Off knob Pressure gauge Manufacture Information
Valve seat Finger prints leave behind oils & can be a hazard! Pin safety system
Oxygen Cylinder Replacement • Make sure the stat-o-seal is clean, and seated properly on the yoke. • Make sure the valve assembly of the oxygen cylinder is clean of any oils, lubricant and dirt, including finger prints. • Insert the valve assembly of the oxygen cylinder through the regulator assembly. • Align the two-pin safety system, and seat the bottle to the yoke and regulator assembly.
Oxygen Cylinder Replacement • Carefully tighten the yoke screw that holds the oxygen cylinder to the regulator. • Tighten the Velcro strap on the O2 cylinder. • Open the valve on the cylinder. If a leak is heard, repeat steps. If the cylinder continues to leak at the regulator, replace the stat-o-seal. • Verify the whistle chirp. If cylinder leaks, tighten yoke screw and/or repeat steps. • If yoke area is not protected unit must be stored with O2 bottles installed.
Pressure Gauge • BioPak 240 is provided with a luminescent chest mounted pressure gauge. • Gauge indicates service life only when O2 cylinder is opened. • Gauge will take up to 1 minute to read full pressure, due to flow restrictor. • If severed gauge line occurs, flow restrictor will limit flow to 0.5 l/pm to allow safe egress.
Pressure Gauge Approximate pressure readings/safe working time: • 3000psig = 4 hours. • 2250psig = 3 hours. • 1500psig = 2 hours. • 750psig = 1 hour.
Yoke Keep Yoke and Regulator area clean!!!!! Check the placement and condition of the STAT-O- SEAL. Pin Safety System.
Regulator Operation • Factory adjusted regulator reduces the pressure from the O2 cylinder to approx. 265-275 psig. • A flow function test is performed during the the turn-around process. • The regulator is designed to fail in the open position. • A failing regulator will be identified by an extremely high flow reading during the flow test. • User’s are not authorized to adjust, modify, or repair any parts of the regulator.
Yoke can always be stored with the rubber valve cap when not in use.
Emergency Bypass Valve • Emergency bypass valve is for emergency use only. • The valve will add additional oxygen over and above the constant flow and demand valve. Valve rate is 80-100 l p/m • Can be manually operated if the user is not receiving enough O2, allowing O2 to flow directly into the breathing chamber. • To operate the bypass valve push button for 2 seconds to add O2 to the breathing chamber.
Emergency Bypass Valve Emergency Bypass valve button • If use of the bypass is necessary the user is to evacuate the zone. • Caution, excessive use of the emergency bypass will significantly decrease the duration of the BioPak. • Use of the bypass will not clear a fogged face-piece.
Alarm Whistle • The BioPak 240 is equipped with a audible 92db alarm whistle. • The alarm will sound for 30-90 seconds, when cylinder pressure drops to 600-750 psig, or 20 - 25% of the unit service life. • Once alarm sounds user has approx. 1 hour of work time remaining.
Alarm Whistle • When the Biopak 240 is turned on, the user should hear a chirp from the alarm to signal that the alarm is working properly. Alarm will also chirp after unit is turned off, with more than 750 psig remaining in O2 cylinder. Alarm whistle
Cooling System • The CO2 absorption process of the BioPak 240 generates heat. This heat is removed by use of the gel tube. Cooling medium is non-toxic “gelled water.” • Good for 4 hours at an ambient temp of 75 degrees F. NOT A CORE BODY COOLING SYSTEM. • Place canister in standard freezer in a horizontal position for at least 8 hours if completely thawed.
Gel tube Cooling System Foam pad Cooling canister Cap w/O-ring
CO2 Absorbent Canister • In the absorbent canister, carbon dioxide (CO2) which is generated by the human body as a by-product of metabolism, is chemically removed from the breathing gas mixture. It is important to remove this out of the recycled breathing gas as it can be toxic over a period of time. The BioPak 240 uses LimePak to absorb CO2 by the following equation: • CO2 + Ca(OH)2 = CaCO3 + H2O • Or: Carbon Dioxide + Calcium Hydroxide = Calcium Carbonate (limestone) + water • Or base + acid = salt
Foam pad Base Cover Limepack
Carbon Dioxide Absorbent Filling • Ensure the absorbent canister has been disinfected and the white disk is completely dried. • Using LimePak fill the canister with absorbent to the fill line and outer ring line (up hill). Foam pad should be seen protruding from each hole in the stainless steel lid. • If movement is felt & heard when canister is lightly shaken, open and top off with more LimePak.
Carbon Dioxide Absorbent Canister Installation • Ensure canister o-ring is in place and properly lubricated using DOW 111. • Press canister into place in the breathing chamber, and replace stainless steel cover. Ensure all cover snaps are engaged properly, and label is properly orientated.
Absorbent Replacement • The absorbent must be replaced: • Each time the unit has been used. • If ambient air is introduced into the system for more than 1-hour. • Units may be stored with filled absorbent canisters for up to 1 year provided the LimePak has not expired.
Units will be stored with the Stainless Steel Lid turned 90°, to identify empty canister
LimePak • Shelf life of five years. • Once opened the LimePak has a shelf-life of one year. The keg must be marked with the date opened. • The spent LimePak is non-hazardous material.
Exhalation side Inhalation side
Interspiro Mask • The mask can be fitted with anti-fog insert lens. • Coat the lens with anti-fog agent, and allow to dry completely. • A slight haze should be seen on the inside lens. • Speaking diaphragm use: • Talk a little louder than normal. • Don’t shout. • Enunciate words. • Speak clearly and slowly. • Do not talk fast.
Pre-use Inspection • Obtain BioPak 240 and frozen gel tube insert. • Make sure unit is tagged for use. • Fill the CO2 absorbent canister, and insert into the breathing chamber. • Ensure O2 cylinder is pressurized to a minimum of 3000 psig. • Check the alarm whistle for proper functioning. • Ensure anti-fog agent has been applied to mask. • Insert the frozen gel tube into the cooling canister.
Donning Procedures • Place BioPak 240 with the harness up. • Lengthen the shoulder straps so that the free ends extend two or three inches. • Don the BioPak 240 like a suit coat.
Donning Procedures • Bend at the waist and pull the shoulder straps tight onto your shoulders. • You may loosen the shoulder straps to let the weight of the unit rest on your hips if desired. • Tighten the waist belt. • Connect the chest strap, do not over tighten because it will constrict breathing. • Don facemask.
Donning Procedures • Perform face mask check by blocking the inhalation port with your hand and inhaling. Mask should collapse on to your face. However, if mask leaks when you inhale with the inhalation port covered, adjust mask for better fit or check the exhalation check valve.
Donning Procedures • Perform second face mask check by covering the exhalation port with your hand and exhaling. The facemask should push from your face by the pressure of your exhalation. If the mask is not pushed away, check the inhalation valve. • Connect the facemask exhalation port (Red) first.
Donning Procedures • Connect the inhalation side (Green) next. After the mask is donned and fully connected, open the oxygen cylinder valve fully counterclockwise and back ¼ turn. • Verify chest-mounted pressure of 3000 PSIG. Note: it is normal for the gauge to take up to a minute and a half to come up to full pressure due to the flow restrictor in the gauge line.
Emergency Operation • The emergency bypass valve is used manually to supply oxygen to the breathing chamber in the event of failure of the demand valve or flow restrictor. Add additional bursts as required to maintain an adequate supply of breathing gas. Remember– Oxygen is your friend. Unnecessary over-use of the Emergency Bypass will shorten your duration.
Emergency Operation • Warning: the bypass valve is intended for emergencies only and WILL NOT clear facemask fogging. WASTEFUL use of the bypass valve seriously reduces the duration of the unit.
Emergency Operation • Emergency actions: • Equipment failure, such as blocked line. • Try bypass, exit area. • Severed pressure gauge. • Exit area. • “Over-actuation” of demand valve inside unit. • Leak in system – exit area. Bad facemask seal adjust facemask fit, and tighten hoses. • User warning symptoms that require immediate attention: • Any feeling of nausea, dizziness or illness. • Rapid pressure drop on chest mounted gauge. • Any difficulty inhaling or exhaling. • Smoke or other contaminants in the facemask.
Doffing the BioPak 240 • Warning: most breathing apparatus malfunctions are directly traceable to careless handling after use. Many years of trouble-free operations are possible if reasonable care is given to the BioPak. • Close the oxygen cylinder valve. • Remove facemask by pushing forward on two lower release buckles and continue pushing forward and upward to lift the facemask over the head. • Unfasten chest and waist straps and lean forward slightly at the waist. • Loosen on shoulder strap, then allow the other shoulder strap to slide from the other shoulder while swinging the BioPak 240 around your front. • Remove unit and set it down.
Turn-Around Maintenance • Clean the mask and hose as normal using disinfectant. • Place the unit on a flat surface and remove the upper housing.
Turn-Around Maintenance • Slide the stainless steel lid snap latches away from the four retainer pins and remove the cover by pressing it up around the edges with your fingers and down with your thumbs on the breathing hose connections. Do not pry up on the lid with any objects. This will result in damage to the o-ring and breathing chamber. • Lift the carbon dioxide absorbent canister from the BioPak 240 by pressing it up around the edges of the plastic rim with your fingers and down with your thumbs on the breathing chamber. Never attempt to open the canister while in the BioPak.
Turn-Around Maintenance • Once removed from the BioPak remove the CO2 stainless steel cover by sliding the snap latch away from the retainer set pin and lifting the cover. • Remove the filter pad, empty the contents of the canister into the trash. • Check the o-rings on the inside and outside perimeter of the breathing chamber for abrasions or cuts. Wipe the o-ring with a clean cloth to be sure they are clean and dry, then apply a thin film of DOW 111 lubricant to them. • Wipe out any particles of carbon dioxide absorbent remaining in the canister well.
Washing and Disinfecting • Prepare a disinfecting solution by adding 1 packet of Portion Pak disinfectant agent per gallon of water. • First clean the facemask, hoses, breathing chamber lid, and coolant canister & gel tube with disinfectant. These parts may be immersed in the disinfectant, and then rinsed several times.