PROCESS CAPABILITY AND STATISTICAL PROCESS CONTROL
OPERATION/PRODUCTION MANAGEMENT. PROCESS CAPABILITY AND STATISTICAL PROCESS CONTROL. Group III. REPORTERS:. Ester D. Gamad: The Basics of Statistical Process Control Control Charts Control Charts for Attributes Cecilia T. Panghulan Control Charts for Variables Control Chart Patterns

PROCESS CAPABILITY AND STATISTICAL PROCESS CONTROL
E N D
Presentation Transcript
OPERATION/PRODUCTION MANAGEMENT PROCESS CAPABILITY AND STATISTICAL PROCESS CONTROL Group III
REPORTERS: Ester D. Gamad: The Basics of Statistical Process Control Control Charts Control Charts for Attributes Cecilia T. Panghulan Control Charts for Variables Control Chart Patterns SPC with Excel and OM Tools Process Capability
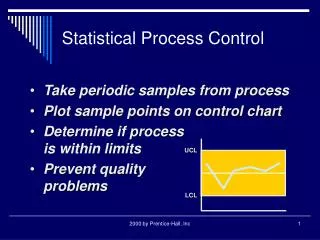
The Basics of Statistical Process Control • Statistical Process Control (SPC) – is a statistical procedure using control charts to see if any part of the production process is not functioning properly and could cause poor quality. • used to inspect & measure the production process to see if it is varying from what is supposed to be doing & if there is unusual or undesirable variability, process is corrected so that the defects will not occur.
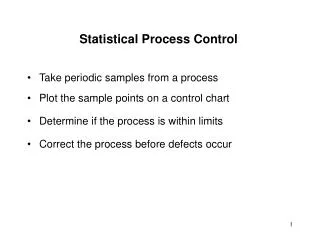
In order that the SPC to be effective, it requires continuous comprehensive training of employees of SPC methods. To Achieved Process Control • Take Samples from the process and plot the sample points on a chart to see if the process with in the statistical limits. • Sample can be single item or group of items. • If sample is outside limits, process maybe out of control, cause is sought so that the problem can be corrected. • If sample is within the control limits process continuous without interference but with continued monitoring.
All Processes Contain Certain Amount of Variability • Two Reasons of Variability • Natural Occurrence : Inherent random variability of the process which depends on the following: • Equipment & machinery • Engineering • Operator • System used for measurements minor factors, impact of the process is negligible Ex.: older machines generally exhibit a higher degree of natural variability than new machines because of worn parts & new machines may incorporate design improvements that lessen the variability in the output 2
2. Unique or Special causes that are identifiable and can be corrected and if left unattended will cause poor quality: • equipment that is out of adjustment • changes in parts or materials • broken machinery or equipment • operator fatigue or poor work methods • errors due to lack of training
Several Quality Control Tools in identifying causes of the Problem: 1. brainstorming - technique in which group of people share thoughts & ideas on the problem in a relaxed atmosphere that encourages unrestrained collective thinking & the goal of which is to generate free flow of ideas on identifying problems, and finding causes , solutions and ways to implement the solutions.
Check Sheets – a format that enable the users to record & organize data in a way that facilitate collection & analysis. It deals with types of defects; location of defects and the time of day each occurred. 3. Histograms – useful in getting a sense of distribution of observed values. These can be observed if the distribution is symmetrical, what the range of values is and if there are any unusual values.
4. Pareto Charts – diagram that arranges categories from highest to the lowest frequency of occurrence. 5. Fishbone diagram – used to organize a search for the cause of a problem. • If problem can not be corrected by employee, management should initiate problem solving activity with in a group which may include other employees, engineers & quality experts.
How Can the Quality of Product or Service be Evaluated? The Quality of Product or Service can be evaluated by using the following: Attribute of a products or service Variable measure of product or service Attribute - a product characteristic such as color, surface texture, cleanliness, or perhaps smell or taste. Known as “Qualitative Classification Method”
Attributes can be evaluated with discrete response such as: 1. good or bad 2. acceptable or not 3. yes or no Example of attribute test to determine the product is defective or not: Operator might test a light bulb by simply turning it on and seeing if it lights.
Variable measure – a product characteristics that is measured on a continuous scale such as length, weight, temperature or time. Example : the amount of liquid detergent in a plastic container can be measured to see if it conforms to the company product specification. Known as “ Qualitative Classification Method”.
Variable Classification is more informative because of its measurements that provides more information about the product. Example: the weight of a product is more informative than simply saying the product is good or bad. Control Charts – historically have been used to monitor the quality of manufacturing processes & quality in services.
Control Charts for service processes tend to use quality characteristics and measurements such a time & customer satisfaction which is determined by surveys, questionnaires or inspections. Following are example of services monitored with control charts. 1. Hospitals: Timeliness & quickness of care; staff responses to requests; accuracy of Lab Tests; cleanliness; courtesy; accuracy of paperwork; speed of admittance & checkouts.
2. Grocery Stores : waiting time to checkout; frequency of out-of-stock items; quality of food items; cleanliness; customer complaints; checkout register errors. Airlines: Flight delays; lost luggage & luggage handling; waiting time at ticket counters & check-in; agent and flight attendant courtesy; accurate flight information; passenger cabin cleanliness & maintenance. Fast food restaurants: waiting time for service; customer complaints; cleanliness; food quality; order accuracy; employee courtesy.
Control Charts • - Graphs that visually show if a sample is with in the statistical control limits . • used at critical points in the process where historically the process has shown to go out of control and at points where if the process goes out of control it is particularly harmful & costly. • Control Charts exist for Attributes & Variables
Commonly used control charts: 1. Attributes 2. Variables p-Charts a. mean (x) c- Charts b. range (R) Control charts differ in how they measure process control but have certain similar characteristics. They have a line through the center of a graph indicating the process average and lines above & below representing the upper & lower limits of the process.
Out of control Upper Control limit Process Average Lower control limit 1 2 3 4 5 6 7 8 9 10 Sample Number PROCESS CONTROL CHART “z” – represent number of standard deviations from the process average according to normal distribution equal to 3.00 which corresponds to a normal probability of 99.74%
Control Charts for Attributes: - discrete values reflecting a simple decision good or bad. p-Chart is used to monitor the proportion of defective items generated in the process. - appropriate when a data consist of two categories of items. Observation that can be classified into: good or bad; pass or fail; operate or don’t operate - the data consist of multiple samples each.
A sample of n items is taken periodically on service process and the proportion of defective items in the sample is determined to see if the proportion falls within the control limits on the chart. Formulas : Upper Limit - UCL = p + zσp Lower Limit – LCL = p – zσp z - the number of standard deviations from the process average. p – the sample proportion defective; estimate zσp - standard deviation of the sample proportion zσp =√ p(1-p) n n – sample size
Example: 20 samples containing 100 pairs of denim jeans (n=100 ) 99.74% or z=3.00. The company has taken 20 samples 1 per day for 20 days. Proportion defective for population is not known.
Prepare a p-chart. P= total defective = 200 = 0.10 total sample observations 20(100) Upper control Limit – UCL =p + z√ p(1-p) n = 0.10 + 3 √ 0.10 (1-0.10) = 0.190 100 Lower Control Limit – LCL = p-z√ p(1-p) n = 0.10- 3 √ 0.10 (1-0.10) = 0.010 100
Day 2 = 0.0 below the lower control limit of 0. 010 means very few defects may suggest something was wrong with the inspection during the week; should be checked out management want to know what caused the quality of the process to improve; perhaps better denim material from the supplier that week or different operator was working. • Day 19 = 0.20 above upper limit of 0. 190 process not in control & cause should be investigated. Causes could be – defective or maladjusted machinery; problem with operator; defective materials or other correctable problems.
There is an upward trend in the number of defectives throughout the 20-day test period. • The process was consistently moving toward an out-of-control situation wherein the pattern in the observations suggests a nonrandom cause which would make the operator alerted to make corrections.
2. c-chart – used to control the number occurrence of defects per unit when it is not possible to compute a proportion defective . Example of occurrences & unit of measure: Scratches, chips, dents or errors per item. Cracks or faults per unit of distance. Breaks or tears per unit of area. Bacteria or pollutants per unit of volume. Calls, complaints, failures, equipment breakdown or crime per unit of time
Formula for Control Limits: Upper Control Limit – UCL = c + zσc Lower Control Limit –LCL = c + zσc c = total number of defects number of samples Example: Ritz house Hotel -240 rooms; Housekeeping Dept. responsible for maintaining the quality of the rooms cleanliness & appearance; 20 rooms per 1 housekeeper; housekeeping supervisor inspected every room each day; management had detailed inspection at random for quality-control purposes; inspection sample 12 rooms which is one room selected at random from each of the twelve 20 room blocks service by a housekeeper.
99% defects or 3.00 of the defects caused by natural ,random variations in the house keeping and room maintenance service & 1% caused by non-random variability by nonrandom variability.
Upper Control Limit – UCL = c + z √c = 12.67 + 3 √ 12.67 = 23.35 Lower Control Limit – LCL = c -z √c = 12.67 -3 √ 12.67 = 1.99
All the sample observations are within the control limits, suggesting that the room quality is in control. This chart would be considered reliable to monitor the room quality in the future.


