Download
1 / 50
500 likes | 535 Views
Learn to create an interactive 3D story using Alice software with step-by-step instructions provided by Prof. Susan Rodger from Duke University in this tutorial. Get hands-on tips on adding characters, moving objects, creating dialogues, and more to bring your story to life. Dive into the world of virtual storytelling today!

E N D
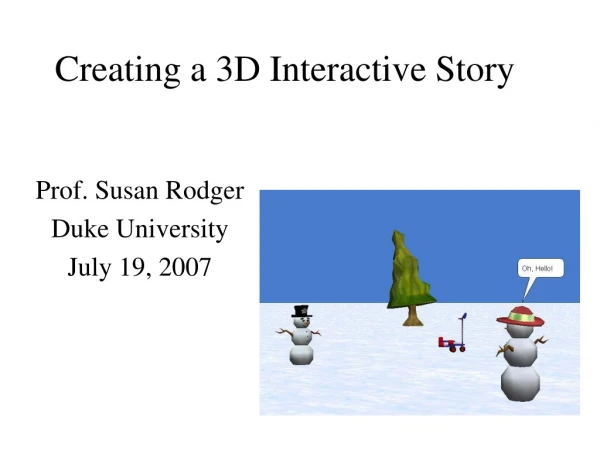
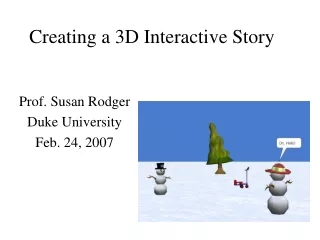
Creating a 3D Interactive Story Prof. Susan Rodger Duke University Feb. 24, 2007
Now Create an Alice World • Start Alice • Select “File”, “New World” • Click on Snow picture • Click on “Open”
Find SnowPeople objects • Click on “add objects” • Scroll over to “people” folder and click on it • Scroll over to Snowman and snowWoman
Add Snowman to World • Click on snowman and you will see: • Click on “Add instance” • Snowman appears in world
Add SnowWoman to world and adjust • Click on SnowWoman and add her to the world • Click on arrow key • Click and hold on snowman to move him left and back • Click and hold on snowWoman and move her to the right • Scene should look like
Save World • Save world • Type in a name such as: snowPeople and then “save” • Alice will remind you to save your work every 15 minutes
Now Ready to program! • Click on done • Should now see myFirstMethod
Write code to move the snowman • This is the object tree, a list of all your objects in the world • Now click on the word “snowman” to highlight it • You should see methods below it (things the snowman can do) such as move, turn, roll, … • Scroll down til you see “turn to face”
Write code to move the snowman (2) • Click left mouse button on “snowman turn to face” AND HOLD IT DOWN, then Drag it over and release the mouse button • Click on “snowWoman” • “the entire snowWoman”
Write code to move the snowman (3) • Code appears • Click on Play
Have the snowman talk • Drag over “Snowman Say” • Select “other” and type a greeting such as “Hello there! • Code is now: • Play again
Now SnowWoman will act • Click on snowWoman to see her methods • Drag over code and drop below other code • Play!
Now write a NEW snowman method • Click on snowman • Should see snowman’s methods • Click on “create new method” and enter name “getAttention” • Empty method is created, ready for you to enter code
Write GetAttention Method • Add the following code to this method • Note you now have two methods: • Click on myFirstMethod to get back to it
Add getAttention method to program – to myFirstMethod • Click on play
Repetition • Sometimes you want to repeat commands • Let’s repeat “getAttention” three times • Click on “loop” and drag and drop at the end of our code, below getAttention • Select “other” and type 3 • Click on left tab of “getAttention and move it inside the loop • Now Play!
Create snowman method - popHat • Click on snowman in objectTree • select “create new method” and name it popHat
Want the “topHat” part of snowman • Click on + by snowman • Click on + by head • click on tophat to highlight it
Now we will move just the tophat • Drag over the “move” command twice to make the tophat move up and then down the same amount
Make an Event • We want the hat to move up and down whenever we press the “H” key • Create a new event and select “when a key is typed” • Click on “any key” and select the “letters” then “H” • Click on “nothing” and select “snowman” “popHat”
Making an Event happen • Play your world • Whenever you want the hat to pop up and down, just press the key “H”
Add more code to myFirstMethod • At the end of your code in myFirstMethod • Add code to have the snowWoman turn toward the snowman, say “I said hello” and turn back • Remember to click on the word snowWoman in the objectTree to get snowWoman methods
Turn SnowWoman’s Head red • In addition to methods, each object also has properties you can drag and change • Select “SnowWoman’s Head in the object tree • Select the Properties tab
Turn SnowWoman’s Head Red (2) • Click on color, hold and drag to right before snowWoman says “I said hello” • Select color “red” and release, results in:
At end, turn head back to “no color” • Here are the two color statements added to the code (note: “no color shows as white”) • Play your world
Write a snowman Flip method • Make sure you select “snowman” in the objectTree • Create the method named “flip” • Have the snowman do the following • Move up 1 meter • Roll left 2 revolutions • Move down 1 meter • Add code at the end of myFirstMethod • Snowman says “Watch what I can do” • SnowWoman turns to look at him • Call the snowman flip method • Play your world
Write a snowWoman flip method • Make sure you select “snowWoman” in the objectTree, then create the method “flip” • Have the snowWoman do the following • Move up 1 meter • Drag up a DoTogether from the bottom
Write a snowWoman flip method (2) • Inside the DoTogether you can put commands that will happen at the same time • Inside this DoTogether have the snowWoman do the following: • Turn forward 1 revolution • Resize by half • Below drop in another DoTogether with: • Turn forward 1 revolution • Resize by 2 (back to the right size) • Add one more command to move snowWoman down 1 meter
Now let’s call the SnowWoman flip method • Add code at the bottom of myFirstWorld • SnowWoman should say “Watch what I can do” • Call the snowWoman flip method • Play your world
Add two new events • Add an event so the snowman flips when M is pressed • Add an event so the snowWoman flips when W is pressed • Play the world, press M and W anytime
Add more objects to the world • First let’s add two more objects • Click on “Add objects”, find the “nature folder” and add any tree to the world • Click on it and push it far back • Find the “vehicles” folder and find the scooter, add it to the world (you may have to look in the Web gallery to find the scooter)
Adjust the scooter • Click on the third control and try turning the scooter around to face this direction • Then click on the first control (the arrow) and push the scooter back between the tree and the snowWoman
Write the SnowWoman method driveAway • First select the snowWoman in the objectTree and create a new method named “driveAway” • Now let’s add code to this method • First have the snowWoman turn to face the backRightFloor (or may be called RightFloor) part of the scooter
Move SnowWoman to the scooter • It will be handy to test this method as we build it, look at the event “When the world starts” • Click on the white arrow and select “snowWoman.driveAway” • Now when the world starts, only this method will play – Click Play and see
Write snowWoman driveAway (2) • We want the snowWoman to move to the scooter.backRightFloor, but we don’t know how far it is • Have the snowWoman move forward 1 meter and Play it • It’s not quite far enough
Write snowWoman driveAway (3) • We can use a snowWoman function to drop in the distance to the scooter.backRightFloor • Click on SnowWoman functions • Drag “distance to” and drop on “1 meter” when it turns green, then select “scooter.backRightFloor”
Write snowWoman driveAway (4) • Play the world • It is hard to tell, but she goes right into the scooter. • We’d like her to stop in front of the scooter. • Click on the last arrow and select “math”, then “minus” then “0.5” • Now she stops 0.5 meters in front of it
Write snowWoman driveAway (5) • Next, have the snowWoman doTogether • move up 0.2 meters • Move forward 0.5 meters • We’d like the scooter to move and have the snowWoman move with it • We can set the vehicle property of the snowWoman to be the scooter
Write snowWoman driveAway (6) • Click on snowWoman’s properties • Drag over “vehicle” and select “scooter”
Write snowWoman driveAway (7) • Almost done, add a few more commands • In a DoTogether • The snowWoman says “Bye” • The scooter moves forward 10 meters • The snowman’s head turns ¼ turn to the left (make sure you select snowman in the objectTree) • One more command after the DoTogether • Snowman’s head turns back ¼ turn to the right
Call snowWoman driveAway • Back in myFirstMethod, add a call at the end of your code to call the method snowWoman.driveAway • Fix the first event so that when the world starts, world.myFirstMethod is called • Play
Write a snowman melt method • Add a snowman method named “melt” • The code should repeat 12 times • Move the snowman down a little (0.1 meters) • Wait 0.5 seconds (drag the “wait” tile up from the bottom) • At the end of myFirstMethod, call melt • Play the world
Almost Done – add title • Click on “add objects” and go to the right end of the local gallery and find 3D text • Click on it and add a short title such as “Life as SnowPeople” • You’ll have to use the control keys to move it up, back, and turn it to face the right way (use first three controls)
Title only in the beginning • Notice the title is an object in the objectTree - Click on it • We would like it to disappear after the snowman says “hello there” • Drag over the “isShowing” property and set it to false
Add “The End” • Add another 3D text that says “The End” and position it over the title • Click on THE END in the objectTree • In properties, click on “true” of “isShowing” and select “false” – The End will disappear
Make “The End” Reappear • Make “The End” visible before the snowman melts
You are now done! • Play your world! • You can download Alice for free at www.alice.org • My web page www.cs.duke.edu/~rodger