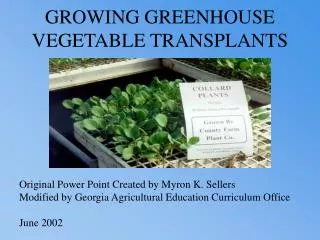
Starting and growing transplants under lights
500 likes | 2.19k Views
Starting and growing transplants under lights Curtis Swift, Ph.D. Colorado State University Extension What it is? Definition – transplanting is the shifting of plants from one place or growing medium to another Goal is to produce vigorous plants ready to be planted in the garden

Starting and growing transplants under lights
E N D
Presentation Transcript
Starting and growing transplants under lights Curtis Swift, Ph.D. Colorado State University Extension
What it is? • Definition – transplanting is the shifting of plants from one place or growing medium to another • Goal is to produce vigorous plants ready to be planted in the garden
Why use transplants • Avoid problems of seed emerging through soil crusts of clay soils • You can more closely control depth of planting • Seeds germinate under ideal conditions • Extends the growing season • Earlier harvest is more attainable by using transplants than by direct seeding in the field
Not All Vegetables Transplant Well • Plants difficult or not to transplant include: • Root crops (carrots, beets) • Leafy biennial herbs (dill) • Heading types of Chinese cabbage • Cucurbits (cucumbers, pumpkins, squash) • Do not like their root systems disturbed • Vegetables growing quickly when seeded in the garden (radish, leaf lettuce, spinach) • Transplanting is not worth the effort
Vegetables Traditionally Transplanted • Small seed vegetables • Tomatoes, peppers, head lettuce, broccoli • Some vegetables are traditionally started from transplants because they do not produce seed or the seed lacks vigor • Sweet potato, Irish potato
Commercially Grown Transplants Advantages • They are easy • Inexpensive if you only need a few plants • They do not require that you commit time and money • Better (ideal?) growing conditions and care
Commercially Grown Transplants Disadvantages • It can be difficult to find “good quality transplants” • You may not be able to find transplants of a specific cultivar • The transplants may introduce diseases, insects, and weeds into your garden
Age affects production • Smaller, stocky plants that have not started to bloom and/or set fruit will adapt to the garden more easily than leggy transplants that already have small fruits hanging on them. • Tomato plants 4-5 weeks old grow and yield better than older transplants. Best Size – 6 “ tall and 6” wide
Producing Your Own Transplants • Advantages • Can ensure disease-free transplants • Transplants available when needed • Best use of expensive seed • Produces transplants you desire • Gives you a good feeling
Producing your own Transplants • Problems • Low light, excessive nitrogen, and high temperature cause excessive stem elongation • Damping off disease
Producing Your Own Transplants • Important factors determining your success • Growing media • Environmental conditions • Light • Temperature • Moisture
Producing Your Own Transplants Growing Media • Want to use a soil-less growing media that does not contain soil from your garden or yard • Why not use garden soil? • Tends to be poorly drained and subject to water logging • Contains insect pests, diseases, and weed seed
Producing Your Own Transplants Growing Media • Characteristics of a good soil-less growing media • Free of pests • Good water-holding capacity • Well aerated and drained • Low in soluble salts
Producing Your Own Transplants Growing Media • Common components of a soil-less growing media • Peat moss • Provides the base for most soil-less media • Decayed remains of sphagnum moss • Vermiculite • Mica-like material that has been heated to a high temperatures • Provides pore space and retains moisture and nutrients • Perlite • An inert light weight volcanic material
Planting • Plant seeds at a depth of 3 times their diameter • Broadcast very small seeds such as broccoli or lettuce and cover with a light sifting of soil
Producing Your Own Transplants Light • Factor most likely to be limiting for good quality transplants • Interrelated with temperature and moisture • Inadequate light often leads to cold temperatures and too much growth • Too little light causes weak spindly plants susceptible to falling over • Vegetable transplants need more light than standard houseplants
Light • Plants grown in the dark are yellow (chlorotic), taller (etiolated), have thinner stems, and in general, are not so healthy • ultra-violet (below 400 nm) • visible (approximately 400-700 nm) • far-red (approximately 700-800 nm).
Producing Your Own Transplants Light • exposure to red light increases seed germination, reduces seedling stem elongation, and promotes lateral shoot growth of many species • an increase in red light and/or a reduction in far-red light in the greenhouse can be used to reduce plant height. • Plastic sheeting that reduces far-red light is available and have been used to produce healthier plants.
Fluorescent Lights • on for 12 to 16 hours per day • no more than 4 inches above the tops of the seedlings • One cool-white plus one warm-white tube • Or • Use Full Spectrum Grow Lights high in red light relative to far-red light, produces short & compact plants.
Fluorescent • High Pressure Sodium • ~$90 • Expensive • Very effective
Incandescent Lights • On for 12 – 16 hours per day • 1 to 3 feet from top of plants • Spot Grow ~$30 • Has proper plant growth enhancing light • Limited space receives light • Regular Incandescent bulb • Due to high level far-red light relative to red light, frequently lead to stem elongation.
Red vs. Far Red Light • Controlling the red to far red light ratio is a means of controlling seedling height without reducing fruit yield or quality • Incandescent lamps, which are low in R:FR ratio, frequently lead to stem elongation while fluorescent sources, which are high in R:FR ratio, produce short and compact plants.
Producing Your Own Transplants Temperature • In windows there can often be large temperature fluctuations between day and night or sunny and cloudy days • Cooler than optimum temperatures may: • Increase disease • Cause rough fruit in tomatoes • Cause bolting in onions • Warmer than optimum temperature may cause weak spindly seedlings
Root Zone Heating • Root zone heating is another method to stimulate quick germination • Use a heating pad
Tomato and PepperAir Temperature • Start seeds at 65 - 75 degrees F.After emergence, lower temperature to 60 - 65 degrees F. • Day temperature can be about 10 degrees warmer than night temperature. • Do not allow to get too hot • 75 - 80 degrees F. is too hot • Too high a temperature will result in leggy plants.
Cabbage, Broccoli, and Cauliflower Air Temperature • Seeds should be started at 55 - 60 degrees F. • After emergence: • Day 65F • Night 55 F
Producing Your Own Transplants Moisture • Avoid cool temperatures and dark conditions • Reduces transpiration and increases excess water problems • Too much water is associated with diseases which require moisture • Examples: root rot and leaf spot fungi
Water • Moisture • Ways to avoid problems with diseases fostered by too much water • Thoroughly water when seed • After emergence water in the morning so leaves will be dry before night and spot water only the dry places • Too little water rapidly kills young seedlings
If reusing trays or flats • wash to remove any soil or plug media that may adhere to the plastic • dip in a 10% solution of chlorine bleach • 9 parts water to 1 part bleach • rinse trays thoroughly before they are reused
Fertilizer • Seedlings will need to be fertilized as soon as they emerge. • Avoid fertilizers with a high concentration of urea. • Over fertilizing can injure seedlings or promote damping-off disease. • Fertilize two to three times per week with the liquid solution.
Fertilizer • Tomatoes are very responsive to fertilizer and excess fertility will reduce transplant quality. • At every watering use a fertilizer concentration of 50 to 100 ppm Nitrogen • Or once every seven days - use a concentration of 250 to 350 ppm Nitrogen
Fertilizer • Peppers require more fertilizer than tomatoes • If feeding at every watering, use approximately 100 PPM Nitrogen • Increase the concentration if feeding less often.
One application per week of 100 to 150 PPM Nitrogen should be sufficient
Vining Crops • Two to four applications of fertilizer at weekly intervals, at a 100 to 150 PPM Nitrogen concentration, should be sufficient to produce good-quality vine crop transplants.
Determining ppm NLiquid Products • You need to know ppm N of the product • May be ppm on the label • May be given as percentage • If percentage • Base ppm on one gallon • One gallon is 3,780 milliliters (ml) • Round off to 3,800 ml
Determining ppm NLiquid Product • i.e. 10% is 100,000 ppm • i.e. 12% is 120,000 ppm • i.e. 15% is 150,000 ppm • Need to dilute to appropriate ppm for final fertilizer solution
Determining ppm Ci x Vi = Cf x Vf i = initial f = final C = ppm V = volume in milliliter 1 gallon = 3,800 ml; 1 quart = 950 ml 1 pint = 475 ml; 1 cup = 240 ml
Determining ppm Ci x Vi = Cf x Vf If using a 12% N product (120,000 ppm) and want a 100 ppm final solution: (120,000 ppm)(Volume in ml) = (100 ppm)(3,800 ml) = ml of product to add to sufficient water to make a gallon of fertilizer with 100 ppm of Nitrogen 1 gallon = 3,800 ml; 1 quart = 950 ml 1 pint = 475 ml; 1 cup = 240 ml
Determining ppmfor 100 ppm solution Ci x Vi = Cf x Vf ml to add to water to make one gallon of a 100 ppm N fertilizer solution 10% 100,000 ppm use 3.8 ml 12% 120,00 ppm use 3.2 ml 15% 150,000 ppm use 2.5 ml 20% 200,000 ppm use 1.9 ml
Determing ppm of dry fertilizer • Add equal amounts of fertilizer to water • Add water first • Add fertilizer to double the amount in the container • The resulting solution is one-half the % on the label of the dry product • i.e. 20% N is not 10% nitrogen • Do computations using Ci x Vi = Cf x Vf
Hardening-off Transplants • Definition: Hardening-off is the process whereby transplants stop growth and develop greater tolerance to the weather so they can survive being planted into the garden • Is critical for both commercially grown transplants and transplants that you grow on your own
Hardening-off Transplants • Hardening-off causes: • A slowing of growth • Greater cuticle thickness and waxes on leaves • Build-up of sugars • Ways to harden-off transplants • Only water the transplants when they start wilting • Stop fertilizing • Expose transplants to cool temperatures and/or higher levels of sunlight
Contacts • http://WesternSlopeGardening.org • Curtis.Swift@colostate.edu