Download

1 / 69
740 likes | 1.22k Views
Unit 3 Fundamental Laboratory Skills. Students will explore essential laboratory safety skills and fundamental skills related to microscopy and measurement. Reasons for Proper Lab Safety.

E N D
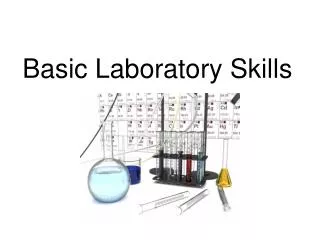
Unit 3 Fundamental Laboratory Skills Students will explore essential laboratory safety skills and fundamental skills related to microscopy and measurement.
Reasons for Proper Lab Safety https://ssl.perfora.net/s218423312.oneandoneshop.com/sess/utn;jsessionid=154c89455964664/shopdata/0105_Posters/product_overview.shopscript In January 2010 there was a lab accident at Texas Tech with a student (Brown). The brief description of the student's accident [Brown] is impressive: 'When Brown thought he was done, he set down the mortar and took off his goggles. Then he decided to give the compound one last stir. The mortar exploded in Brown's hands. Brown "lost three digits on his left hand, severely lacerated his right hand, perforated his left eye, scratched his right eye and had superficial cuts to the parts of his body that were exposed," says an investigation report...' (Chemical and Engineering News, Aug 23, 2010, pp. 34-35.) http://pubs.acs.org/cen/science/88/8834sci1.html
Demonstrate proper donning and removal of Personal Protective Equipment. • A. Proper donning (from CDC website) • 1. The type of PPE used will vary based on the level of precautions required. • 2. Keep hands away from face. Limit surfaces touched. Change gloves when torn or heavily contaminated. Perform hand hygiene. • 3. GOWN: Fully cover torso from neck to knees, arms to end of wrists, and wrap around the back. Fasten in back of neck and waist • 4. MASK OR RESPIRATOR: Secure ties or elastic bands at middle of head and neck. Fit flexible band to nose bridge. Fit snug to face and below chin. Fit-check respirator. • 5. GOGGLES OR FACE SHIELD: Place over face and eyes and adjust to fit. • 6. GLOVES: Extend to cover wrist of isolation gown.
Proper removal of PPE (from CDC website) 1.Except for respirator, remove PPE at doorway or in anteroom. Remove respirator after leaving room and closing door. 2. GLOVES: Outside of gloves is contaminated! Grasp outside of glove with opposite gloved hand; peel off. Hold removed glove in gloved hand. Slide fingers of ungloved hand under remaining glove at wrist. Peel glove off over first glove. Discard gloves in waste container. 3. GOGGLES OR FACE SHIELD: Outside of goggles or face shield is contaminated! To remove, handle by head band or ear pieces. Place in designated receptacle for reprocessing or in waste container. 4. GOWN: Gown front and sleeves are contaminated! Unfasten ties. Pull away from neck and shoulders, touching inside of gown only. Turn gown inside out. Fold or roll into a bundle and discard. 5. MASK OR RESPIRATOR: Front of mask/respirator is contaminated — DO NOT TOUCH! Grasp bottom, then top ties or elastics and remove. Discard in waste container.
Washing hands! Apply a small amount of powder to hands. Wash in your usual method. Evaluate your current method
Demonstrate CDC requirements for hand washing • A. Hand washing is the single most important prevention step for reducing disease transmission • 1. Wet hands with running water; place soap in palms; rub together to make a lather; scrub hands vigorously for 20 seconds; rinse soap off hands. • 2. If possible, turn off the faucet by using a disposable paper towel. • 3. Dry hands with a disposable paper towel. Do not dry hands on clothing.
Washing hands! Apply a small amount of powder to hands. Wash in your new method. Evaluate your new method
B. Hand-Washing Agents • 1. Liquid soap dispensed by a hand or foot pump is recommended. • 2. Alcohol-based hand sanitizers can be used if soap and water cannot be made available and are effective against multiple common disease agents (e.g., shiga toxin-producing E. coli, Salmonella, and Campylobacter). However, they are ineffective against certain organisms (e.g., bacterial spores, Cryptosporidium, and certain viruses). • 3. The U.S. Food and Drug Administration recommends using an alcohol-based hand sanitizer with a concentration of 60% or higher to be effective against common disease agents. • 4. Hand sanitizers are less effective if hands are visibly soiled. Therefore, visible contamination and dirt should be removed to the extent possible before using hand sanitizers.
Identify biohazards and perform biohazard safety procedures • A. Biohazard: (from American Heritage Dictionary) A biological agent, such as an infectious microorganism, or a condition that constitutes a threat to humans, especially in biological research or experimentation. The potential danger, risk, or harm from exposure to such an agent of condition. • 1. Examples include airborne diseases such as Ebola, resin gas, etc; blood pathogens, body fluid transmittable diseases like HIV, hepatitis, etc. and any material these body fluids could be found on. • 2. Known as blood-borne pathogens (BBPs) and other potentially infectious materials (OPIM).
Identify biohazards and perform biohazard safety procedures • B. Biohazard safety procedures (from www.clinimmune.com/documents/BiohazardTrainingEMS3-07.ppt) • 1. The Universal Precaution Rule: Treat all human blood, bodily fluids and other potentially infectious materials as if they are infectious. • 2. Exposure Controls consist of those policies and practices that prevent occupational exposures to infectious materials, including: • a. Administrative Controls • Exposure control plan (ECP) • Individual Laboratory Risk assessments • Universal (Standard) Precautions • Personal Protective Equipment (PPE) • Engineering Controls (HVAC, bio-safety cabinets, self-sheathing needles, safer medical devices, and needleless systems)
3. Sharps Precautions • You must exercise care when using needles, scalpels, glass pipettes and other sharp instruments or devices. Follow these rules of thumb when handling sharps: • Do not recap, bend, break, or otherwise manipulate used needles by hand. • Do not remove used needles from disposable syringes. • Place used sharps in labeled or color-coded puncture-resistant, leak-proof, closable, sharps containers for disposal. • Do not overfill sharps containers. • Consider the use of alternative, non-sharps equipment whenever possible.
4. Personal Protective Equipment (PPE) • Whenever you may be exposed to infectious materials you must wear the appropriate personal protective equipment. PPE places a barrier between you and potentially infectious material. • Here are some basic rules to follow: • PPE should be readily accessible • Always wear PPE in exposure situations-Wear a lab coat, gloves and eye protection whenever splashing is imminent • Remove and replace PPE that is torn or punctured, or that loses its ability to function as a barrier to potentially infectious materials • Remove PPE before leaving the work area • Dispose of contaminated PPE properly-in biohazard containers
5. Hand Hygiene • a. Most common mode of transmission of pathogens is via hands! • b. Often infections acquired in healthcare and research settings are due to not washing your hands. • c. Employees must wash their hands with soap and water: • immediately, or as soon as feasible, after removal of gloves or other PPE. • whenever they leave the work area, go on break, or before eating. • following contact with blood or other potentially infectious materials.
6. Engineering controls • a. Containment is the concept of managing materials to reduce or eliminate potential exposures to personnel, the general public and the outside environment.
Locate and identify chemicals using MSDS sheets. • What are MSDS sheets • The MSDS is a detailed informational document prepared by the manufacturer or importer of a hazardous chemical. It describes the physical and chemical properties of the product. MSDS’s contain useful information such as flash point, toxicity, procedures for spills and leaks, and storage guidelines.
MSDS • Information included in a Material Safety Data Sheet aids in the selection of safe products, helps you understand the potential health and physical hazards of a chemical and describes how to respond effectively to exposure situations. Although there is an effort currently underway to standardizes MSDS’s the quality of individual MSDS’s vary. A MSDS may be useful but it can not substitute for prudent practices and comprehensive risk management.
MSDS • They must be written in English and contain: • The name of the chemical (same as on the label) • The chemical and common names of the substance • A lsiting of the ingredients • A statement of the ingredients tha tare known carninogens or that present other known hazards • Any specific hazards
MSDS • The information of greatest concern to workers is featured at the beginning of the data sheet, including information on chemical composition and first aid measures. More technical information that addresses topics such as the physical and chemical properties of the material and toxicological data appears later in the document.
MSDS Sheet Activity Using two MSDS sheets, complete two worksheets filling in information found on the MSDS
MSDS • Sections & Terms used on MSDS sheets • Section 1. Chemical product and company identification • Links the MSDS to the material. Identifies the supplier of the MSDS. Identifies a source for more information. You must include the manufacturer’s name. • Section 2. Composition/information on ingredients • Lists the OSHA hazardous components May also list significant nonhazardous components. May also include additional information about components (e.g., exposure guidelines) • You can patent your product to protect the contents, but you must disclose all hazardous constituents.
MSDS • Section 3. Hazards identification, including emergency overview • Provides information on the potential adverse human health effects and symptoms that might result from reasonably foreseeable use and misuse of the material. May provide emergency overview. • Typically, this section is brief, one or two paragraphs. • Section 4. First aid measures • Provides instructions to be taken if accidental exposure requires immediate treatment. May also include instructions to medical professionals. This should include specific instructions to medical professionals; not general platitudes, like “seek medical help” or “apply CPR”
MSDS • Section 5. Fire fighting measures • Provides basic fire fighting guidance, including appropriate extinguishing media. Describes other fire and explosive properties useful for avoiding and fighting fires involving the material, such as flash point or explosive limits. • Section 6. Accidental release measures • Describes actions to be taken to minimize the adverse effects of an accidental spell, leak or release of the material. • Section 7. Handling and storage • Provides information on appropriate practices for safe handling and storage.
MSDS • Section 8. Exposure controls/personal protection • Provides information on practices, or equipment, or both, that are useful in minimizing worker exposure. May also include exposure guidelines. Provides guidance on personal protective equipment. • Section 9. Physical and chemical properties • Provides additional data that can be used to help characterize the material and design safe work practices. • Section 10. Stability and reactivity • Describes the conditions to be avoided or other materials that may cause a reaction that would change the intrinsic stability of the material. • Section 11. Toxicological information • May be used to provide background toxicological information on the material, its compounds, or both.
Section 12. Ecological information • May be used to provide information on the effects the material may have on plants or animals and on the material's environmental fate. • Section 13. Disposal considerations • May provide information that is useful in determining appropriate disposal measures. • Section 14. Transport information • May provide basic shipping classification information. [Comment: If any specific transportation label is required state it here. For bulk chemicals include the UN number. Otherwise just say "May be shipped normally as a nonhazardous matererial"
MSDS • Section 15. Regulatory information • May be used to proved any additional information on regulations affecting the material. • Section 16. Other information • May be used to provide any additional information. [Comment: If you must include useless denials of responsibility, keep them confined to this section] • Safety of a common household products: try this search engine, Scorecard
Demonstrate proper handling and disposal of chemicals • http://www.chem.uky.edu/resources/stockroom/watse.html • A. The purpose of this section is to assist you in proper handling and disposal of hazardous chemical waste. If at any time you are unsure how to deal with wastes, immediately consult your teacher. • B. 5 Most Common (Deadly and EPA-Fineable) Errors In Waste Handling • Even experienced laboratory workers have a tendency to become lax or complacent in the laboratory when they are "just cleaning up". Most serious laboratory accidents occur during cleanup, when one's attention is more focused elsewhere.
5 Most Common (Deadly and EPA-Fineable) Errors In Waste Handling • 1. Improper Labeling of Waste • Failing to label a waste bottle. If the contents of the bottle are not listed, the next person to use the bottle could accidentally combine incompatible chemicals, causing a fire and explosion • Storing waste in a bottle lacking the words "Hazardous Waste". Only these exact words must be used. "Organic Waste", "Xylene Waste" etc. are unacceptable. If something isn't really waste, don't put the word "waste" on the bottle. Label it "used" etc. • Scratching out the former contents of the bottle and writing "Waste" on the bottle. You must remove or totally deface the old label so there is no confusion over the contents. "Waste" is an unacceptable term to the EPA or OSHA -- the words "Hazardous Waste" must appear on the bottle.
5 Most Common (Deadly and EPA-Fineable) Errors In Waste Handling • 2. Improper Segregation of Waste • Storing acids and bases in the same cabinet. Leaking containers or a spill could cause a violent reaction which would release large quantities of toxic gases. • Storing acids and organic waste in the same cabinet. In the event of accidental mixing, a catastrophic fire or explosion could result. • Mixing incompatible chemicals in a waste container. For example, nitric acid and ethanol can form an explosive mixture.
5 Most Common (Deadly and EPA-Fineable) Errors In Waste Handling • 3. Improper Storage of Waste • Storage of waste in a fume hood where reactions are being carried out. If your reaction gets out of control, the waste bottle could explode and lead to a catastrophic fire or mixing of incompatible chemicals. Always remove waste bottles from hoods where reactions are being performed. • Using metal cans for waste. Even near neutral pH, solids and liquids can easily corrode through metal cans in a surprisingly short period of time. Use only glass or polyethylene containers for waste. • Storing flammable waste containers on a bench or floor. Store your waste containers in a cabinet, preferably an explosion-resistant solvent cabinet. • Storing waste bottles in or near a sink or floor drain. This could allow toxic chemicals to enter the sewer, contrary to EPA regulations.
5 Most Common (Deadly and EPA-Fineable) Errors In Waste Handling • 4. Failure to Cap Waste Bottles • Leaving the cap off an organic waste bottle. The only time a cap should be off a waste bottle is when you are actually putting waste into it. If you are afraid of a pressure buildup in the bottle, simply cap it loosely. • Leaving a funnel in the waste bottle. When you are done with it, cap it!
5 Most Common (Deadly and EPA-Fineable) Errors In Waste Handling • 5. Accumulation of Excessive Waste • Ideally, you should have no more than ONE bottle of each kind of waste in your laboratory. If the organic waste bottle is full, notify your teacher for proper disposal.
Demonstrate proper handling and disposal of chemicals C. How To Segregate Waste In The Laboratory 1. The guidelines for temporary storage of chemical wastes in the laboratory are really no different than those that you use for the storage of your usual lab chemicals. The most important rule is to make sure that any chemicals or wastes that stored together are compatible with each other! Proper segregation of wastes involves making sure that wastes within a bottle are compatible, but it also means that you should NEVER store the following types of wastes near each other:
Demonstrate proper handling and disposal of chemicals • Acids and bases. • Organics and acids. • Cyanide, sulfide or arsenic compounds and acids. • Alkali or alkali earth metals, alkyllithiums etc. and aqueous waste. • Powdered or reactive metals and combustible materials. • Mercury or silver and ammonium containing compounds
Demonstrate proper handling and disposal of chemicals • Self-Auditing Checklist For Hazardous Waste Generators • ALL hazardous waste containers must comply with ALL of the following requirements at ALL TIMES. If any item on this list is not checked, you are in violation of State and Federal EPA regulations.
Demonstrate proper handling and disposal of chemicals - checklist • Is the container sound? (No cracks, rust or deterioration permitted). • Is the container compatible with the waste? (No metal cans, in particular). • Are the contents of the container compatible with each other? • Is the container properly labeled, including the words Hazardous Waste and a date? • Are the contents of the container clearly listed? • Is container closed with a properly fitting cap? (Not left with a funnel inserted.) • Is the waste container located in the lab (not in a hallway or storeroom)? • Is there less than 55 gallons of waste in the laboratory? • Is the waste located away from floor drains or sinks? • If the container is full, it is being taken to the teacher for disposal.
Maintain safety and quality control logs in the laboratory 03.06 A. Documents vs. Records 1. A document is: WRITTEN policies, process descriptions, procedures, and blank forms; used to communicate information 2. A record is: Information captured on worksheets, forms, and charts B. The purpose and functions of a laboratory determines the type(s) of records kept. C. Proper documentation is needed for safety & quality control in a laboratory D. Record-keeping allows a lab to minimize error and monitor the lab system .
Maintain safety and quality control logs in the laboratory 03.06 • E. Examples of records which could be kept at a laboratory • 1. Specimen transfer logs • 2. Lab / Test register • 3. Temperature logs • 4. Equipment maintenance logs • 5. Inventory records
Maintain safety and quality control logs in the laboratory 03.06 • F. Good record keeping requires: • 1. Understand the information to be collected • 2. Record the information every time • 3. Record all the information • 4. Record the information in the same way every time
Maintain safety and quality control logs in the laboratory 03.06 • G. Records Should be Permanent, Secure, Traceable • 1. Permanent: Keep books bound, number pages, use permanent ink, control storage • 2. Secure: Maintain confidentiality, limit access, protect from environmental hazards 3.Traceable: Sign and date every record
Maintain safety and quality control logs in the laboratory 03.06 • H. Examples of records • 1. Lab records may be kept on laboratory notebooks. Notebooks can be purchased special for the lab or a regular spiral bound notebook may be used. • I. In the Medical Forensics Lab: • 1. You will be required to keep your own laboratory record in your own laboratory notebook. This notebook needs to be 70 pages and bound. The records kept in the notebook for each unit will vary. At the beginning of the laboratory exercise, the instructor will demonstrate how to set up your notebook for that particular exercise.
DEMONSTRATE PROPER USE, CLEANING, AND STORAGE OF A COMPOUND MICROSCOPE AND STEROSCOPE. • A. Types of microscopes • 1. Compound microscope. • A. The eyepiece system may be monocular, binocular, or trinocular. • B.Monocular observation uses one eyepiece, binocular observation uses two. Trinocular microscopes contain an additional upright ocular which is utilized when the microscope is used with a photo or video system. • C. Compound microscopes are used to observe small animals in water, sections of plants, and/or animal and plant cells, hair & fibers
DEMONSTRATE PROPER USE, CLEANING, AND STORAGE OF A COMPOUND MICROSCOPE AND STEROSCOPE. • 2. Stereo microscope. • a. Stereoscopic (3D) vision is possible by the combined action of two eyes. • b. This requires an independent optical system for each eye (similar to how binoculars work). • c. A stereo microscope has two tubes with independent optical systems with two eyepieces and two objectives. • d. A stereo microscope is a combination of two compound monocular microscopes whose optical axes are at a right angle to each other and directed to the same specimen area.
DEMONSTRATE PROPER USE, CLEANING, AND STORAGE OF A COMPOUND MICROSCOPE AND STEROSCOPE. • B. Parts of a microscope • 1. Eyepiece (Ocular)—contains lenses to increase magnification. It may be replaced with lower or higher magnification. • 2. Body Tube—holds lenses of ocular and objectives at the proper working distance from each other. • 3. Nosepiece—permits interchange of objectives. • 4. Objectives—Contains lenses of different magnifications: usually low, medium and high power objective magnifiers. • 5. Stage—supports slide over opening that admits light from mirror or lamp.
DEMONSTRATE PROPER USE, CLEANING, AND STORAGE OF A COMPOUND MICROSCOPE AND STEROSCOPE. • 6.Stage Clips—holds slide firmly in place. • 7. Course Adjustment—moves body tube or stage up and down. • 8. Fine Adjustment—permits exact focusing by moving stage or body tube up or down very slightly. • 9. Diaphragm—regulates the amount of light passing through the specimen. • 10.Light Source—directs light upward through the diaphragm and hole in stage. • 11. Arm—supports the body tube and course adjustment. • 12. Base—firm support that bears the weight of the microscope.
DEMONSTRATE PROPER USE, CLEANING, AND STORAGE OF A COMPOUND MICROSCOPE AND STEROSCOPE. • How to use a microscope • 1. Carry the microscope with one hand on the arm and one hand on the base. Carry it close to the body. • 2. Remove the cover and plug in the microscope. If the cord is too long, place the excess cord on the table (do not let the cord dangle over the edge of the table). • 3. Always start with the lowest power. Place the slide on the microscope stage with the specimen directly over the center of the glass circle on the stage (directly over the light).
DEMONSTRATE PROPER USE, CLEANING, AND STORAGE OF A COMPOUND MICROSCOPE AND STEROSCOPE. • a. Trouble shooting. • (1). If you wear glasses take them off. • (2). If you see only your eyelashes, move closer. • (3). If using a monocular microscope, cover or close your other eye. • (4). If you see a dark line that goes part way across the field of view, turn the eyepiece. The dark line is a pointer that is a very valuable tool when you want to point out something to your lab partner or your teacher.
DEMONSTRATE PROPER USE, CLEANING, AND STORAGE OF A COMPOUND MICROSCOPE AND STEROSCOPE. 4. On the low power, lower the objective lens using the course (large) adjustment until it is at the lowest point. Then slowly raise the lens using the course (large) adjustment until you see the specimen within the field of view. Then use the fine (small) adjustment to see the specimen clearly. 5. At this point adjust the diaphragm while still looking through the eyepiece. This will allow more or less light. More detail will be seen when less light is allowed in through the diaphragm. Too much light will give the specimen a washed-out appearance.
DEMONSTRATE PROPER USE, CLEANING, AND STORAGE OF A COMPOUND MICROSCOPE AND STEROSCOPE. 6. Once the specimen is clear on low power, center the specimen in the field of view, then, without changing the focus knobs, switch to the next higher power. 7. Once on this higher power only the fine adjustment can be used. Use of the course adjustment at this point may scratch or crack the slide. 8. The highest power is an oil immersion lens. If this lens is used without oil, it may ruin the lens.
DEMONSTRATE PROPER USE, CLEANING, AND STORAGE OF A COMPOUND MICROSCOPE AND STEROSCOPE. • How to clean and store a microscope • 1. Only use lens paper to clean the lenses. A paper towel may be used to clean the stage. • 2. Lower the stage completely. • 3. Return the lens to the lowest power. • 4. Wrap cords loosely around the microscope and replace the cover. • 5. Return the microscope to the storage area carrying the microscope with one hand on the arm and one hand on the base and close to the body.