Download
1 / 67
680 likes | 905 Views
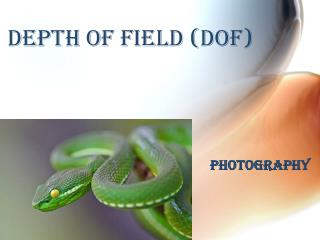
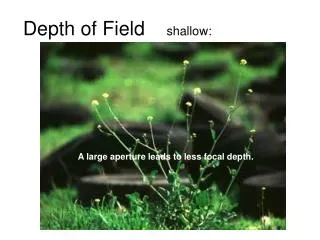
Short Depth of Field. Depth of Field or DOF for short is a description of how much of your photograph is in focus. A shallow depth of field simply means that one specific area of your photo is tack sharp while other elements remain blurred.

E N D
Short Depth of Field Depth of Field or DOF for short is a description of how much of your photograph is in focus. A shallow depth of field simply means that one specific area of your photo is tack sharp while other elements remain blurred.
One technique that many photographers use to add a ‘wow factor’ to their images is to shoot with a shallow depth of field. In doing so they isolate part of the shot which is nicely in focus while throwing elements in the background (and sometimes the foreground) out of focus and into a lovely blur. Here are a few shots that use the technique of shallow depth of field.
One of the greatest uses of DOF is to single out your subject while at the same time reducing the effect of distracting background clutter. This can be used in almost any style of photography, portraits, sports, photojournalism, close-up and macro all use shallow DOF extensively. Personally I like the effect so much that I rarely ever take a photo that doesn't utilize some form of this technique. The basic rule is that if you want something to pop out, use shallow DOF.
The depth of field does not abruptly change from sharp to unsharp, but instead occurs as a gradual transition. In fact, everything immediately in front of or in back of the focusing distance begins to lose sharpness — even if this is not perceived by our eyes or by the resolution of the camera.
Positioning of SubjectOne of the easiest things you can do is position the subject you’re wanting to photograph as far away from any objects behind them as possible. If they are standing right in front of a wall you’ll probably end up with it in focus no matter what else you do – but if they’re standing 50 feet in front of that same wall it’s going to be a lot more blurry.
Long Depth of Field • LONG Depth of Field, by contrast, refers to a wide field of view that is in focus. With long depth of field, objects are in focus both the foreground and mid-ground, or in the mid-ground as well as background, or even from the foreground all the way through to the background...all are in focus!
Leading Lines • using a part of the image to move your eye towards the final subject • Leading lines can be found virtually anywhere, from the shoreline of a river to the stone walls of a castle. The secret is to position yourself to maximize their impact. Rather than try and describe ways of using leading lines, the best way to understand the concept is from looking at images incorporating leading lines.
Balance • cropping (sometimes some post production processing will achieve a lot) • altering your shooting view point (shooting from higher up or lower down • zooming (more tightly cropped or wider angles) • moving an element of your picture (sometimes scenes can be rearranged)
images can be improved greatly by having a secondary point of interest counter balancing the main focal point of an image and providing those ‘empty’ spots with a little weight
Rule of Thirds • The rule of thirds is a “rule of thumb" or guideline which applies to the process of composing visual images such as paintings, photographs and designs. The guideline proposes that an image should be imagined as divided into nine equal parts by two equally-spaced horizontal lines and two equally-spaced vertical lines, and that important compositional elements should be placed along these lines or their intersections. Proponents of the technique claim that aligning a subject with these points creates more tension, energy and interest in the composition than simply centering the subject would
Stop Action • To capture a crystal-clear photograph of something traveling toward you at high speed — a race car, a speeding train, a pack of bicyclists, or what have you — your focus has to be spot-on. You have to anticipate where the subject will be when the shutter opens, which means you’ll have to press the shutter a fraction of a second before the subject reaches the point at which you want to photograph it.
Contrast • Contrast in photography is the difference between dark and light. But it doesn’t end there It also refers to contrasts created with colour, tones and texture. We “see” these only because of light.
Panning • creative ways to show movement is to use a technique called panning • Panning Tip #1: Aim small, miss small. It means that the smaller a point you train your focus on, the less movement you will be tolerant to. You can apply this to panning photography and significantly improve the percentage of keeper shots you take. Instead of aiming big and just trying to keep the bicyclist in the middle of the frame, aim small and try to keep the cyclist’s eye on one of your focus points.
Shoot when the subject is directly in front of you. If you shoot while the subject is angled toward or away from you, the perspective will change slightly during the exposure, which will produce a less sharp subject. • Twist with your hips. If you simply turn your head and arms rather than spinning at the trunk, you will be less steady and the photo will be less sharp.
When photographing a moving subject, the panning technique is achieved by keeping the subject in the same position of the frame for the duration of the exposure. The length of the exposure must be long enough to allow the background to blur due to the movement of the camera as the photographer follows the subject in the viewfinder.