Download
1 / 62
640 likes | 845 Views
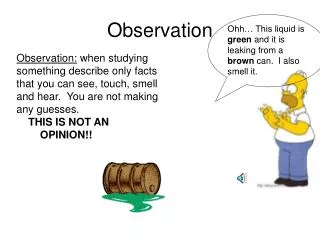
Perhaps the birds passed the flu to human. Scientists tried to find out if the patients and the birds got the same virus. Why did many people get flu after contact with birds?. Making hypothesis. Carrying out experiment. Observation. Bird flu was passed from birds to humans.

E N D
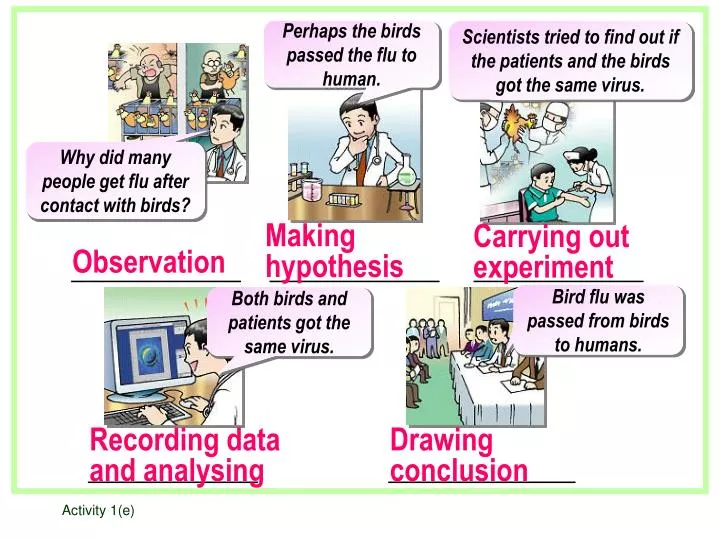
Perhaps the birds passed the flu to human. Scientists tried to find out if the patients and the birds got the same virus. Why did many people get flu after contact with birds? Making hypothesis Carrying out experiment Observation Bird flu was passed from birds to humans. Both birds and patients got the same virus. Recording data and analysing Drawing conclusion
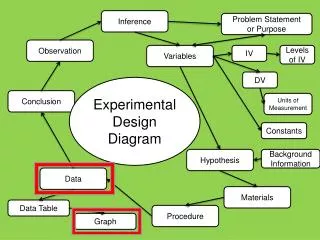
QUICK PRACTICE 1.2 The following are steps in a scientific investigation. Arrange them in the correct order. • Carry out experiments • Record and analyse • Make observations • Make a hypothesis • (e) Draw a conclusion (c) (d) (a) (b) (e)
Activity1 (f) 1. How many laboratories are there in your school? 2. What are their names? (You can check them out attheir entrances.) 3. Whereis your sciencelaboratory(located on whichfloor)? Laboratory There are four. They are Physics Lab., Biology Lab., Chemistry Lab. and Integrated Science Lab. It is on the 4th floor.
4. Write down three main differencesbetween a sciencelaboratory and anormal classroom. Science laboratory: Normal classroom: smaller bigger no laboratory equipment with laboratory equipment e.g. gas tap, sink with benches no benches
Activity1 (h) Apparatus Function dropper to a small amount of liquid reagent bottle to store conical flask, beaker to hold Functions of apparatus Look at the photos in Fig.1.9 carefully. Try to guess the functions of the following apparatus. transfer solutions/liquids solutions/liquids
Apparatus Function spatula to transfer a small amount of glass rod to liquids Bunsen burner to things heat-proof mat to protect the safety spectacles to protect your tongs to pick up and hold objects powder stir heat bench eyes hot
Apparatus Function measuring cylinder to measure the of liquids gas jar to hold test tube to hold a small amount of test tube holder to hold a during heating test tube rack to hold volume gases liquid test tube test tubes
G E C H A B F I D Put a red circle around each potential danger. Discuss why it is dangerous and suggest necessary precautions in each case.
A-I should not enter the laboratory unless the teacher is present. A should tie up her long hair and turn off the gas tap. B should not use a thermometer to stir the liquid. C should not touch the switch with a wet hand.
D should not hold the test tube with a bare hand when heating. She should clean up the bench and keep paper away from the Bunsen burner. E should not smell the chemical directly. He should fan the gas gently to his nose. F should not throw solid waste into the sink.
G should not point the mouth of a test tube with hot liquid towards another student. H should not pour solutions into the beaker from a high position, and he should wear safety goggles. I should clean up the bench and report the breakage to the teacher immediately. Also, she should not touch the wire gauze when it is hot.
QUICK PRACTICE 1.3 Name Apparatus Function to support wire gauze to protect the bench to hold liquids to store solutions to transfer a small amount of liquid to protect the beaker in heating to stir liquids reagent bottle beaker glass rod tripod heat-proof mat dropper wire gauze A B C D E F G A B C F E D G
XPERIMENT 1.1 Materials and apparatus Bunsen burner1matches 1 box heat-proof mat 1safety spectacles1 test tube 1 test tube holder 1 Using a Bunsen burner
(a) Observe the flame of the Bunsen burner. What is the colour and shape of theflame? yellow The flame is in colour and (regular / irregular) in shape. irregular The Bunsen flame you now observe iscalled the yellow flame (luminous flameor quiet flame).
yellow the air hole is closed Draw the flame in the diagram on the right and colour it with a coloured pencil.
(b)Open the air hole slowly. The colour of the flame changes from to . The shape of the flame becomes . The Bunsen burner becomes (quieter / noisier). yellow blue regular noisier
blue the air hole is open
XPERIMENT 1.2 Materials and apparatus tongs 1 Bunsen burner 1 glass tube 1 heat-proof mat 1 splint 1 wire gauze 1 pin 1 matches 1 box Demonstration Investigating the Bunsen flame
(b) Turn on the gas tap and light the Bunsen burner. What happens to the match? This shows that the inner cone of theBunsen flame is(very hot / not very hot). inner cone match pin chimney It does not light up. not very hot
splint tongs 0.5 cm chimney • (a) Light the Bunsen burner. Open the air hole to produce a blue flame. • Hold a splint with a pair of tongs. Put it into the Bunsen flame about 0.5 cm above the chimney fortwo seconds. (If the splint burns, you can try again and shorten the time to one second.)
What does this tell us about the hotness of the inner cone? • (c) Remove the splint from the Bunsen flame and observe it carefully. Draw what you see. The temperature of the inner cone is not very high.
wire gauze C A B At which position does the wire gauze glow first? (b) Now we want to find out which part of the Bunsen flame is the hottest. Put the wire gauze at different positions. It is B.
(c) Mark the hottest part of the Bunsen flame on the diagram with an ‘X’. X
4. (a) Hold a glass tube with a pair of tongs. Put one end of the tube into the inner cone of the Bunsen flame. (b) Light the other end with a burning splint. Does it burn? Yes, it does This shows that the inner cone contains (burnt / unburnt) gas. unburnt
XPERIMENT 1.3 Materials and apparatus test tubes 2 dropper 1 test tube rack 1 coloured liquid Using a dropper to transfer solution
What will happen if you squeeze the rubber bulb too much? The coloured liquid will be sucked into the rubber bulb . X What will happen if you hold the dropper upside down? Should we use the dropper like this? Why? rubber bulb The liquid will go into the and it may be contaminated by left behind in the bulb. other chemicals
XPERIMENT 1.4 Materials and apparatus test tubes 9 beaker (100cm3)1 test tube rack 1 different solutions dropper 1 Mixing solution
Solution Colour Solution Colour A E B F C G D H • Your teacher will give you eight bottles of solutions labelled A to H. Note the colour of each solution. Write down your observations in the table below. colourless clear yellow colourless colourless clear blue colourless clear green colourless
Caution If you spill any solution on your hands, wash them immediately in running water. Observe carefully what happens. Write down your observations. The colour of the mixed solution is . (c) Mix well by shaking the tube. yellow
Solutions mixed Colour of the solution Is it clear or cloudy? Any solids formed? Any bubbles formed? A+B yellow clear yes no B+C brown cloudy yes no white / light blue A+C clear yes no yes C+D blue cloudy no orange E+G clear no no yes A+H white clear no yes cloudy C+F blue no
Caution Wash your hands after the experiment. • You can also mix the solutions by pouring them directly out of the bottles into the test tubes. • Compared with this, what are the advantages of using a dropper? It is easier to control the amount of solution transferred, and the solution is less likely to spill.
or (c) (e) (b) (d) QUICK PRACTICE 1.4 1. The following are the steps for lighting a Bunsen burner. Arrange them in the correct order. (a) Make sure that the rubber tubing isproperly connected to the gas tap. (b) Light a match. (c) Close the air hole. (d) Hold the burning match just abovethe top of the chimney and turn on the gas tap. (e) Put the Bunsen burner on a heat-proof mat. (c) (b) (d) (e) (a)
Activity1 (j) Choosing the unit for measuring lengths What units would you use to represent the length of the following things? mm cm m
Activity1 (k) Three students are measuring the length of a pencil. Who is in the proper position to read the scale? B C A Correct way of measuring lengths It is B. 7.5cm 7 cm 8 cm
XPERIMENT 1.6 Materials and apparatus thermometer 1 ice beaker (250 cm3) 1 hot water Using a thermometer to measure temperatures
Measure the room temperature with a thermometer. • The room temperature is ºC. Caution Mercury is poisonous. When you are using a mercury thermometer, extra care needs to be taken. If you accidentally break a thermometer, do not touch the mercury or try to pick up the pieces of broken glass. Inform your teacher immediately.
2. What is the temperature of tap water? Caution Do not stir water with a thermometer. You may break the thermometer.
Your teacher will give you some hot water. • What is the temperature of the hot water?
4. Your teacher will give you some ice water. What is the temperature of the ice water?
Hold the bulb of the thermometer in your hand for one minute. • What temperature does it show?
XPERIMENT 1.9 Materials and apparatus measuring cylinder (100 cm3) 1 empty cans of similar containers several displacement can 1 plasticine block 1 stone 1 thread Using a measuring cylinder to measure volumes
(c) The volume of tap water in the above measuring cylinder is cm3. (b) The correct reading is taken from the bottom of the meniscus. Also, make sure that your eyes are at the same level as the bottom of the meniscus. 79
Labelled volume (cm3) Type of container Measured volume (cm3) Is the measured volume equal to thelabelled volume? If not, can you explain why?
1 (a) Pour tap water into a measuringcylinder until it is about half full. The volume of water in the measuring cylinder is cm3. II. Measuring the volumes of irregular solids
The new reading is cm3. The volume of the plasticine block is cm3. If the plasticine block is divided into two smaller pieces, do you think its volume will change? The volume of a solid is equal to the volume of water it displaces.
The reading is cm3. The volume of the plasticine blocks is cm3. What can you conclude after this step? Does the volume of the plasticine block change? No, it doesn’t The volume of a solid does not change even when it is divided into many pieces.
Some irregular-shaped objects are too large to fit into a measuring cylinder. Theirvolumes can be measured by a displacement can. • Tie a large stone with a thread. • (b) Fill the displacement can with water until a small amount runs out of the spout.
displacement can Volume of thestone = volume of water collectedby the measuring cylinder = cm3. spout measuring cylinder stone (d)Slowly lower the stone into thedisplacement can. Measure the volume of water that flows out of the can into the measuring cylinder.
QUICK PRACTICE 1.5 1. Complete the table below. Name of the instrument What does it measure? Units of measurement Instrument stop-watch time second measuring cylinder volume cm3
QUICK PRACTICE 1.5 1. Complete the table below. 1. Complete the table below. Name of the instrument What does it measure? Units of measurement Instrument thermometer temperature oC balance weight kg