Download
1 / 4
0 likes | 4 Views
Find reliable road construction equipment for concrete paving, grading & compaction. Browse high-performance machinery for efficient and precise road building.

E N D
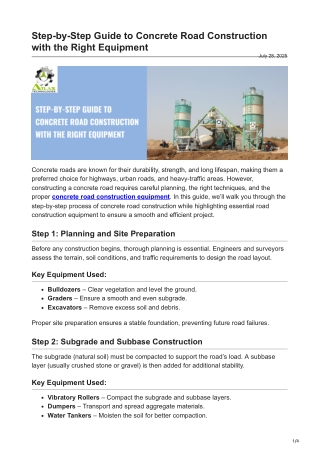
Step-by-Step Guide to Concrete Road Construction with the Right Equipment July 28, 2025 Concrete roads are known for their durability, strength, and long lifespan, making them a preferred choice for highways, urban roads, and heavy-traffic areas. However, constructing a concrete road requires careful planning, the right techniques, and the proper concrete road construction equipment. In this guide, we’ll walk you through the step-by-step process of concrete road construction while highlighting essential road construction equipment to ensure a smooth and efficient project. Step 1: Planning and Site Preparation Before any construction begins, thorough planning is essential. Engineers and surveyors assess the terrain, soil conditions, and traffic requirements to design the road layout. Key Equipment Used: Bulldozers – Clear vegetation and level the ground. Graders – Ensure a smooth and even subgrade. Excavators – Remove excess soil and debris. Proper site preparation ensures a stable foundation, preventing future road failures. Step 2: Subgrade and Subbase Construction The subgrade (natural soil) must be compacted to support the road’s load. A subbase layer (usually crushed stone or gravel) is then added for additional stability. Key Equipment Used: Vibratory Rollers – Compact the subgrade and subbase layers. Dumpers – Transport and spread aggregate materials. Water Tankers – Moisten the soil for better compaction. 1/4
A well-prepared subgrade and subbase prevent cracking and settling in the concrete road. Step 3: Formwork Installation Formwork acts as a mold to shape the concrete road. Steel or wooden forms are placed along the edges to contain the wet concrete until it hardens. Key Equipment Used: Formwork Panels – Provide structure for concrete pouring. Stakes and Clamps – Secure forms in place. Proper alignment of formwork ensures the road has a uniform width and thickness. Step 4: Reinforcement Placement For added strength, steel reinforcement bars (rebar) or welded wire mesh are placed within the formwork. This step is crucial for high-traffic roads. Key Equipment Used: Rebar Cutters & Benders – Shape reinforcement bars as needed. Cranes or Forklifts – Position heavy rebar mats. Reinforcement prevents cracks and enhances load-bearing capacity. Step 5: Concrete Mixing and Pouring High-quality concrete is mixed and poured onto the prepared roadbed. The mix typically includes cement, aggregates, water, and additives for strength and workability. Key Equipment Used: Concrete Batching Plants – Ensure precise mixing ratios. Concrete Mixer Trucks – Transport ready-mix concrete to the site. Concrete Pumps – Distribute concrete evenly across the road. Consistency in mixing and pouring is critical for a smooth, crack-free surface. Step 6: Concrete Spreading and Leveling Once poured, the concrete must be spread and leveled to the desired thickness. Key Equipment Used: Screed Machines – Level the concrete surface. Bull Floats – Smooth out imperfections before finishing. 2/4
Proper leveling ensures a uniform road surface for safe driving. Step 7: Finishing and Texturing After leveling, the concrete surface is finished to improve durability and skid resistance. Key Equipment Used: Troweling Machines – Create a smooth finish. Broom Finishers – Add texture for better traction. Texturing prevents slippery surfaces, especially in wet conditions. Step 8: Curing the Concrete Curing allows the concrete to gain strength gradually. This involves keeping the surface moist for several days. Key Equipment Used: Curing Compounds Sprayers – Apply sealants to retain moisture. Water Sprinklers – Maintain hydration during curing. Proper curing prevents cracks and ensures long-term durability. Step 9: Joint Cutting Contraction joints are cut into the concrete to control cracking caused by temperature changes. Key Equipment Used: Concrete Saw Cutters – Create precise joints at regular intervals. Joints help direct cracks to predetermined locations, preserving the road’s integrity. Step 10: Final Inspection and Opening to Traffic Once cured, the road undergoes quality checks before opening to traffic. Key Equipment Used: Testing Equipment – Measure strength and smoothness. Traffic Barriers – Ensure safety during final inspections. Only after passing all tests is the road ready for public use. Conclusion 3/4
Constructing a concrete road involves multiple stages, each requiring specialized construction road equipment. From site preparation to curing, using the right types of concrete road construction equipment ensures efficiency, durability, and safety. By following this step-by-step guide, contractors can build long-lasting concrete roads capable of handling heavy traffic for decades. Investing in high-quality road construction equipment not only speeds up the process but also enhances the final road quality, making it a worthwhile investment for any infrastructure project. 4/4