Chemistry Lab Measurements Guide | Thermometer, Ruler, Balance, Cylinder
Learn correct measurement techniques in this chemistry lab overview. Understand temperature, length, volume, and mass measurements with practical examples and uncertainties explained.

Chemistry Lab Measurements Guide | Thermometer, Ruler, Balance, Cylinder
E N D
Presentation Transcript
Intro to Chemistry Chem1020 Lab Measurements Chemistry Department Minneapolis Community & Technical College
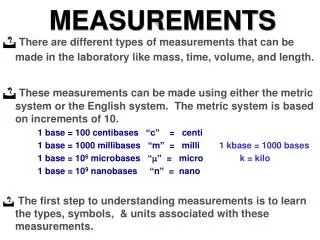
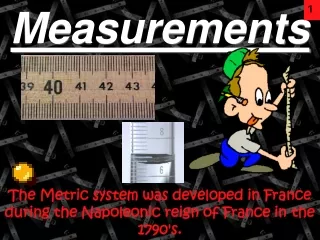
Overview Making measurements is a very important part in a chemistry lab. In this lab, you will learn how to make the measurements CORRECTLY. 2. A ruler for length measurement 1. A thermometer for temperature measurement 4. A balance for mass measurement 3. A graduated cylinder for volume measurement
Part I: Temperature Measurements Example: • Always determine the increment of the thermometer first. For example, the space between 20 and 30ºC in the thermometer on the left is divided into ten equal spaces. So the space between any two closest lines, or the increment is: (30ºC - 20ºC) / 10 = 1ºC (at ones place) It means that the top of the green liquid inside the thermometer falls somewhere in between 21 ºC and 22 ºC even though the numbers 21 and 22 are not really marked on the thermometer. 2. Now imagine the space between 21 and 22 is divided into 10 even smaller but equal spaces, thus each space will have a magnitude of (22ºC - 21ºC ) / 10 = 0.1 ºC. With this assumption, the top of the green liquid may be around 21.9 ºC. The number 9 on the tenth place is just an estimation, therefore not accurate. It may also be estimated as 21.8 ºC or 22.0 ºC. So the final measurement should be reported as 21.9 ± 0.1 ºC. The 0.1 ºC is called the uncertainty or error. Note that the uncertainty is always one digit beyond the increment digit. increment 22 21
Part I: Temperature Measurements Using the same approach as described in the previous slide, you will be measuring the temperatures of cold tap water, boiling water, and ice-cold water. Since you will be using the same thermometer, the increment will still be 1 ºC, and the uncertainty or error will be 0.1 ºC. Hold the thermometer so that the bottom bulb is in the middle of the water body. When the green liquid inside stops moving, read the temperature. x Never let the bulb touch the sides of the beaker, which may cause inaccurate reading.
Part II. Length Measurements • Ask a labmate to stand against this pillar in the lab and mark his/her height (only on the white paper). • Use two different meter sticks (Tools 1 & 2) to measure that height. Both sticks are one meter long, however, they are graduated differently. In other words, they have different increments.
Part II. Length Measurements • As with the thermometer, determine the increments of these two meter sticks first. Just a reminder, the increment is the magnitude between any two closest lines. • Always estimate one digit beyond the increment digit. • For example, if the increment is 0.1 m, the uncertainty/error would be 0.01 m, and the measurement should be reported as X.XX ± 0.01 m. If the increment is 0.01 m, the uncertainty/error would be 0.001 m, and the measurement should be reported as X.XXX ± 0.001 m.
Part III. Volume Measurements A graduated cylinder is one of the most common devices to measure the volumes of liquids in a chemistry lab. They come in different sizes, and most likely, different increments as well. First determine the increments of one 10-mL, one 25-mL, one 100-mL, and one 1000-mL graduated cylinders. You may find the 25-mL on your own bench. 25-mL 10-mL 100-mL 1000-mL
Part III. Volume Measurements 2. Determine the volumes of water in the 10-mL and the 100-mL graduated cylinders. Example: • The increment of this 10-mL graduated cylinder is (9-8) / 10 = 0.1 mL, so the uncertainty /error would be 0.01 mL. • Make sure your eyes are at the same level as the bottom of the meniscus. • Estimate where the bottom of the meniscus is located between 8.1 and 8.2 mL. The measurement can be reported as 8.15 ± 0.01 mL. 8.2 8.1
Part IV. Mass Measurements • Always use the same balance during one experiment (or follow instructions) and record the balance number. • Always have a piece of weighing paper on the balance. • Before putting your object on the balance, press the “Zero” or “Tare” button to zero it with the weighing paper. • Record every single digit shown in the electronic display. This includes all zeros! weighing paper balance number “zero” button A top-loading balance With this kind of balance, you do not need to estimate the uncertainty as what you did with thermometer, ruler or graduated cylinder. The last digit shown on the balance display is the “uncertain” or “estimated” digit. Therefore the balance shown above has an uncertainty/error of 0.01 g. The measurements should always be reported as X.XX ± 0.01 g.
Part IV. Mass Measurements • Determine and record the mass of the same nickel on three different balances. Record the corresponding balance numbers as well. • Determine the mass of 5.00 mL of water. • Since you have to use a container for water or any other liquids, determine and record the mass of an empty glass vial with its green cap on. • After 5.00 mL of water is transferred into the vial, put the capped vial back onto the same balance. Record this new mass measurement. The difference between these two mass measurements (without and with water) is the mass of water. • Empty the water in the vial into sink. Repeat steps a and b for a second trial. You do not need to dry the vial between trials. • But how do you measure 5.00 mL of water? a. Without water b. With water
Bulb: Squeeze out air. Fill/Empty Lever Fill Line pipette helper non-pointed, normal end Volumetric Pipette pointed, narrow end volumetric pipette Squeeze the bulb of the pipette helper to let air out. Gently insert the non-pointed end of the volumetric pipette into the pipette helper. Submerge the pointed end of the pipette into water till it is only a little bit above the bottom of the beaker. Keep it in water when performing the next step. Push the fill/empty lever up to bring the water into the pipette. Stop filling when the bottom of the water meniscus sits right on the fill line (see the picture on the left).
Volumetric Pipette • Always point a filled pipette downward so that the liquid does not get into the pipette helper and disable the helper. If the helper seems to stop working, inform the instructor immediately. • Move the pipette (still attached to the helper) so that the pointed end is now inside the vial as shown. • Push the fill/empty lever down to discharge the water into the vial. • Do not worry about the last bit of water remaining inside the pointed end. It is not included in the 5.00-mL volume.
Lab Report • Work on the post lab questions carefully and practice more to fully understand how to determine increment and uncertainty. • Follow the significant rules when doing calculation. • When subtracting or adding, pay attention to the numbers of decimal places instead of the numbers of significant figures. Example: vial with water: 22.79 g (2 decimal places) empty vial: - 17.89 g (2 decimal places) water: 4.90 g (2 decimal places) b. When multiplying or dividing, count the numbers of significant figures. Example: • Note: Conversion factors (such as 1.094 yd/m) have unlimited numbers of significant figures, i.e. they do not determine the number of significant figures in the final result.
Empty the water in the beaker and the green-capped vial into sink and return them onto your bench. • Put the used volumetric pipette into the used pipette holder with the pointed end pointing upward. • Wipe your bench with wet sponge. • Ask your instructor to sign you out • Next lab will be an application of what you learned in this lab. You will be making mass, volume, and temperature measurements on an unknown liquid. Based on its density, boiling point, and solubility, you will be able to determine its identity.