Download
1 / 11
110 likes | 382 Views
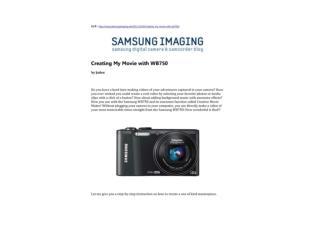
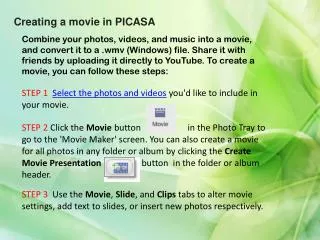
Creating a movie in PICASA. Combine your photos, videos, and music into a movie, and convert it to a . wmv (Windows) file. Share it with friends by uploading it directly to YouTube. To create a movie, you can follow these steps:.

E N D
Creating a movie in PICASA Combine your photos, videos, and music into a movie, and convert it to a .wmv (Windows) file. Share it with friends by uploading it directly to YouTube. To create a movie, you can follow these steps: STEP 1Select the photos and videos you'd like to include in your movie. STEP 2 Click the Movie button in the Photo Tray to go to the 'Movie Maker' screen. You can also create a movie for all photos in any folder or album by clicking the Create Movie Presentation button in the folder or album header. STEP 3 Use the Movie, Slide, and Clips tabs to alter movie settings, add text to slides, or insert new photos respectively.
MOVIE TAB • Use this tab to adjust the audio, appearance, and flow of your movie: • Audio track: You can load one supported audio file for use with each movie. Choose from three different options to sync your photos to music. • Transition style: Determine how to go from one picture to the next during the movie, e.g. wipe from left, dissolve, pan and zoom. • Slide Duration: Use the slider to adjust the amount of time spent on each slide. • Overlap: Adjust the amount of overlap during the transition from slide to slide. • Dimensions: Control the resolution of your movie. When choosing a dimension for your movie, it's useful to consider the format in which your movie will be viewed. • Show captions: Choose whether or not your photo captions should appear in your movie. • Full frame photo crop: Crop all movie images so that they completely fill the space on the slide.
SLIDE TAB Use this tab to add text to the slides in your movie. You can add text on top of any image or create a text-only slide to serve as a cover slide or a divider in your movie. Click the Slide tab on the 'Movie Maker' screen. Add text in the text box. The preview of your slide or photo will automatically update. Adjust the font, size, style, and color of your text and background. Change the style and location of your text using the 'Template' drop-down menu. By default, each movie has a cover slide that displays the title and date of your album. To create a new text-only slide, click the Add a new text slide button located below the Play button on the 'Movie Maker' screen.
CLIPS TAB Use this tab to add or remove photos, and to retrieve additional photos from your Library for use in your movie. Click the Clips tab on the left side of the 'Movie Maker' screen. Click the Get More button to find additional photos in your Library. Select your desired photos from your Library. After you've finished, click Back to Movie Maker in the Photo Tray. You should now see your additional images displayed on the Clips tab. Use the (+) and (-)buttons to insert and remove photos.
STEP 4 When you are satisfied with your creation, you have a few options: • Click the Play full screen button in the lower-right corner of the screen to see a full-screen preview. • Click the Create Movie button to begin the creation process. • Click the YouTube button to create the movie and automatically upload it to YouTube. • All completed movies in addition to drafts will be saved in the 'Movies' folder, located under My Pictures > Picasa (Windows). In Picasa, your 'Movies' folder is located in the 'Projects' collection (flat-folder view) or in the Picasa folder (tree view).
If you're not finished creating a movie, click the Close button and you'll be prompted to save a draft of your work in the 'Movies' folder. You can re-edit a draft or a finished movie at any time. In the 'Movies' folder, double-click your selected movie, then click the Edit Movie button to access the movie creation tools. Include music The Movie Maker allows you to add supported audio files to accompany your movies created in Picasa. On the 'Movie Maker' screen, click the Movie tab on the left side. Click the Load button to select the music you'd like to include from your computer. After you've loaded the music for your movie, you have three options for how your photos line up with the music:
Truncate audio: Your selected music will be cut-off at the end of your movie. • Fit photos into audio: Your photos will be automatically timed so that they fit within your chosen audio track. • You will not be able to adjust the 'Slide Duration' using this option; each of your photos will be displayed for the same amount of time. • Loop photos to match audio: Your photos will continue to display for the duration of your audio track. Unlike the 'Fit photos into audio' option, each photo will display for length of time you've specified in the 'Slide Duration' section. Photos will loop until the audio track ends.
Creating a Face movie in PICASA Face Movie analyzes the faces in your selected photos to find the smoothest transitions across facial expressions and poses. Unlike a movie presentation, Face Movie overlays the most similar facial expressions in each photo on top of each other to create the smoothest transitions. To create a Face Movie, follow these steps: STEP 1 Select multiple photos or an entire People album. STEP 2 Click Create Face Movie • STEP 3 You can select different transitions from the 'Transition Style' drop-down menu, choose the slide duration, or even the amount of overlap across photos.
STEP 4 Click Create Movie Your drafts and finished masterpieces will be saved in your 'Movies' folder, located in your 'My Pictures' folder on Windows or your 'Pictures' folder on a Mac. In Picasa, your 'Movies' folder is located in your 'Projects' collection or your 'Picasa' folder.