Understanding Form and Control Properties in Programming
170 likes | 295 Views
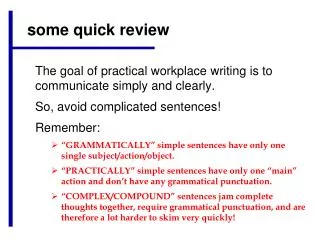
This guide explores fundamental controls in programming, including Forms, Labels, TextBoxes, and Buttons. We examine the naming conventions for controls and important properties like Name, Text, ForeColor, Visible, and AutoSize. Additionally, we discuss gathering user input via TextBoxes, modifying properties through code, and controlling form behavior such as tab order and keyboard shortcuts. Key concepts include dot operators, assignment statements, string concatenation, and methods for managing text input in user interfaces.

Understanding Form and Control Properties in Programming
E N D
Presentation Transcript
Some Review Controls and Properties
Controls We’ve Discussed • Form (naming prefix: frm) • Label (naming prefix: lbl) • Typically used for output because user cannot change Text property during execution • TextBox (naming prefix: txt) • Typically used for input because user can change • Button (naming prefix: btn) • Can execute code during click event
Properties You Should Know • Name – allows us to access a specific control • Text – displayed to user on screen • ForeColor – the color of the Text property • AutoSize – size changes based on Text Property, resets to smallest needed size • Visible – control will be seen by user • Boolean Properties have a value of TRUE or FALSE (examples: AutoSize and Visible)
First Concepts for Code • DOT Operator – allows access to a property or method of an object • lblGrossPay.Text • btnCalculate.Click() • Assignment Statement– sets the STORATE LOCATION on the left with the VALUE on the right • Left side changes • Right side remains unchanged • Strings – a group of characters
Chapter 3: Part 1 Text Input and Other Common Properties
Section 3.1 Gathering Text Input In this section, we use the TextBox control to gather input the user has typed on the keyboard. We also alter a form’s tab order and assign keyboard access keys to controls.
Using the Text Property in Code • The TextBox control’s Text property can be accessed in code the same way you access other properties • For Example: • You can modify the contents of the Text property in code – maybe to prompt the user • txtInput.Text=“Type Your Name” • The contents of the Text property can be assigned into a Label control’s Text property: • lblInfo.Text = txtInput.Text
Clearing a Text Box • Can be done with an assignment statement: • txtInput.Text = “” • This replaces whatever text was in txtInput’s Text property with an empty string • Can also be done with a method: • txtInput.Clear() • Clear is a Method, not a Property • Methods are actions – as in clearing the text • Uses the form Object.Method
String Concatenation • Assume the user has entered their name into the TextBoxtxtName • Label lblGreeting can say, “Hello” to any name found in the TextBox • lblGreeting.Text="Hello " & txtName.Text • Appends user name in txtName.Text to “Hello ” and stores result in text property of lblGreeting
String Concatenation • Tutorial 3-2 provides another example of how to concatenate strings from text boxes txtDayOfWeek txtMonth txtDayOfMonth txtYear lblDateString btnExit btnClear btnShowDate
The Focus Method • For a control to have the focus means that it is ready to receive the user's input • In a running form, one and only one of the controls on the form may have the focus • Only a control capable of receiving some sort of input may have the focus • The focus can be set to a control in code using the Focus method: txtName.Focus()
The Focus Method • You can tell which control has focus by its characteristics: • When a TextBox has focus, it will have a blinking cursor or its text will be highlighted • When a button (and other types of controls) has focus, you’ll see a thin dotted line around the control
Controlling a Form’s Tab Orderwith the TabIndex Property • Tab key steps focus from one control to the next • This order is set by the TabIndex property • The Tab key causes the focus to jump to the control with the next highest TabIndex value • The TabIndex property is best changed with the Tab Order option from the View menu • Displays the form in tab order selection mode • Set a new tab order by clicking the controls in the order you want • This sets the numeric TabIndex value
Assigning Keyboard Access Keys to Buttons • Say your form had a button with the text “Exit" on it • You can allow the user to activate the button using Alt-X instead of a mouse click • Just change the button text property to “E&xit" • The character following the '&' (x in this case) is designated as an access key • Be careful not to use the same access key for two different buttons
'&' Has Special Meaning in a Button • Note that the '&' in “E&xit" does not display in the button control on the form • It simply establishes the Alt Key access • In order to actually display an '&' on a button, it must be entered as "&&“ • Button text Save & Exit is entered as Save && Exit
Setting the Accept Button • The accept button is a button that is implicitly activated if the user hits the Enter Key • The AcceptButton Property designates which button on the form will behave in this manner • The button clicked most frequently on a form is usually assigned as the accept button
Setting the Cancel Button • The cancel button is a button that is implicitly activated if the user hits the Escape Key • The CancelButton Property designates which button on the form will behave in this manner • Any exit or cancel button on a form is a candidate to become the cancel button • Tutorial 3-5 provides examples of setting access keys, accept, and cancel buttons