Download
1 / 25
260 likes | 323 Views
Follow instructions provided by Jane Gick, Paediatric Metabolic Nurse Specialist, for collecting blood spot samples for phenylalanine testing at Evelina Children’s Hospital. Includes preparation, heel prick test, sample site selection, sample size, coverage, and next steps. Learn about the lab procedures, sample analysis, and reported results.

E N D
Blood Spot samples Jane Gick Paediatric Metabolic Nurse Specialist Evelina Children’s Hospital Guy’s & St. Thomas’ NHS Foundation trust
Preparation • Write out card with all the necessary details. • Have lancet pen ready and loaded • A clean cotton wool ball for wiping site after sample collected • Plaster if required
Using soft clix pen • If using a soft clix device, set the gauge. • Depth gauge is according to skin type, three to four is usually fine.
cleansing • Wash your hands, dry them thoroughly. • Wet hands can contaminate a sample as well as prevent a nice blood bubble formation.
Heel prick test • Apply booties or warm socks an hour or so prior to collecting sample. • Make sure heel is clean • Either side of the heel and big toe can be used.
Sample site • Choose a different finger/toe from last sample. • Make sure hands are nice and warm. • Hold device firmly on skin. • Press button. • Count to three 1,2,3 • Squeeze.
Sample size • Use a squeeze and relax, squeeze and relax tension allowing for a good size sample.
Apply sample to card • Allow for nice bubble formation • If bubble is not going to drip, bring card to bubble trying not to let finger/heel touch the card. Blood will seep through the card.
How many spots? • Most laboratories are happy for two blood spots but they must be big enough. • If the first spot looks too small collect three blood spots or even four, this will ensure some of the sample sent will be sufficient.
coverage • Each spot should cover most of the circle diameter.
What’s on the other side? • Turn the card over to check enough blood has soaked through.
Poor samples • Samples that are too small will give an inaccurate phenylalanine level.
examples • Another example of poor samples.
spotting • Spotting will give a result that may not reflect a true phenylalanine level.
What happens next • A suitable spot is punched from the card for analysis
Size required for accurate testing • This picture demonstrates the size of sample required to get a good phenylalanine result.
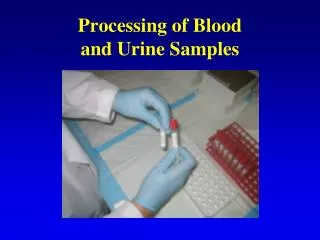
Checking in • Samples posted in are received at the laboratory and are logged in to the computer.
Punching out spot • A special machine punches out the spots
Mixing and shaking • Samples are then put onto plates and mixed.
Analysing • All samples running for analysis.
results • Sample results are then checked by the laboratory staff.
Lab team • Our hard working biochemistry team.
Reported results • Our dietitians have both a phoned and faxed report of all the day’s phenylalanine samples received
Phoning parents • With all the results available, the dietitian phones the families, discusses both the child’s well being dietary changes if needed and often a bit of a social chit-chat.