Download
1 / 32
410 likes | 885 Views
FTP for Beginners with FileZilla. What is File Transfer Protocol (FTP)?. Standard network protocol used to copy a file from one host to another over a network , such as the Internet. What is FileZIlla ?. FileZilla is a free FTP solution

E N D
What is File Transfer Protocol (FTP)? • Standard network protocol used to copy a file from one host to another over a network, such as the Internet
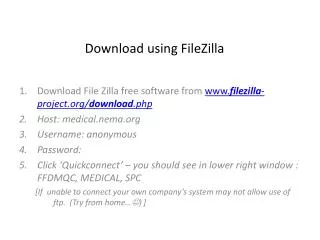
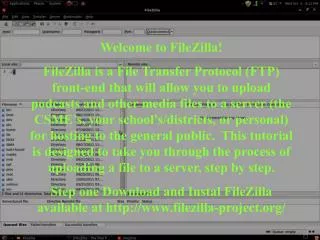
What is FileZIlla? • FileZilla is a free FTP solution • FileZilla is open source software distributed free of charge under the terms of the General Public License (GNU) • Website: filezilla-project.org • Download and install FileZilla Client • Lunch FileZilla
FileZilla • Legend: 1. Toolbar, 2. Quickconnect bar, 3. Message log, 4. Local pane, 5. Remote pane, 6. Transfer queue
Connecting to FTP Server • Host: csitpiercecollege.com • Username: csit55001@csitpiercecollege.com(course name and two digit number, emailed to you) • Password: 758631(take last 7 digits of your student id and drop middle one 88 – 758– 9631) • Server Port: 21
Connecting to FTP Server • Click Quickconnectbutton • Wait for confirmation that connection was successful Status : Directory listing successful • If you receive an error (in red) double check Host, Username, Password and Port entries. Click Quickconnect
Navigating on your Computer (Left Pane) • Left side of the main window is Local Site, your computer • Navigate your computer as you normally navigate in any File Manager software • The content of a folder, drive selected in Local site ( red box) is displayed in bottom part of the pane (purple box) • To view content of a drive or folder double click on it
Navigating on the Server (Right Pane) Name of the current remote directory Remote directory tree Content of current remote directory
Navigating on the Server • To change the current remote directory double-click a directory in the list of the current directory contents • Question marks ("?“, red box) appear on directories you haven't accessed yet, indicating that the FileZilla Client can't tell if there are subdirectories within those directories • If you access the directory the question mark will vanish • Selecting (a folder and two dots, purple box) directory allows you to go up to the parent directory of the current directory
Uploading Your Homework • Folder structure of your assignment on the remote site MUST BE ABSOLUTELY IDENTICAL with the folder structure on your Local site • Navigate to the top directory on your remote site
Uploading Your Homework • Select the top directory on your Remote Site (red box) • Create a root folder for your homework (next slide) • Create the same folder structure as in your Local Site
Creating a Folder • Navigate to the location where you want to create a folder • Right Click and choose Create directoryfrom the popup menu • Type the name in the dialog box and click OK button
Transfer Files – Drag & Drop • Navigate to the appropriate location • Select a file o a group of files to be transferred • To select adjacent files use Shift + Click • To select non-adjacent files use Ctrl + Click • Drag selected file(s) (a box is added to the arrow cursor) to the directory where you want to move it • The directory will be highlighted when you are over it • Let go of the mouse button and the file will be moved to the directory
Transfer Files – Drag & Drop Directory on the remote computer where files will be uploaded Files to be uploaded Release your mouse pointer here
Disconnecting from the Server • When done uploading • click on the Disconnect button • Exit FileZilla (FileExit or Ctrl + Q or close button
How Do I get a Link to my Assignment? • Open any browser • Type your domain in the address bar csit55001.csitpiercecollege.com user name
How do I get a link to my assignment? • Click on the folder with the assignment • Click on the file appropriate file
Submitting the Link • Before you submit make sure your website works properly! • Right-click on the address bar and copy the link
After you have made sure the link is correct, send the link to your instructor via your Moodle account for each lab assignment. Upload Link To Moodle © Lynne O’Hanlon 2010
Log into your Moodle Account. • Enter your SID (Student ID Number - 88 XXXXXX). • Enter your Password (Birth Month, Birth Date – for example 0102) © Lynne O’Hanlon 2010
Scroll down and select CSIT 550 course © Lynne O’Hanlon 2010
Look for Lab #1 Upload link to FirstPage.html assignment. • The clipboard is the symbol to look for when uploading class assignments. • Click Lab #1 Upload … to open the submission page where you will enter the link to this first assignment. © Lynne O’Hanlon 2010
On the assignment submission page you will see the description of the assignment, assignment available dates and the due date. • The submission box is where you will paste and create the link to your web page. • The submission box is the text box below the due date. © Lynne O’Hanlon 2010
Click Edit My Submission © Lynne O’Hanlon 2010
In the submission box you will insert the text for the link to your web page. • Right Click in the text area. • From the context sensitive menu select Paste. • This pastes the web page address in your Moodle submission box. © Lynne O’Hanlon 2010
Next, we need to change this into a link to your web page. • Highlight the entire address. • Click the Chain (Link button) above the document window. • This opens the Insert Link Dialog Box. © Lynne O’Hanlon 2010
In the Insert Link Dialog Box, in the URL line, Right Click. • From the context sensitive menu, select Paste. • This changes the text address of your web page into the link to your Web Page. © Lynne O’Hanlon 2010
To submit the assignment, click Save changes at the bottom of the page • Make sure the link works! © Lynne O’Hanlon 2010
Your instructor will open Moodle and click on the link. • If done correctly, your link will change color and the cursor will turn into a pointing finger. • Your instructor will click on the link and your page will open in my Browser. • The page will be evaluated and your grade on the assignment will be sent in an emailed reply from Moodle. © Lynne O’Hanlon 2010
The record of your graded assignments for the class will be kept in Moodle under your account © Lynne O’Hanlon 2010