Download
1 / 65
650 likes | 803 Views
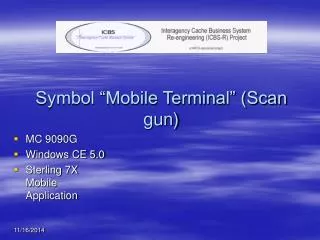
Symbol “Mobile Terminal” (Scan gun). MC 9090G Windows CE 5.0 Sterling 7X Mobile Application. Getting started. Symbol 9090 G Quickstart Guide and Training PowerPoint For Fire Cache Warehouse Operations. How to get a good scan. Don’t hurt yourself!. Getting Started. First Time Usage

E N D
Symbol “Mobile Terminal” (Scan gun) • MC 9090G • Windows CE 5.0 • Sterling 7X Mobile Application
Getting started Symbol 9090 G Quickstart Guide and Training PowerPoint For Fire Cache Warehouse Operations
Getting Started First Time Usage • Battery Charging and Battery Change Out • Refer to pages1-5 through 1-8 User’s Manual
Battery Management Battery Saving Tips • Leave the scan gun connected to AC power at all times when not in use. • Set the scan gun to turn off after a short time period of non-use. • Set the display and keyboard backlight to turn off after a short period of non-use. • Power off the scan gun when charging to charge at a faster rate.
Starting the Mobile Computer • Press the red Power button • If the scan gun does not power on, perform a cold boot (page 2-50 User’s Manual)
Changing the Power Setting To Turn the scan gun Off After a Short Period of Non-Use: • Devices equipped with CE 5.0 tap: Start>Settings>Control Panel>Power icon>Power Off tab. • Select the On battery power: Turn off device if not used for: check box and select value from the drop down menu. • Tap OK.
Scanning Bar Codes • Ensure that a scan enabled application is loaded on the scan gun. • Aim the scan exit window at the bar code. • Pull the trigger. • For scan guns with a laser scanner, ensure the red scan beam covers the entire bar code.
Inbound PO/Requisition Receipt Inbound shipments can be received at the dock location and then transferred to the storage location using a separate move task. When required, a user can bypass deposit to the dock location and deposit directly to the storage location (NOTE: The user will need to input the storage location versus the system directing the user to a storage location.) The steps described below should be followed for receiving inbound orders like POs and requisitions.
Inbound PO/Requisition Receipt (cont) • Login to the scan gun 2. From the menu page, select ‘Receive’ and hit Enter 3. The Receive window displays the list of available document types 4. Select the ‘Inbound’ document type and hit Enter 5. In the resulting screen, enter the Shipment # if known, or else hit the ‘Go’ button to display a list of all shipments that can be received. The user can then click on the relevant shipment to be received.
Inbound PO/Requisition Receipt (cont) 6. This brings up the receiving screen where the user should scan the receiving location and then hit ‘Go’ 7. The user then enters/scans the item ID of the item that is to be received and then hits ‘Go’. 8. In the resulting screen, the quantity to be received is entered. This may or may not match the original ordered quantity for the PO/Requisition. Also, the Receiving Disposition will default to RFI. The user can modify this as required to other pre-defined dispositions.
Inbound PO/Requisition Receipt (cont) 9. If there are more items to be scanned for the particular shipment, then step 8 can be repeated, else hit the ‘Done’ button until the shipment entry screen in step 5 is displayed. 10. If there are any more shipments to be received, steps 5 through 9 should be followed. 11. After a receipt is completed, the receipt can be closed using the “console” (PC-based application screens)
(B) (A) (A) Figure 4.1.1 Inbound Receipt – Resource (B) Figure 4.1.2 Inbound Receipt – Menu Screen
(C) (D) (C) Figure 4.1.2 Inbound Receipt – Document Type (D) Figure 4.1.3 Inbound Receipt – Details-choose go or enter Order Number
(F) (E) (E) Figure 4.1.4 Inbound Receipt – Details (F) Figure 4.1.5 Inbound Receipt – Receipt Location
(G) (H) (G) Figure 4.1.6 Inbound Receipt – Receipt Item ID (H) Figure 4.1.7 Inbound Receipt – Receipt Quantity (NOTE: Disposition Code defaults to RFI.
Inbound Orders • The example NFES item in the previous screenshot is a 001238 • The user will choose “go” on the scan gun screen • The user is done receipting in the “Inbound Order” • If there are multiple items to receipt in, then the user will scan the item bar code and then enter the number to receive in and select “go” for each item. • A separate move to storage location task will be generated for each item received.
Receipt of Items With Trackable IDs • Items that have Trackable IDs are received in the same manner as non-Trackable items except that the Trackable ID is also scanned/entered during receipt. • Depending on the quantity of items to be received, multiple Trackable IDs can be scanned one after another.
Receipt of Items With Trackable IDs (cont) • For purchase order receiving, the serial capture window appears only if the “Serial Numbers Tracked in Inventory” is checked in the ICBS Configurator. For returns receiving, the serial capture window appears if “Serial Numbers Tracked in Inventory” or “Serial Numbers tracked in Returns and Outbound” is checked. • The scan gun screen for receiving Trackable items is shown in the figure below:
(I) • Figure 4.1.8 Trackable Items Receipt • The Trackable number entered into the dialog box will correspond with the standardized Alpha-Numeric number established for that particular cache. • The Manufacturing date will display
Receiving Screen-Tag Controlled Items • Items that are tag controlled can be received in the same manner as non-tag controlled items except that the user will be prompted to enter tag information like manufacturer information during the receipt.
Putaway Process for Inbound Orders Putaway tasks are automatically generated whenever there is a receipt at the warehouse. Since a typical warehouse has several different locations, the putaway process first asks for a reference location to be scanned. This reference location tells the system where the operator is located in the warehouse.
Putaway Process for Inbound Orders (cont) Based on where the operator is located in the warehouse, the system presents the nearest putaway location to the user.
Putaway Process for Inbound Orders (cont) The following steps describe the putaway process using the scan gun: • Login to the scan gun • In the resulting menu, click on the “Task Controller” menu option
Putaway Process for Inbound Orders (cont) • In the next screen, the “Start Location” can be scanned. • The ‘Equipment #’ field can be left unspecified. • The start location is only scanned for reference purposes. It tells the system where the user is physically located in the warehouse, so that the nearest putaway task can be suggested.
Putaway Process for Inbound Orders (cont) • The item number can then be scanned in the resulting field. The system suggests the appropriate item to be scanned for the task at hand. • If the item is Trackable or tag controlled, the user can scan one or more Trackable IDs in the resulting screen.
Put away Process for Inbound Orders (cont) • Finally, the location to put away the item can be scanned. • The “Deposit All” button puts away the items to the final storage location. • Note that the system will not prompt the user for a pick location, since the task is already associated with that location, where the item was originally received. • If there are additional putaway tasks to be completed, the system will prompt the user again and steps 3-6 are carried out.
The following screen shots illustrate the Putaway process in ICBS
(B) (A) (A) Figure 4.2.1 Inbound Putaway – Menu Screen (B) Figure 4.2.2 Inbound Putaway – Reference Location Scan (optional)
(C) (C) (D) (C) Figure 4.2.3 Inbound Putaway – Deposit Location Scan (D) Figure 4.2.4 Inbound Putaway-Item ID Scan
(E) (F) (E) Figure 4.2.5 Inbound Putaway-Trackable ID scan (F) Figure 4.2.6 Inbound Putaway-Target Storage Location
Retrieval Pick Tasks The retrieval pick tasks are for outbound shipments for incident/other issues. The retrieval pick tasks will be automatically generated when a shipment is created for the incident/other issue. On the scan gun, the pick tasks will be split as two separate tasks – one for doing the actual pickup of the item from the pick location and another for doing the deposit (locating to a shipping area).
Retrieval Pick Tasks(cont) The following steps illustrate the processing of pick tasks for incident/other issues: • Log into the scan gun • Choose the “Retrieval” menu option on the resulting screen. • Enter/scan the reference “Start Location” on the scan gun.
Retrieval Pick Tasks (cont) • In the resulting screen, scan the pick location for the pick task. • The system automatically suggests the pick location from where to pick. • Hit the “Go” button • On the next screen, scan the suggested item and quantity and hit the “Go” button.
Retrieval Pick Tasks (cont) • If all the pick tasks have been completed, the system suggests the next deposit task. • Scan the deposit location and item on the deposit screen and hit “Deposit All” button. This will deposit all items into the shipping location This will complete the pick task cycle.
Retrieval Pick Tasks (cont) The outbound pick task screen would need to display the following customized fields (not currently shown on the mock-up screens that follow): • Issue Number – This should be displayed on the retrieval screen, along with item information, for all tasks associated with incident issues. • Incident Number – This should be displayed on the retrieval screen, along with item information, for all tasks associated with incident issues.
Retrieval Pick Tasks (cont) • Incident Name – This, too, should be displayed on the retrieval screen, along with item information. • A button will be added, called “Issue Info” which will present the user with key information for the Issue such as Ship-To address and Account Numbers • Because of the limited “footprint” of the mobile terminal screen, not all information on a full-sized issue screen will appear (e.g. If an issue has split account codes, there’s not enough room to show the additional codes)
The following screen shots illustrate the pick cycle for outbound shipments
(A) (B) (A) Figure 5.1.1 Outbound Pick – Retrieval (B) Figure 5.1.2 Outbound Pick – Reference Location Scan (optional)
(D) (C) (C) Figure 5.1.3 Outbound Pick – Item & Qty Scan (D) Figure 5.1.4 Outbound Pick – Location scan
(F) (E) (E) Figure 5.1.5 Outbound Pick – Item ID scan (F) Figure 5.1.6 Outbound Pick – Target Location scan and Deposit All
(G) (G) Figure 5.1.7 No Open Tasks
Ad hoc Move Requests Ad hoc move requests that are created in the console will generate pick and deposit tasks that can be executed through the AIT mobile devices. Ad-hoc moves may be created for several reasons, including movement of goods from the Receiving Dock to Storage or movement of product between two locations in storage. It is particularly useful if authorized users are manually consolidating inventory locations to conserve space.
Ad hoc Move Requests(cont) The process for executing ad-hoc move tasks is described below: • Log into the scan gun. • Choose “Ad-Hoc Move” • On the ensuing screen enter the reference location for the start location. • In the resulting screen, scan the suggested pick location for the move task and hit “Go”.
Ad hoc Move Requests (cont) • On the next screen, scan the suggested item and hit “Go”. If the item is tag controlled and/or Trackable, then scan the lot attributes and Trackable IDs in the resulting screens. • On the deposit screen, scan the suggested item and deposit location and hit “Deposit All” • This completes the move cycle. The following screen shots illustrate the ad-hoc move process:
(A) (B) (A) Figure 6.1.1 Ad Hoc Move – Main Menu (Ad Hoc Move) (B) Figure 6.1.2 Ad Hoc Move – Equipment # (go)
(D) (C) (C) Figure 6.1.3 Ad Hoc Move –Source Location and Item scan (D) Figure 6.1.4 Ad Hoc Move – Quantity to move
(E) (F) (E) Figure 6.1.5 Ad Hoc Move – Target location scan (Deposit All) (F) No Open Tasks