Download
1 / 23
230 likes | 560 Views
Class 2 Review of Class One - Microscopy and Introduction to Aseptic Technique and Media. Mrs. Sidelsky. Key Words. Parfocal and parcentric( paracentric) Parfocal means that once you have focused on low power you should be close to focus when you increase the magnification

E N D
Class 2Review of Class One - Microscopy andIntroduction to Aseptic Technique and Media Mrs. Sidelsky
Key Words • Parfocal and parcentric( paracentric) Parfocal means that once you have focused on low power you should be close to focus when you increase the magnification Parcentric – If your point of interest on a slide is centered on low power, it should remain in a central position.
Magnification • Increase the size of microorganisms by using lenses to affect the light • A maximum of 1000x can be attained by using a light microscope without sacrificing the clarity of the image • 1000X means that the object is magnified by 1000 times its actual size
Managing light • Three ways to adjust light • Iris diaphragm • Condenser lens • Diopter( adjust light intensity)
Coarse and fine adjustment • Use coarse adjustment only with scanning and low • Use fine adjustment only with high and oil • Never use fine adjustment with scanning – you should not need it
Resolution • Resolution is the clarity and accuracy of the image. • When light is produced by the lamp underneath the stage it can enter the lens system through the aperture or opening from different directions • High and oil immersion have the smallest distortion of images and the highest clarity, because the light rays enter the lens system almost perpendicular to the stage.
How large are bacteria ? • Bacteria range in size from 0.1 um to 600 um( microns) • Mycoplasma are very small, but there are also nanobacteria • Epulopiscium fisheloni is the largest bacteria
Oil Immersion • In order to view prokaryote cells, it is necessary to use high magnification. • Start your focus on scanning and low. Find the best portion of the slide for study. • You want to choose a place where the cells are space so you can study the shape and arrangement
Oil Immersion (continued) • When you increase the magnification remember to adjust the lighting • You may need more light on higher magnifications • When you have focused on high power and your image is clear, turn the revolving nosepiece between high and oil • Place a drop of oil on the slide and turn your oil immersion lens gently into the drop • Remember to use the fine adjustment
Aseptic • Work to protect yourself and contain organisms under safe working conditions • Prevent contamination of cultures from external sources so that microorganisms in the Petri Dish can be identified and characterized.
Part Two • Introduction to Microbiological Techniques • Objective One-To be able to work with aseptic technique • Goals - - To be able to handle media and cultures - To be able to transfer microorganisms from one culture to another
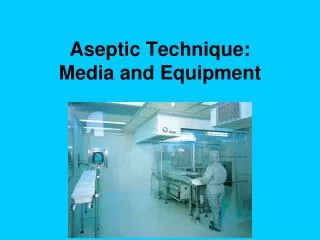
Terminology • Media – Solid – Agar Trypticase Soy Agar( TSA) - Enriched Media Nutrient Agar( NUT) Enriched Media( many) • Media – broth TSA broth NUT Broth Fermentation tubes- sugars
Equipment • Inoculating Loop • Inoculating Needle • Flaming the loop • Petri Dish • Streak Plate • Slant • Deep • Broth
Flaming- prevents contamination of culture • Hold Inoculating loop • Insert in flame until loop glows red • Allow to cool
Transfer of broth to broth • Steps for Transfer of Broth to Broth • Hold loop or needle with dominant hand( right ) • Flame the loop • Hold culture tube in left hand • Remove red cap with pinkie of right hand • Flame mouth of culture tube • Place loop into broth( water) • Flame mouth of culture tube and close • Open culture tube with broth( should be labeled) • Dip loop into new broth and mix • Flame mouth of tube and close • Flame loop • Place to the side of your rack
Broth to slant • 1. Wrap fingers of non dominant hand around the culture tube containing broth for transfer • 2. Using the pinkie finger of your dominant hand twist the red cap from the tube. Hold in your pinkie and do not place it on the counter • 3.Pass the mouth of the culture tube across the flame • 4.Direct the inoculating needle into the broth. • 5.Flame the mouth of your broth culture tube and replace the cap. Place it in your rack • 6.Pick up the slant in your non dominant hand
Part 2 • Twist off the red cap • 8.Flame the mouth of the slant tube • 9.Direct the inoculating needle into the tube and “ stab” the agar in the base( butt) • 10. Withdraw on the entry line and when you reach the surface make a simple streak along the face. • 11.Flame the mouth of the tube and replace the cap. • 12. Flame your inoculating needle and replace in your rack.
Broth to streak plate • Procedure for Streaking a Plate for Isolation: • Procedure: • 1. Flame the loop and wire and streak a loopful of broth as at A in the diagram. 2. Reflame the loop and cool it. 3. Streak as at B to spread the original inoculum over more of the agar. 4. Reflame the loop and cool it. 5. Streak as at C. 6. Reflame the loop and cool it. 7. Streak as at D. 8. Label the plate and incubate it inverted. • Go To Results of Streak PlateLab Procedures