Download
1 / 14
140 likes | 311 Views
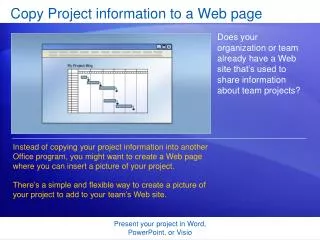
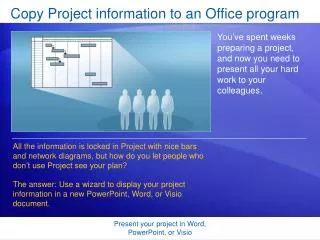
Copy Project information to an Office program. You’ve spent weeks preparing a project, and now you need to present all your hard work to your colleagues. . All the information is locked in Project with nice bars and network diagrams, but how do you let people who don’t use Project see your plan?

E N D
Copy Project information to an Office program You’ve spent weeks preparing a project, and now you need to present all your hard work to your colleagues. All the information is locked in Project with nice bars and network diagrams, but how do you let people who don’t use Project see your plan? The answer: Use a wizard to display your project information in a new PowerPoint, Word, or Visio document. Present your project in Word, PowerPoint, or Visio
How do you get your information out of Project? Once you’ve filled in all the fields and data in your project, how do you leverage all this work into an attractive and effective presentation — and not have to work over another weekend? You could use Excel or Visio to create a diagram that resembles your project. But duplicating your work in this way can be too time-consuming, especially when you already have all the information you need in Project. Present your project in Word, PowerPoint, or Visio
How do you get your information out of Project? You can use the Copy Picture to Office Wizard in Project to create an image of your project that is automatically copied into Word, PowerPoint, or Visio. The Copy Picture to Office Wizard can be found on the Analysis toolbar. On the View menu, point to Toolbars, and then click Analysis. Present your project in Word, PowerPoint, or Visio
Get a clear view of things first You’ll want to prepare your Project view first to contain all the relevant information you want to display in Word, PowerPoint, or Visio. This is because you don’t want your presentation to contain distracting or irrelevant information, such as the duration of individual tasks or resource pay rates. Present your project in Word, PowerPoint, or Visio
Get a clear view of things first So for starters, you may want to remove some columns. A typical project can have dozens, even hundreds of columns. But you want to minimize the number for the purpose of an effective presentation. In addition, if you want to show only specific tasks in your copied picture, be sure to select the rows you want to display before starting the wizard. Present your project in Word, PowerPoint, or Visio
Okay, fine. Now take me to the wizard When your project’s columns and view look the way you want, you’re ready to use the wizard to help refine your project’s display. So as described earlier, on the Analysis toolbar, click Copy Picture to Office Wizard. Present your project in Word, PowerPoint, or Visio
Okay, fine. Now take me to the wizard The first step in the wizard is to decide if you want to keep your original outline level or change it to display all tasks or only summary tasks. For example, you may decide that displaying only summary tasks will make the presentation more readable at a glance, and therefore might be better for managers or stakeholders. Determining an appropriate level of detail is often critical to the success of your presentation. Present your project in Word, PowerPoint, or Visio
Specify the look of the presentation Now comes the fun part — determining how you want your image of the project to be created. This is the next step in the wizard. If you’ve already selected rows prior to starting the wizard, you can specify that only these rows be displayed. If you want to select different rows, you’ll have to exit the wizard, select the rows you want, and then restart the wizard. Present your project in Word, PowerPoint, or Visio
Specify the look of the presentation Now comes the fun part — determining how you want your image of the project to be created. This is the next step in the wizard. If you want to show a particular time period, you can specify the new time in this page of the wizard as well. Now, your presentation is almost ready to be exported into another program. Present your project in Word, PowerPoint, or Visio
How big should it be? You don’t want to overwhelm your audience with an image too large, or make them squint their eyes to see a tiny image. So it’s important to specify an appropriate size for your image: • Choose Default if you want a typical image size of about 8 inches high and 6 inches wide. This might be an appropriate size for a Visio or PowerPoint presentation. Present your project in Word, PowerPoint, or Visio
How big should it be? You don’t want to overwhelm your audience with an image too large, or make them squint their eyes to see a tiny image. • Choose Maximum if you want a large image that, for example, you will print out. The maximum size is 22 inches. • Choose Custom and enter the dimensions you want to use if you are using Word, for example, and want a smaller image that fits between paragraphs of text. Present your project in Word, PowerPoint, or Visio
Time to take a look at it The next thing you will want to do is preview the image by clicking Preview. If you don’t like what you see, just click the Back button in the wizard and make your changes. When you are satisfied with your image, select the Office program you want to send the image to, and then select either a landscape or a portrait orientation. Present your project in Word, PowerPoint, or Visio
Select more information to send along Finally, you need to specify additional information to send along with the image. This is information about your project as a whole, such as project start and end dates, which will appear in a separate table above the image of your project that you have just set up. Present your project in Word, PowerPoint, or Visio
Select more information to send along When you click Finish in the wizard, the program you have specified will open with the image of your project. The final image will contain two portions: • An overview portion that contains your project’s overall duration, costs, or any other information you specified in Step 4 of the wizard. • Detailed project information about the tasks you selected for the wizard to report on. Present your project in Word, PowerPoint, or Visio