Download
1 / 12
120 likes | 143 Views
Learn how to set up and organize your interactive science notebook using the right materials and techniques. Includes instructions, tips, and examples.

E N D
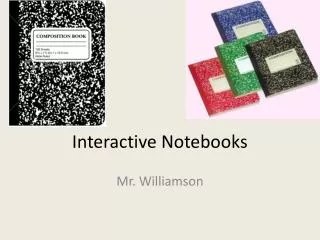
Materials • Composition notebook or spiral notebook. (Hard cover, books are preferred) • Elmer’s Glue • Scissors • Handouts • Pencil/pens • Colored Pencils/Crayons etc.
Open your notebook to the first page. • We are going to skip this page for now. • Go to the next page
Copy or glue in “Guide to the Interactive Notebooks Interactive Notebook Guide : Left Side Interactive Notebook Guide : Right Side The RIGHT side of the notebook is the “input” side. It is the information side. • Handouts • Class Notes • Reading Notes • Vocabulary • Concept/Thinking Maps • Data from activities • Diagrams/Sketches of activities • Articles • Homework The LEFT side is the “output side”. It is your side for you to think and respond. • Quick Writes • Predictions • Review questions • Reflections • Summaries • Brainstorming • Data analysis
Table of Contents Table of Contents • Make a table of contents page like the one shown here. • You will create a table of contents on the next five pages.
Skip the next four pages. These will be used for the table of contents.
Label the Bottom outside corners of your notebook. Front to Back. • For now STOP at 100 1 2
Today’s Date Mrs. Shivers Rm 8 Science Policies Mrs. Shivers Rm 8 Science Policies • On the first pages of your 2 pages of your notebook. Glue in the Classroom Policies. 1 2
Today’s Date • On the pages 3 & 4. Glue in the scoring guides and rubrics 4 3
You will create a front cover for your Interactive notebook. Your notebook must include the following: • Title: 8th Science • Teacher: Ms. Shivers • Room: 8 • First and Last Name, Period • Colored Picture and a caption: • Science topic of interest • Science topic we will study this year • Scientist • Science related job/career • Be creative, detailed, and colorful.
About the Author • On the inside front cover you will: • Write two paragraphs about your self. Your about the author page, tells readers about you. You can include any information you like people to know. For example: Family, friends, school, hobbies, likes, dislikes etc. • Include a colored collage to represent who you are.