Download
1 / 17
180 likes | 353 Views
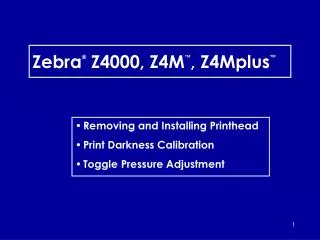
Zebra ® Z4000, Z4M ™ , Z4Mplus ™. Removing and Installing Printhead Print Darkness Calibration Toggle Pressure Adjustment. Removing the Printhead. Turn the power off and remove the power cord and the printer communications cable. Open the side cover.

E N D
Zebra® Z4000, Z4M™, Z4Mplus™ • Removing and Installing Printhead • Print Darkness Calibration • Toggle Pressure Adjustment
Removing the Printhead • Turn the power off and remove the power cord and the printer communications cable. • Open the side cover.
Locate the Printhead Assembly and remove the thumbscrew that fastens the Printhead to the Printhead Assembly. Thumbscrew Pressure Toggles
Open Printhead Lever. • Raise the Printhead Assembly until it “clicks” into place, remaining open. Printhead Assembly Printhead Lever
Remove media and ribbon (if applicable). • Carefully pull Printhead forward until Printhead Assembly cables are exposed. Printhead Assembly Cables
Detach the right cable assembly first, then the left cable assembly. • Remove the Printhead Left Cable Assembly Right Cable Assembly
Installing the Printhead Pressure Toggles • Make sure power is off and power cord and printer communications cable are both detached. • Set both pressure toggles to zero by turning them counter-clockwise.
Attach the Printhead Assembly cables, first the left, then the right. • Position the new Printhead under the Printhead Assembly. The Printhead Assembly guide pins must fit into the Printhead slots perfectly to ensure that the Printhead remains parallel and stationary.
Position the Printhead Assembly alignment guide pins into the Printhead alignment slots. You should hear and feel it “click” into place, which signifies that the Printhead is secured properly. Printhead Assembly Guide Pins
Make sure to wedge the Printhead Assembly cables into the rear of the Printhead Assembly (cables should not be exposed to media or ribbon). Printhead Assembly cables properly tucked away behind Printhead. Printhead Assembly cables should not be exposed.
Clean the print-line using an alcohol swab, removing dirt or oils that may have been deposited during installation. Print Line
Close the Printhead Assembly by lowering it until it “clicks” into the Printhead lever. • Close the side cover. • Attach the power cord and the printer communications cable. • Turn the power on.
Printhead Pressure Adjustment Toggle Pressure Adjustment • After installing the Printhead correctly, lower the Printhead Assembly until it “clicks” into place. • Once the Printhead Assembly is secure, run a print test. • If the test label is too light on one side, increase the pressure (turning the toggle clockwise) on the lighter side using the pressure toggles until the print is consistent across the width of the label. Too much pressure applied to the toggles will shorten the life of the Printhead. Choose the lowest pressure that produces the desired print quality, thus maximizing Printhead life.
Print darkness Print Darkness Calibration • After printer is turned on and self power test is completed, press the SETUP/EXIT button. • If printer requests a password, the factory default is 1-2-3-4. • After pressing the SETUP/EXIT button, scroll forward or backward using the INCREMENT buttons (+ or -) until DARKNESS is displayed.
1. Once DARKNESS is displayed on the LCD, press the select button. You can now increase or decrease darkness value using the INCREMENT buttons. 2. After printing a successful label at the desired darkness level, press the SETUP/EXIT button twice to save the changes and exit the setup mode.
Zebra is a registered trademark of ZIH Corp. All other trademarks are the property of their respective owners. (*) Contents Subject to Change Without Notice. Doc. No. Z4M-Instructions