Lecture 3 RTL Design Methodology Transition from Pseudocode & Interface
220 likes | 456 Views
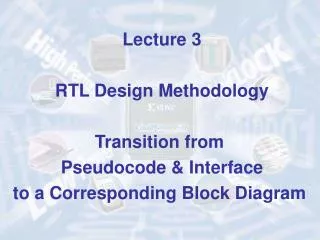
Lecture 3 RTL Design Methodology Transition from Pseudocode & Interface to a Corresponding Block Diagram. Structure of a Typical Digital System. Data Inputs. Control & Status Inputs. Control Signals. Datapath ( Execution Unit ). Control ler (Control Unit ). Status Signals.

Lecture 3 RTL Design Methodology Transition from Pseudocode & Interface
E N D
Presentation Transcript
Lecture 3 RTL Design Methodology Transition from Pseudocode & Interface to a Corresponding Block Diagram
Structure of a Typical Digital System Data Inputs Control & Status Inputs Control Signals Datapath (Execution Unit) Controller (Control Unit) Status Signals Data Outputs Control & Status Outputs
Hardware Design with RTL VHDL Interface Pseudocode Datapath Controller Block diagram State diagram or ASM chart Block diagram VHDL code VHDL code VHDL code
Steps of the Design Process • Text description • Interface • Pseudocode • Block diagram of the Datapath • Interface with the division into the Datapath and the Controller • ASM chart of the Controller • RTL VHDL code of the Datapath, the Controller, and the Top Unit • Testbench of the Datapath, the Controller, and the Top Unit • Functional simulation and debugging • Synthesis and post-synthesis simulation • Implementation and timing simulation • Experimental testing
Steps of the Design ProcessPracticed in Class Today • Text description • Interface • Pseudocode • Block diagram of the Datapath • Interface with the division into the Datapath and the Controller • ASM chart of the Controller • RTL VHDL code of the Datapath, the Controller, and the Top Unit • Testbench of the Datapath, the Controller, and the Top Unit • Functional simulation and debugging • Synthesis and post-synthesis simulation • Implementation and timing simulation • Experimental testing
Statistics example
Circuit Interface clk done reset n n dout Statistics din 2 dout_mode go
Pseudocode no_1 = no_2 = no_3 = sum = 0 for i=0 to k-1 do sum = sum + din if din > no_1 then no_3 = no_2 no_2 = no_1 no_1 = din elseif (din > no_2) then no_3 = no_2 no_2 = din elseif (din > no_3) then no_3 = din end if end for avr = sum / k
Statistics Example: Solutions
din n n n en1 reset en rst n+m clk A gt1 clk n+m no_1 A>B n esum B n reset en rst clk 1 0 s2 clk sum n+m en2 reset enc en reset en rst rst clk clk clk clk A gt2 no_2 m A>B n n+m n B i 1 0 s3 >> m = k-1 en3 reset en rst clk n A gt3 clk A>B avr no_3 zk n B no_3 no_2 no_1 n n n dout_mode 00 01 10 11 2 n dout Block diagram of the Datapath
Interface with the division into the Datapath and the Controller din dout_mode clk reset go n 2 gt1 gt2 gt3 Datapath Controller zk en1 en2 en3 esum enc s2 s3 n dout done
RC5 One of the fastest ciphers A w Basic operations: w C=A<<<B A<<<B B Rotation by a variable number of bits w C w A + B Addition modulo 2w where w is the size of operands A and B C C = A + B mod 2w
RC5 w/r/b w = 16, 32, 64 w - word size in bits input/output block = 2 words = 2w bits Typical value: w=32 64-bit input/output block r - number of rounds b - key size in bytes 0 b 255 key size in bits = 8b bits RC5 32/12/16 Recommended version: 64 bit block 12 rounds 128 bit key
Pseudocode Split M into two halves A and B, w bits each A = A + S[0] B = B + S[1] for j= 1 to r do { A’ = ((A⊕B) <<< B) + S[2j] B’ = ((B⊕A’) <<< A’) + S[2j+1] A = A’ B = B’ } C= A || B
Notation A, B, A’, B’ = w-bit variables S[2j], S[2j+1] = a pair of round keys, each round key is a w-bit variable ⊕ = an XOR of two w-bit words + = unsigned addition mod 2w A <<< B = rotation of the variable A by a number of positions given by the current value of the variable B A || B = concatenation of A and B The algorithms has two parameters: • r = number of rounds (e.g., 3) • w = word size (always a power of 2, e.g., w = 24 = 16)
Circuit Interface clk reset 2w 2w C M RC5 Done write_M w Si write_Si i m
Protocol (1) An external circuit first loads all round keys S[0], S[1], S[2], …, S[2r], [2r+1] to the two internal memories of the RC5 unit. The first memory stores values of S[i=2j], i.e., only round keys with even indices. The second memory stores values of S[i=2j+1], i.e. only round keys with odd indices. Loading round keys is performed using inputs: Si, i, write_Si, clk. Then, the external circuits, loads a message block M to the RC5 unit, using inputs: M, write_M, clk. After the message block M is loaded to the RC5 unit, the encryption starts automatically.
Protocol (2) When the encryption is completed, signal Done becomes active, and the output C changes to the new value of the ciphertext. The output C keeps the last value of the ciphertext at the output, until the next encryption is completed. Before the first encryption is completed, this output should be equal to zero.
Assumptions • one round of the main for loop of the pseudocode executes in one clock cycle • you can access only one position of each internal memory of round keys per clock cycle As a result, the entire encryption of a single message block M should last r+1 clock cycles.