Download
1 / 49
500 likes | 901 Views
Welcome to Library Management System. Based on Apache Struts 2.3.4.1 Framework. What is Struts.

E N D
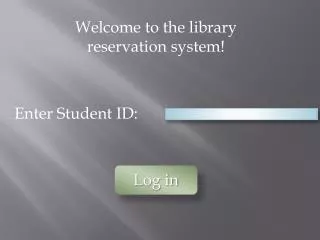
Welcome to Library Management System • Based on Apache Struts 2.3.4.1 Framework
What is Struts • Apache Struts is an open source Java framework used for building web applications based on the servlet and JavaServer Pages (JSP) technologies. It was created in 2000 by Craig R. McClanahan and has become the de facto standard framework for web applications in Java. It is based on MVC2 architecture • A SOFTWARE FRAMEWORK is a re-usable design for a software system (or subsystem). A software framework may include support programs, code libraries, a scripting language, or other software to help develop and glue together the different components of a software project.
Environment variables needed for working on Struts 2.0 • Eclipse Europa • Jboss • Jdk version 1.5 and above • .jar files which include the following-----ojdbc14.jar; commons-fileupload-1.2.2.jar; commons-io-2.0.1.jar;commons-lang-2.4.jar; commons-lang3-3.1.jar; commons-logging-1.1.1.jar; commons-logging-api-1.1.jar; freemarker-2.3.19.jar; javassist-3.11.0.GA.jar; mail.jar; mysql-connector-java-5.1.22-bin.jar; ognl-3.0.5.jar; struts2-core-2.3.4.1.jar; xwork-core-2.3.4.1.jar • Any database e.g. Oracle 9i and SQL developer;MySQL
How to create an application in struts 2.0 • File > New > Other > Web > Dynamic Web Project • You will go to “Select a wizard screen” - Click on web > select Dynamic Web Project and click next • You will go to Dynamic Web Project screen • Give a name to your project • On the Web Module Setting click on the checkbox for – generate web module for deployment descriptor Now you have successfully created a project on your system.
Directory Structure Struts2 • struts.xml file is placed inside WebContent/WEB-INF/classes • The web.xml file is placed inside WebContent/WEB-INF • The index.html and all the jsp are placed inside the WebContent folder • The jar files are in the lib folder • The classes files are created inside the build folder • The java files is placed inside the src folder inside its own directory (package) • The properties file are contained in WebContent/WEB-INF/classes • The ftl file are inside WebContent/WEB-INF/classes/templates/mytheme. These are used for configuring the page layout are are based on the freemarker
MVC 1 • The controller and the view merged
MVC 2 • The controller and the view separated.
Request lifecycle in struts application • User Sends request: User sends a request to the server for some resource. • FilterDispatcher determines the appropriate action: The FilterDispatcher looks at the request and then determines the appropriate Action. • Interceptors are applied: Interceptors configured for applying the common functionalities such as workflow, validation, file upload etc. are automatically applied to the request. • Execution of Action: Then the action method is executed to perform the database related operations like storing or retrieving data from the database. • Output rendering: Then the Result renders the output. • Return of Request: Then the request returns through the interceptors in the reverse order. The returning request allows us to perform the clean-up or additional processing. • Display the result to user: Finally the control is returned to the servlet container, which sends the output to the user browser.
Basic Struts Flow Basic Struts Flow • Struts 2.0 web.xml index.html success.jsp action class struts.xml error.jsp
The Struts Presentation Layer • The Struts presentation layer is almost as flexible as the model layer. You can (and most users do) use JavaServer Pages, of course. But you can also use one of many alternative presentation technologies if JSP isn't your thing. From Velocity Templates to XSLT to JavaServer Faces, Struts easily integrates with many. • In struts 2.0 we struts tags. These tags are used in the body of the jsp. The <html>,<head>,<title>,<body> tags remain the same. These are different from the normal jsp tags. and we need to use the taglib directive which invokes the .tld file struts-tag.tld <%@ taglib prefix=“s” uri=“/struts-tags” %> The taglib files are included in the jar file struts2-core-2.1.8.1.jar
Validation in Struts 2.0 – Server Side • There are two types of validations in struts • A) server side validation • B) client side validation • The Struts 2 validation framework uses xml based configuration file. The file name should be <Your action class> -validation.xml. In our case our action class name is Login.java, so our validation configuration file will be Login-validation.xml. The Login-validation.xml will be saved into "webapps\struts2tutorial\WEB-INF\src\java\net\nucsoft" directory.
Client Side validation in Struts 2 application • In the last section we developed Login-validator.xml configuration file for defining the server side validation. In this section we will use the same Login-validator.xml file for generating the client side java script. • In the login jsp page we will just add validate="true" in the <s:form tag...> so that it becomes • <s:form action="doLoginClientSideValidation" method="POST" validate="true">Rest of the code in login.jsp remains the same. This is the only work we have to do and rest work is done by Struts 2 validator framework. The validator framework generates JavaScript for validating the form at client side. • Finally we add the link in the index.html to access the login form for testing client side validation. <ul> <li><a href=“<s:url action= ‘roseindia/showLoginClientSideValidation.action’>Login Application (Client Side Validation)</a> </li> <li> <s:url value="/HelloWorldInput.jsp" var="helloworld" /> <s:a href="%{helloworld}">HelloWorld</s:a> </li> </ul>
Explanation of the Login PAge • When supply the user name and the password and click submit the control goes to the struts.xml which maps it to the action class Login.java • In login.java we first establish a connection with the database and pull the userlogin,password,role stored in the database. • We also store the userlogin into the Map variable session • We compare the password retrieved from front end with the password gethered from the database and if it matches and if the role pulled from the database is user we we return success1. Similarly we can return success2,success3, and error • The control is forwarded to struts.xml and if success1 is returned then control is forwarded to user.jsp. If success2 is returned control is forwarded to librarian.jsp. If success3 is returned control is forwarded to admin.jsp. If error is returned then control is forwarded to invalidlogin.jsp
Struts Flow for Login Page . invalidlogin.jsp login.jsp struts.xml login.java loginsuccess
Demonstration of Struts flow through code snippets. • Index.html • <tr> • <td> • <ul> • <li><a href="nucsoft/showLoginThroughDatabase.action">Login Application (Validation Through Database)</a></li> • </ul> • </td> • </tr> (From here the control with flow to web.xml and after the filter org.apache.struts2.dispatcher.FilterDispatcher is applied
Demonstration of Struts flow through code snippets. • <filter> • <filter-name>struts2</filter-name> • <filter-class>org.apache.struts2.dispatcher.FilterDispatcher</filter-class> • </filter> • <filter-mapping> • <filter-name>struts2</filter-name> • <url-pattern>/*</url-pattern> • </filter-mapping> (after the filter is applied control again flows back to struts.xml)
Demonstration of Struts flow through code snippets. • Struts.xml • <?xml version="1.0" encoding="UTF-8"?> • <!DOCTYPE struts PUBLIC "-//Apache Software Foundation//DTD Struts Configuration 2.0//EN" "/WEB-INF/classes/struts-2.1.7.dtd"> • <struts> • <constant name="struts.devMode" value="true" /> • <constant name="struts.custom.i18n.resources" value="global"/> • <package name="default" namespace="/" extends="struts-default"> • <action name="HelloWorld" class="com.tutorialspoint.struts2.HelloWorldAction" method="execute"> • <result name="success">/HelloWorld.jsp</result> • </action> • <action name="fileUpload" class="com.tutorialspoint.struts2.FileUploadAction" method="execute"> • <result name="success">/success.jsp</result> • <result name="error">/error.jsp</result> • </action> • </package> • </struts> • (struts.xml forwards the control to Login.jsp which is displayed)
Demonstration of Struts flow through code snippets. • When you provide userlogin and password and click submit the <s:form tag> maps the jsp to the action tag in struts.xml. This tag is in login1.jsp • <s:form action="loginaction" method="post"> • <s:textfield name="user" label="User"></s:textfield> • <s:password name="password" label="Password"></s:password> • <s:submit value="Login"></s:submit> • </s:form> > The control goes back to struts.xml and looks for the mapping of “dloginaction” and the corresponding action class Login1.java is invoked. • action name="loginaction" class="com.tutorialspoint.struts2.LoginAction" method="execute"> • <result name="success">/success.jsp</result> • <result name="error">/error.jsp</result> • </action>
Demonstration of Struts flow through code snippets. • In Login1.java we make a connection with database and retrieve userlogin,password and role. • We first put the userlogin in Map variable session Map session = ActionContext.getContext().getSession(); session.put("logged-in", "true"); getSession().put("userlogin_db", userlogin_db); • We then compare front end and database password and on matching we also check the role. We then return success1 or success2 or success3, or error if(pwd_fe.equals(pwd_db)&& role_db.equals("user")) { return "SUCCESS1"; } elseif(pwd_fe.equals(pwd_db)&& role_db.equals("librarian")) { return "SUCCESS2"; } elseif(pwd_fe.equals(pwd_db)&& role_db.equals("admin")) { return "SUCCESS3"; } else { returnERROR; }
Demonstration of Struts flow through code snippets. • The control is again transferred to struts.xml and if success1 is returned we dispatch it to user.jsp and so on. If error is returned we dispatch it to invalidlogin.jsp • <action name="doLoginThroughDatabase" class="net.nucsoft.Login1"> • <result name="SUCCESS1" type="dispatcher">/pages/user.jsp</result> • <result name="SUCCESS2" type="dispatcher">/pages/librarian.jsp</result> • <result name="SUCCESS3" type="dispatcher">/pages/admin.jsp</result> • <result name="error" type="redirect">/pages/invalidLogin.jsp</result> • </action>
Demonstration of Struts flow through code snippets. • Suppose the control goes to user.jsp . In user.jsp we use the following code to include welcome.jsp • <jsp:include page="welcome.jsp" /> In welcome.jsp we again get the values set in the session variable using the following code. <h1><b><i>Welcome <s:property value="#session.userlogin_db" /></i></b></h1> Also in welcome.jsp we provide the link to various other jsp’s associated with the user module with the following code. <tr><td> <s:a href="search.jsp">Please click here to view your search page</s:a> </td></tr> <tr><td> <s:a href="account.jsp">Please click here to change your account settings</s:a><br><br><br> </td></tr> <tr><td> <s:a href="reserve.jsp">Please click here to reserve the book that you have blocked</s:a><br><br><br> </td></tr>
Explanation of the search page • In search.jsp we ask the user to provide the parameter he is searching i.e. if he is searching for bookname, author, bookid, etc. he is also required to provide the keyword. When the user clicks submit the control goes struts.xml which directs the control to to search.java. • In search.java we run a query and find out the details the person is looking. These details are pulled out from the ResultSet and stored in variable session which is an instance of Map class. • Then the control is transferred to the struts.xml which forwards it to printsearchdet.jsp. The variables stored in the session are retrieved and displayed on printserachdet.jsp.
Explanation of the search page • In search.jsp we ask the user to provide the parameter he is searching i.e. if he is searching for bookname, author, bookid, etc. he is also required to provide the keyword. When the user clicks submit the control goes struts.xml which directs the control to to search.java. • In search.java we run a query and find out the details the person is looking. These details are pulled out from the ResultSet and stored in variable session which is an instance of Map class. • Then the control is transferred to the struts.xml which forwards it to printsearchdet.jsp. The variables stored in the session are retrieved and displayed on printserachdet.jsp.
The Display or View in Struts2 • The jsp files are placed inside the WebContent folder • If you wan to display something on the jsp use the tag <s:property value="parameter from action class“ />. This value parameter of action class is obtained from the input jsp and its defined as a private variable in action class and getters and setters are generated for this parameter • In the jsp you just need to import the directive <%@ taglib prefix="s" uri="/struts-tags"%> • The <Html>, <head>, <title>, <body> tags do not change. Allowed HTML tags: <a> <em> <strong> <cite> <code> <ul> <ol> <li> <dl> <dt> <dd> • The tags which do change are given below a. <s:form action="fileUpload" method="post" namespace="/" enctype="multipart/form-data"> b. <s:file name="myFile" label="select a file to upload"/> c. <s:submit value="submit"/> d. <s:form action="HelloWorld" namespace="/" method="post" > e. <s:label>Please enter your name</s:label> f. <s:textfield name="userName" label="User Name" /> g. <s:property value="message" /> h. <s:url value="/SendMail.jsp" var="sendmail"/> <s:a href="%{sendmail}">SendMail</s:a> i. <s:password name="password" label="password" />
Action Class • The action class has one execute method which returns SUCCESS as a String. This method can be named something else also in which case it has to be mentioned in struts.xml. The rest of the methods are the getters and setters for the variables • The action class does not need to extend any class, however the above mentioned class extends ActionSupport class. This is done because ActionSupport has default implementations of common methods, gives access to Action.SUCCESS etc ie. If you return SUCCESS without any double quotes from execute method, you will get error, but after extending this class you will not. • There is one java class in Struts2 which is your action. It can have any name. What ever name you want just add Action to that name so that you know that this is the action class. This has all the fields mentioned in the view (as private variables). This also has their corresponding getters and setters and an execute method. This execute method must return SUCCESS ( all caps) and SUCCESS should never be in quotes. If you wan to name your method different from execute then you need to specify the method in struts.xml as follows: • <action name="fileUpload" class="com.tutorialspoint.struts2.FileUploadAction" method=“xyz"> • <result name="success">/success.jsp</result> • <result name="error">/error.jsp</result> • </action>
Create the directory structure • The directory structure of struts 2 is same as servlet/JSP. Here, struts.xml file must be located in the classes folder.
Create input page (index.jsp) • This jsp page creates a form using struts UI tags. To use the struts UI tags, you need to specify uri /struts-tags. Here, we have used s:form to create a form, s:textfield to create a text field, s:submit to create a submit button. • index.jsp • <%@ tagliburi="/struts-tags" prefix="s" %> • <s:form action="product"> • <s:textfield name="id" label="Product Id"></s:textfield> • <s:textfield name="name" label="Product Name"></s:textfield> • <s:textfield name="price" label="Product Price"></s:textfield> • <s:submit value="save"></s:submit> • </s:form>
3) Provide the entry of Controller in (web.xml) file • In struts 2, StrutsPrepareAndExecuteFilter class works as the controller. As we know well, struts 2 uses filter for the controller. It is implicitely provided by the struts framework. • web.xml • <?xml version="1.0" encoding="UTF-8"?> • <web-app> • <filter> • <filter-name>struts2</filter-name> • <filter-class> • org.apache.struts2.dispatcher.ng.filter.StrutsPrepareAndExecuteFilter • </filter-class> • </filter> • <filter-mapping> • <filter-name>struts2</filter-name> • <url-pattern>/*</url-pattern> • </filter-mapping> • </web-app>
4) Create the action class (Product.java)This is simple bean class. In struts 2, action is POJO (Plain Old Java Object). It has one extra method execute i.e. invoked by struts framework by default.Product.java • package com.javatpoint; • public class Product { • private int id; • private String name; • private float price; • public int getId() { • return id; • } • public void setId(int id) { • this.id = id; • } • public String getName() { • return name; • } • public void setName(String name) { • this.name = name; • } • public float getPrice() { • return price; • } • public void setPrice(float price) { • this.price = price; • } • public String execute(){ • return "success"; • } • }
5) Map the request in (struts.xml) file and define the view components • It is the important file from where struts framework gets information about the action and decides which result to be invoked. Here, we have used many elements such as struts, package, action and result. • struts element is the root elements of this file. It represents an application. • package element is the sub element of struts. It represents a module of the application. It generally extends the struts-default package where many interceptors and result types are defined. • action element is the sub element of package. It represents an action to be invoked for the incoming request. It has name, class and method attributes. If you don't specify name attribute by default execute() method will be invoked for the specified action class. • result element is the sub element of action. It represents an view (result) that will be invoked. Struts framework checks the string returned by the action class, if it returns success, result page for the action is invoked whose name is success or has no name. It has name and type attributes. Both are optional. If you don't specify the result name, by default success is assumed as the result name. If you don't specify the type attribute, by default dispatcher is considered as the default result type. We will learn about result types later. • struts.xml • <?xml version="1.0" encoding="UTF-8" ?> • <!DOCTYPE struts PUBLIC "-//Apache Software Foundation//DTD Struts • Configuration 2.1//EN" "http://struts.apache.org/dtds/struts-2.1.dtd"> • <struts> • <package name="default" extends="struts-default"> • <action name="product" class="com.javatpoint.Product"> • <result name="success">welcome.jsp</result> • </action> • </package> • </struts>
6) Create view components (welcome.jsp) • It is the view component the displays information of the action. Here, we are using struts tags to get the information. • The s:property tag returns the value for the given name, stored in the action object. • welcome.jsp • <%@ tagliburi="/struts-tags" prefix="s" %> Product Id:<s:property value="id"/><br/> Product Name:<s:property value="name"/><br/> Product Price:<s:property value="price"/><br/>
7) Load the jar files • To run this application, you need to have the struts 2 jar files. Here, we are providing all the necessary jar files for struts 2. Download it and put these jar files in the lib folder of your project. • download the struts2 jar files
Implementing the SessionAware interface in Struts2 • import java.util.Map; • import org.apache.struts2.interceptor.SessionAware; • import com.opensymphony.xwork2.ActionSupport; • public class MyAction extends ActionSupport implements SessionAware { • private Map<String, Object> sessionMap; • @Override • public void setSession(Map<String, Object> sessionMap) { • this.sessionMap = sessionMap; } public String login() { • String loggedUserName = null; • if (userName != null && userName.equals("admin") • && password != null && password.equals("nimda")) • // add userName to the session • sessionMap.put("userName", userName); • return SUCCESS; // return welcome page} • // in other cases, return login page • return INPUT;}
Retrieving Attributes from Session Struts2 • Adding an attribute to the session: • sessionMap.put("userName", "Tom"); • Removing an attribute from the session: • sessionMap.remove("userName"); • Getting the attribute from session: • <body> • <center> <h3>Welcome <i><s:property value=“#session[‘userName’]” /></i> ,you have logged in successfully!</h3> • </center> • </body> • The application, session and request objects are available from within s tags in jsp wherever ognl can be evaluated. Use the #application, #session, or #request syntax to get the object and access values by their keys using ['key']. • <s:property value="#session['baz']"/>
Object Graph Navigation Language • The Object Graph Navigation Language (OGNL) is an expression language. It simplifies the accessibility of data stored in the ActionContext. • The struts framework sets the ValueStack as the root object of OGNL. Notice that action object is pushed into the ValueStack. We can direct access the action property. • <s:property value="username"/> • Here, username is the property key. • The struts framework places other objects in ActionContext also e.g. map representing the request, session, application scopes. • To get these values i.e. not the action property, we need to use # notation. For example to get the data from session scope, we need to use #session as given in the following example: • <s:property name="#session.username"/> • (or) • <s:property name="#session['username']"/>
8) start server and deploy the project • Finally, start the server and deploy the project and access it.
Controller in Struts 1.x • In Struts 1.x the controller is ActionServlet • <servlet> • <servlet-name>action</servlet-name> • <servlet-class> • Org.apache.struts.action.ActionServlet • </servlet-class> </servlet> <servlet-mapping> <servlet-name>action</servlet-name> <url-patter>*.do</url-patter> </servlet-mapping> ActionServlet is a simple servlet which is the backbone of all Struts applications. It is the main Controller component that handles client requests and determines which Action will process each received request. It serves as an Action factory – creating specific Action classes based on user’s request. ActionServlet performs the role of Controller: Process user requests Determine what the user is trying to achieve according to the request Pull data from the model (if necessary) to be given to the appropriate view, Select the proper view to respond to the user Delegates most of this grunt work to Action classes Is responsible for initialization and clean-up of resources
Action class in Struts 1.x • The action class extends the class Action and ends with Action like YourAction • The action class has an execute method which can return multiple values like “success”, “bad-address”,”bad-password” etc • public class SignupAction1 extends Action{ • public ActionForward execute(ActionMapping mapping, ActionForm form, HttpServletRequest request, HttpServletResponse response) throws Exception{ • ContactFormBeanuserBean = (ContactFormBean)form; • String firstName = userBean.getFirstName(); • String lastName = userBean.getLastName(); • String email = userBean.getEmail(); • String faxNumber = userBean.getFaxNumber(); • if(userBean.isMissing(firstName)){ • makeWarning(request,”first name”); • return(mapping.findForward(“missing-value”)); • }else if(userBean.isMissing(lastName)){ • makeWarning(request,”last name”); • return(mapping.findForward(“missing-value”)); • }else if(userBean.isMissing(email)){ • makeWarning(request,”email address”); • return(mapping.findForward(“missing-value”)); • }else if(userBean.isMissing(faxNumber)){ • makeWarning(request,”fax number”); • return(mapping.findForward(“missing-value”)); • }else{ • return (mapping.findForward(“success”)); • }} • protected void makeWarning(HttpServletRequest request, String message){ • MessageBeanmessageBean = new MessageBean(); • messageBean.setMessage(message); • Request.setAttribute(“messageBean”,messageBean); • }}
Struts-config.xml in Struts1.x <struts-config> <form-beans> <form-bean name=“contactFormBean” type=“coreServlets.ContactFormBean” /> </form-beans> <global-forwards> <forward name=“success” path=“/WEB-INF/results/signup-confirmation.jsp” /> </global-forwards> • <action-mappings> • <action path=“/actions/signup1” • type=“coreservlets.SignupAction1” • name=“contactFormBean” • scope=“request” • <forward name=“missing-value” path=“/WEB-INF/results/missing-value.jsp”?> • </action> </action-mappings> </struts-config>
Create a form that invokes blah.do in Struts1.x • <HTML> • <HEAD><TITLE>Sign Up</TITLE></HEAD> • <BODY BGCOLOUR=“#FDF5E6”> • <H1 ALIGN=“CENTER”>Sign UP</H1> • <P> • <CENTER> • <%@ tagliburi=“http://struts.apache.org/tags-html” prefix=“html” %> • <html:form action=“/actions/signup1”> • First name: <html:text property=“firstName” /><BR> • Last name: <html:text property=“lastName” /><BR> • Email Address: <html:text property=“email” /><BR> • Fax Numer: <html:text property=“faxNumber” /><BR> • <html:submit value=“Sign Me Up!” /> • </html:form> • <CENTER> • </BODY> • </HTML>
Display the result in JSP page • <HTML> • <HEAD><TITLE>Confirmation</TITLE></HEAD> • <BODY BGCOLOR=“FDF5E6”> • <CENTER> • <H1>Confirmation</H1> • <%@ tagliburi=“http://struts.apache.org/tag-bean” prefix=“bean” %> • <UL> • <LI>First Name: • <bean:write name=“contactFromBean” property=“firstName” /> • <LI>Last Name: • <bean:write name=“contactFromBean” property=“lastName” /> • <LI>Email Address: • <bean:write name=“contactFromBean” property=“email” /> • <LI>Fax Number: • <bean:write name=“contactFromBean” property=“faxNumber” /> </CENTER> </BODY> </HTML>
Missing-value.jsp • <HTML> • <%@ tagliburi=“http://struts.apache.org/tag-bean” prefix=“bean” %> • <HEAD><TITLE>Missing or Invalid • <bean:write name=“messageBean” property=“message” /> • </TITLE></HEAD> • <BODY BGCOLOR=“FDF5E6”> • <CENTER> • <H1>TITLE>Missing or Invalid • <bean:write name=“messageBean” property=“message” /> • </H1> • Please try again </CENTER> </BODY> </HTML>
Create a form bean that is filled in with the incoming form parameters • Form bean is a class that extends ActionForm. These form bean need to be declared in struts-config.xml • ActionForm is javabean which represents the form inputs containing the request parameters from the View referencing the Action bean. • The important methods of ActionForm are : validate() & reset(). • public class ContactFormBean extends Action form{ • private String firstName = “First name”; • private String lastName = “Last name”; • private String email = “user@host”; • Private String faxNumber = “xxx-yyy-zzzz”; • private String [] defaultValues= {firstName, lastName, email, faxNumber}; • private String warning = “”; • -----getters and setters • public void getWarning(){ • return (warning);} • public void setWarning(String baseWarning){ • this.warning = “<H2><FONT COLOR=RED>Missing or invalid” + baseWarning+ “!</FONT></H2>”; } • public void clearWarning(){ • warning = “”;} • public void reset(ActionMapping mapping, HttpServletRequest request){ • clearWarning(); } • public booleanisMissing(String value){ • if((value==null) || (value.trim.equals(“”))){ • return(true); • }else{ • for( inti=0; i<defaultValues.length; i++){ • if(value.equals(defaultValues[i])){ • return(true); • } • } • return (false)}}}
Create Result Beans to hold the data resulting from business logic which is then displayed using bean:write tag • These beans need to extend no special class and need not be declared in struts-confirg.xml • public class MessageBean{ • private String message = “”; • public String getMessage(){ • return(message); • } • public void setMessage(String message){ • this.message = message; • } • }