1 / 8

How to use public lists at wishsimply

Learn how to use public list at wishsimply

WishSimply
Download Presentation

How to use public lists at wishsimply

An Image/Link below is provided (as is) to download presentation Download Policy: Content on the Website is provided to you AS IS for your information and personal use and may not be sold / licensed / shared on other websites without getting consent from its author. Content is provided to you AS IS for your information and personal use only. Download presentation by click this link. While downloading, if for some reason you are not able to download a presentation, the publisher may have deleted the file from their server. During download, if you can't get a presentation, the file might be deleted by the publisher.

E N D

Presentation Transcript


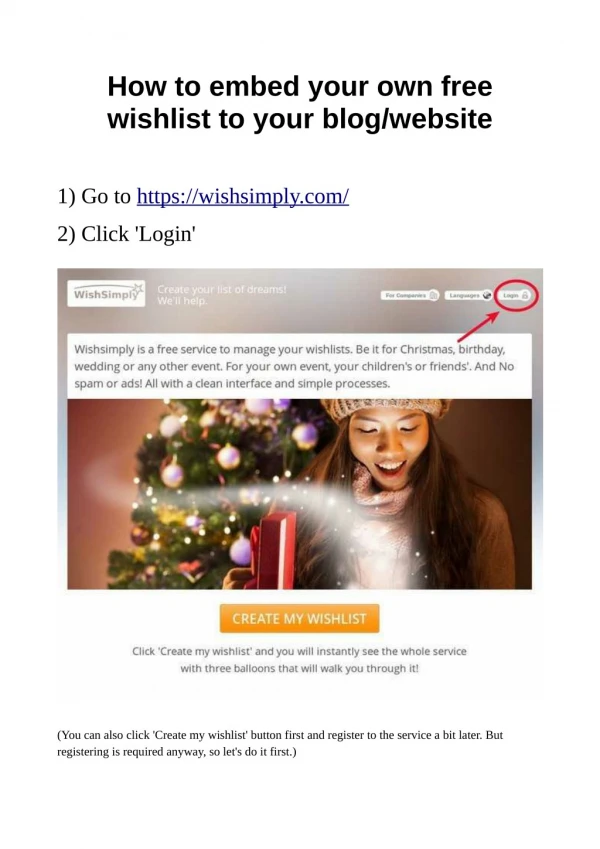
  1. How to embed your own free wishlist to your blog/website 1) Go to https://wishsimply.com/ 2) Click 'Login' (You can also click 'Create my wishlist' button first and register to the service a bit later. But registering is required anyway, so let's do it first.)

  2. 3) Login / Register to the service with Facebook or Google account.

  3. 4) Add some items in your list by clicking the plus sign.

  4. 5) Update your data by clicking any of the details fields

  5. A pop-up opens. Fill at least the fields that have the red borders and turn the 'Public list' switch ON. Then click the 'save' button.

  6. 6) Copy the code from the 'Embed your list' box.

  7. 7) Paste the code to your web page. (I use wordpress here as an example.)

  8. 8) Publish the page and verify that everything looks fine. That was it. Make your own free public wishlist at wishsimply.com

More Related