Download
1 / 5
0 likes | 7 Views
Installing a home CCTV system is a proactive step toward enhancing security and protecting your property. By following this step-by-step guide for home CCTV installation, homeowners can create a safer environment for themselves and their families. With the right planning, equipment, and execution, a CCTV system can provide peace of mind and a reliable safeguard against potential threats.

E N D
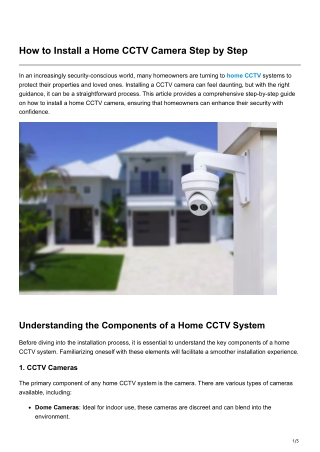
How to Install a Home CCTV Camera Step by Step In an increasingly security-conscious world, many homeowners are turning to home CCTV systems to protect their properties and loved ones. Installing a CCTV camera can feel daunting, but with the right guidance, it can be a straightforward process. This article provides a comprehensive step-by-step guide on how to install a home CCTV camera, ensuring that homeowners can enhance their security with confidence. Understanding the Components of a Home CCTV System Before diving into the installation process, it is essential to understand the key components of a home CCTV system. Familiarizing oneself with these elements will facilitate a smoother installation experience. 1. CCTV Cameras The primary component of any home CCTV system is the camera. There are various types of cameras available, including: Dome Cameras: Ideal for indoor use, these cameras are discreet and can blend into the environment. 1/5
Bullet Cameras: These are often used for outdoor surveillance due to their durability and weather resistance. PTZ Cameras: Pan-tilt-zoom cameras allow for remote control of the camera’s direction and zoom level, providing flexibility in monitoring. 2. Recording Device Footage captured by the cameras needs to be stored. This is typically done using: Digital Video Recorders (DVRs): Used with analog cameras, DVRs convert video signals into digital format for recording. Network Video Recorders (NVRs): These are designed for IP cameras and store video footage on a network. 3. Monitors Monitors are used to display live feeds from the cameras. This can be done through dedicated screens or via connected devices such as smartphones and computers. 4. Cables and Accessories Depending on the type of CCTV system, various cables and accessories are needed for installation, including power cables, video cables, connectors, and mounts for positioning the cameras. 5. Software Many modern CCTV systems come with software that allows for remote access and management of the system, enabling users to view footage from anywhere. Step-by-Step Guide to Installing a Home CCTV Camera Now that the components are understood, let’s dive into the step-by-step process of installing a home CCTV camera. Step 1: Assess Your Security Needs Before installation, evaluate your property to determine where surveillance is most needed. Consider areas such as: Entrances and exits Driveways and parking lots Backyards or side entrances High-traffic areas inside the home Creating a security plan will help identify the number and type of cameras required for optimal coverage. Step 2: Choose the Right Cameras 2/5
Based on the assessment, select the appropriate cameras for your needs. For outdoor areas, bullet cameras may be more suitable due to their weather resistance, while dome cameras can be great for indoor use where discretion is important. Step 3: Gather Tools and Materials Before starting the installation, gather all the necessary tools and materials, which may include: Drill and drill bits Screwdriver Level Measuring tape Cable clips or adhesive tape for securing cables Ladder (if installing high-mounted cameras) Step 4: Plan Camera Locations Using the security plan created earlier, identify the specific locations for each camera. Ensure that the cameras are positioned to cover the most critical areas while minimizing blind spots. Take into account the following considerations: Camera angle: Aim for a clear view of entrances and significant areas. Height: Position cameras high enough to avoid tampering but low enough to capture clear images. Lighting: Ensure that the cameras can effectively monitor areas regardless of lighting conditions. Step 5: Install the Cameras With the planned locations in mind, proceed with the camera installation: 1. Mark the Drill Points: Use a pencil to mark the drill points based on the camera mounting brackets. Ensure the marks are level. 2. Drill Holes: Using a drill, create holes for the mounting screws. Be cautious of any electrical wiring or plumbing in the walls. 3. Attach the Mounting Bracket: Secure the mounting bracket to the wall using screws. Ensure it is firmly anchored and level. 4. Mount the Camera: Attach the camera to the mounting bracket, ensuring it is securely fastened. Adjust the angle to cover the desired area. Step 6: Run the Cables For wired systems, running the cables correctly is crucial for functionality: 1. Plan the Cable Route: Determine the best route for the cables from the cameras to the recording device. Avoid areas where the cables could be easily damaged. 3/5
2. Secure the Cables: Use cable clips or adhesive tape to secure the cables along walls, ceilings, or floors. Ensure that they are neatly organized to avoid tripping hazards. 3. Connect the Cables: Once the cables are in place, connect the camera cables to the DVR or NVR, following the manufacturer’s instructions. Step 7: Set Up the Recording Device Now that the cameras are installed and connected, set up the recording device: 1. Connect to Power: Plug in the DVR or NVR to a power source. 2. Connect to Monitor: If using a monitor for live feeds, connect it to the DVR or NVR using the appropriate cables. 3. Configure Settings: Follow the manufacturer’s instructions to configure the recording settings, including resolution, recording schedule, and motion detection features. Step 8: Test the System Before finalizing the installation, it’s essential to test the system to ensure everything is functioning correctly: 1. Check Camera Feeds: View the live feeds from each camera on the monitor. Adjust angles if necessary to ensure optimal coverage. 2. Test Recording Functionality: Verify that the recording device is capturing footage as intended. Review recorded footage to confirm quality and clarity. 3. Test Remote Access: If the system includes remote access capabilities, test the functionality by logging in from a smartphone or computer. Step 9: Secure and Maintain the System Once the installation is complete and the system is operational, take steps to secure and maintain it: Secure Access: Change default passwords on the DVR or NVR to prevent unauthorized access. Use strong, unique passwords for added security. Regular Maintenance: Schedule regular checks to ensure the cameras and recording devices are functioning effectively. Clean camera lenses periodically to maintain image clarity. Update Software: Keep the system’s software up to date to ensure optimal performance and security against vulnerabilities. Conclusion Installing a home CCTV system is a proactive step toward enhancing security and protecting your property. By following this step-by-step guide for home CCTV installation, homeowners can create a 4/5
safer environment for themselves and their families. With the right planning, equipment, and execution, a CCTV system can provide peace of mind and a reliable safeguard against potential threats. For those looking to enhance their home security with professional guidance, CCTV.co.uk offers a comprehensive range of CCTV solutions tailored to meet diverse needs. Don’t wait until it’s too late—take action today and invest in the safety of your home with CCTV.co.uk! 5/5