Download
1 / 3
0 likes | 5 Views
This article delves into the detailed process of conducting a BRE 365 percolation test, shedding<br>light on each phase and its significance

E N D
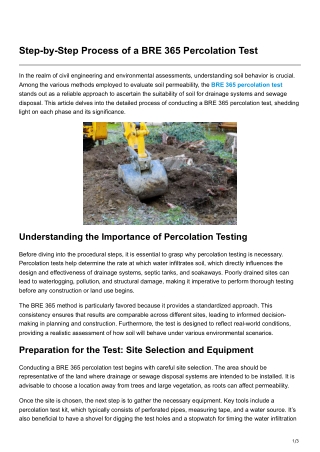
Step-by-Step Process of a BRE 365 Percolation Test In the realm of civil engineering and environmental assessments, understanding soil behavior is crucial. Among the various methods employed to evaluate soil permeability, the BRE 365 percolation test stands out as a reliable approach to ascertain the suitability of soil for drainage systems and sewage disposal. This article delves into the detailed process of conducting a BRE 365 percolation test, shedding light on each phase and its significance. Understanding the Importance of Percolation Testing Before diving into the procedural steps, it is essential to grasp why percolation testing is necessary. Percolation tests help determine the rate at which water infiltrates soil, which directly influences the design and effectiveness of drainage systems, septic tanks, and soakaways. Poorly drained sites can lead to waterlogging, pollution, and structural damage, making it imperative to perform thorough testing before any construction or land use begins. The BRE 365 method is particularly favored because it provides a standardized approach. This consistency ensures that results are comparable across different sites, leading to informed decision- making in planning and construction. Furthermore, the test is designed to reflect real-world conditions, providing a realistic assessment of how soil will behave under various environmental scenarios. Preparation for the Test: Site Selection and Equipment Conducting a BRE 365 percolation test begins with careful site selection. The area should be representative of the land where drainage or sewage disposal systems are intended to be installed. It is advisable to choose a location away from trees and large vegetation, as roots can affect permeability. Once the site is chosen, the next step is to gather the necessary equipment. Key tools include a percolation test kit, which typically consists of perforated pipes, measuring tape, and a water source. It’s also beneficial to have a shovel for digging the test holes and a stopwatch for timing the water infiltration 1/3
process. Ensuring that all equipment is clean and in good working order is essential for obtaining accurate results. Conducting the BRE 365 Percolation Test Step 1: Digging the Test Holes The first physical step in the BRE 365 percolation test involves digging test holes. According to the guidelines, a minimum of two holes should be dug at the site to provide a reliable average of soil conditions. Each hole should be approximately 300mm deep and 150mm wide. It’s crucial to avoid compacting the sides of the holes; hence digging should be done gently. Step 2: Preparing the Holes After the holes are dug, it’s important to prepare them for the test. This preparation involves filling each hole with water to saturate the soil. The recommended duration for this saturation phase is at least 24 hours. This process allows the soil to acclimate and ensures that any potential water absorption from the soil does not skew the test results. Step 3: Measuring the Water Level Following the saturation period, the next step is to measure the water level in each hole. This measurement serves as the baseline for the percolation test. A measuring stick or tape is typically used to determine the depth of the water in the hole accurately. It’s essential to record this initial water level meticulously as it will be used to calculate the percolation rate. Step 4: Performing the Percolation Test With the initial water level recorded, the actual percolation test can commence. Water is removed from the hole to a specific level, usually around 150mm from the bottom. The timer is then started, and observers must periodically measure how much the water level drops over a set duration, typically 30 minutes. This process is repeated for each test hole to gather comprehensive data. The key to this part of the test is consistency. Measurements should be taken at regular intervals, and the results should be recorded meticulously. After the test is completed, the data collected will provide insight into the soil's percolation rate, which is crucial for determining its suitability for drainage systems. Step 5: Analyzing the Results Once the percolation tests are completed, the next step is to analyze the results. The data collected from the measurements during the test will allow engineers to calculate the percolation rate, generally expressed in millimeters per hour. This rate is crucial in deciding the type of drainage system that can be implemented. A slower percolation rate may indicate that alternative solutions need to be explored, such as more extensive drainage systems or different types of sewage disposal methods. Conversely, a faster percolation rate may suggest that the soil can handle more significant water flow, allowing for simpler drainage solutions. 2/3
Factors Affecting Percolation Rates Understanding the factors that influence percolation rates is vital for accurate interpretation of the test results. Soil texture, structure, and moisture content are significant variables. For instance, sandy soils typically exhibit high percolation rates due to their larger particle size and spacing, allowing water to flow through easily. In contrast, clayey soils, with their fine particles and compact structure, tend to have lower rates of water infiltration. Additionally, the presence of organic matter, soil compaction, and seasonal variations can also impact percolation rates. Engineers must consider these factors when interpreting the results, as they provide context for the data gathered during the BRE 365 percolation test. Conclusion: The Significance of Accurate Percolation Testing In conclusion, the BRE 365 percolation test is an indispensable tool in civil engineering and environmental assessments. By following a systematic approach to testing, practitioners can gain valuable insights into soil behavior, which is essential for designing effective drainage and sewage systems. The thorough preparation, execution, and analysis of the test ensure that the data collected is reliable and relevant to the project at hand. For those in the field seeking expert assistance with percolation testing and other civil engineering services, Onn Point Civil Engineering offers comprehensive solutions tailored to meet specific project needs. Their expertise ensures that each test is conducted with precision, providing clients with the information necessary for successful project implementation. 3/3