Download

1 / 9
100 likes | 115 Views
Through this article, we came to known about the quick tips and trips to copy a file path on Windows and to show or hide the extensions on Windows. Now uploading any document or image on any site will not take as much time as it used to take. We just need to copy the path of the image, document, or file and we can use it simply where we want without surfing numerous files.

E N D
How to Copy a File Path, Show or Hide Extension in Windows https://mightypccleaner.com/
https://mightypccleaner.com/ Content: • Introduction • How to Copy a File Path in Windows • How to Show File Extension in Windows 8 and 10 • How to Show File Extension in Windows 7 • Hiding the Extension Again • Conclusion
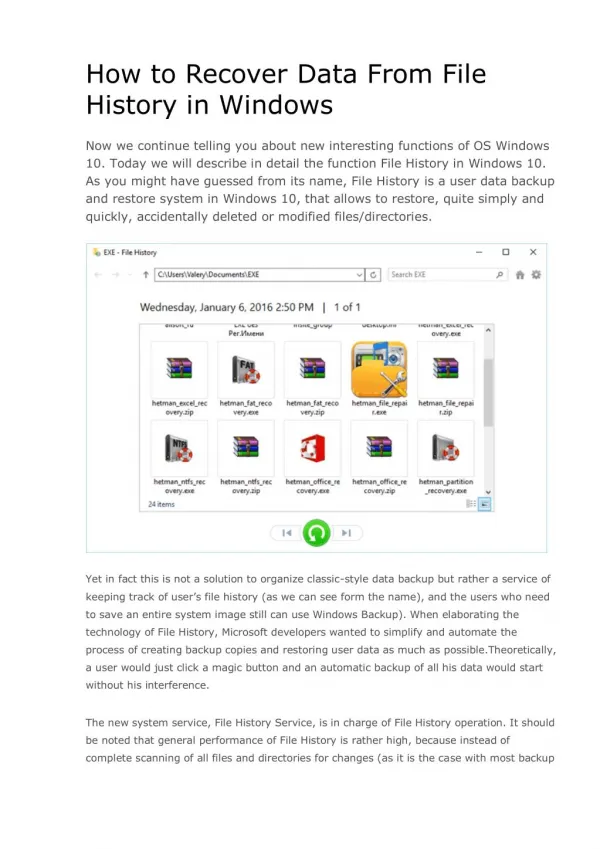
https://mightypccleaner.com/ Introduction: A big question while working on the system is How to Copy a File Path, Show or Hide an Extension in Windows? Previously followed methods are time taking and may keep you browsing and struggling for minutes just to upload the file. Windows have a default setting of hiding file extensions. Windows itself knows that it is a word document so it should be opened in Microsoft Word or it is an image so it will be open in photos. Showing file extension is good for security reasons. If you will not be able to see an extension of the file, you will not be able to know whether it’s a program, safe document, or media file. Making the file extensions will save our time. In case we do not want to see those extensions we can hide them again.
https://mightypccleaner.com/ How to Copy a File Path in Windows: • In the question section in windows explorer, find your desired image or document. • Right-click the photo or file while holding the shift key. • A context menu will appear on the screen. • Find and click on the “Copy as path” option. • This will copy the path of that image or folder on your keyboard • Now head towards the page in your browser where you want to upload the copied file. • Now to paste that file (image or document), press ctrl+v. • Click on ok and you are done.
https://mightypccleaner.com/ How to Show File Extension in Windows 8 and 10: • Open the control panel on your system • Under Appearance and Personalization, choose the folder option. • On the right of the ribbon there will be an option icon, click it. • Click on the “View” tab to open. • In the show/hide section, there will be three options that will have a toggle between on and off. • Activate the “File Name Extension” option and this is it. • File Explorer will remember your choice until you turn it off by yourself.
https://mightypccleaner.com/ How to Show File Extension in Windows 7: • Same as in previous, click on the start option. • Click the “Organiser” option on the Windows Explorer Toolbar. • Open the “Folder and Search “ option. • At the top of the Folder Options window, there will be a view option. • Click it. • Under the Advanced Setting option, there will be a checkbox option showing “Hide Extension of Known File Types”. • Uncheck it. • Click “OK” to change your setting.
https://mightypccleaner.com/ Hiding the Extension Again: In case if you feel that you no longer need o see the extensions or in any case if you want to hide the extensions again then you can just do the same process what to follow to show them and just check the checkbox of hiding option or just toggle the value to no accordingly. Your file’s extension will be hidden again and you can show them when you need it.
https://mightypccleaner.com/ Conclusion: Through this article, we came to known about the quick tips and trips to copy a file path on Windows and to show or hide the extensions on Windows. Now uploading any document or image on any site will not take as much time as it used to take. We just need to copy the path of the image, document, or file and we can use it simply where we want without surfing numerous files.
https://mightypccleaner.com/ THANK YOU