Making Field Maps and Marking Locations
300 likes | 630 Views
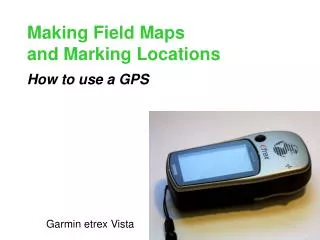
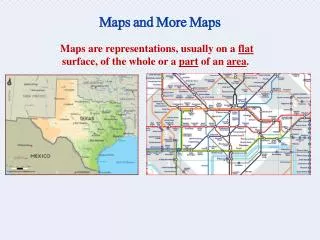
Making Field Maps and Marking Locations. How to use a GPS. Garmin etrex Vista. Goals. Build a base map for reference. Locate places so they may be found again. Navigate with confidence to a known point. Add location references to an existing map. Basic Equipment.

Making Field Maps and Marking Locations
E N D
Presentation Transcript
Making Field Maps and Marking Locations How to use a GPS Garmin etrex Vista
Goals Build a base map for reference Locate places so they may be found again Navigate with confidence to a known point Add location references to an existing map
Basic Equipment “Garmin” GPS (plus batteries) Computer with a serial port Serial cable for the GPS Mapping software (e.g., GARtrip) Scanner (optional: your own base maps) GPS map (optional: commercial maps)
Key Terms Waypoint Single points that you choose Route Waypoints assembled into a set Track Set of points automatically generated by the GPS
How GPS Works Signal time to arrival using multiple satellites 4 satellites minimum
GPS Coverage Limitations Works worldwide, equally well everywhere Signal is degraded by vegetation cover Signal is blocked by buildings Signal goes through a windshield or airplane window, but not the roof of a car or sides of an airplane
GPS Accuracy Selective Availability ~40 m Normal Accuracy ~20 m WAAS Correction <10 m Base-Station Differential Correction ~ m to cm
N 06 05 02 09 12 17 12 14 11 22 W E S GPS Constellation 29 satellites in orbit (8/01) Orbits are not synchronous Garmin GPS listens to 12 max at a time Quality of the constellation varies
e trex lL LEGEND Controlling the GPS Functions click stick zoom out page zoom in enter (choice selection) power(hold in)
Page button Satellite Map e trex lL LEGEND Navigation Trip Computer Main Pages page
Setting Up the GPS Main page Main Menu System Units Coordinate format: hddd.dddddº Datum: WGS-84
N 06 17 14 11 22 09 02 05 27 12 W E S 02 05 06 09 11 12 14 17 22 27 Initial GPS Acquisition Satellite page May take several minutes to get enough satellites No signal detected CheckingID Signal strength of confirmed satellite
Map Display Map Page Current location and the direction you are moving Scale 0.2 mi
GPS Map Databases Map page Garmin Default US Cities (general) and Foreign (general) Garmin Supplemental US Cities US Topography Foreign (some detail) Some foreign countries (mostly Europe)
Navigation Navigation page Waypoint destination Honolulu 34.1 mi Straight-line Distance 01 hrs 34 min W N Bearing Pointer (toward destination) Compass (direction you are moving) S E Elevation Time of Day 1103 ft 04:06 pm
Trip Odometer8.1 mi Moving Time10 hr 07 min Stopped1 min 56 sec Odometer000008.1 mi Speed___ mh Max Speed7.2 mh Moving Avg6.9 mh Overall Avg7.2 mh Trip Computer Trip Computer Page These fields can be replaced with many alternative types of information
Save Clear Logging a Track Main page Main Menu Tracks on off Track Log 0% Saved Tracks 10 unused
Helpful Hints Use GARtrip to manage your data Go to the field with the locations of key places already in your GPS Save sets of location data as separate files Mark locations of places that are important and carry the GPS so you can find them
More Helpful Hints Check the batteries before you start Clear out old data (use GARtrip) Enter key waypoints (e.g., airports, cities)
Marking a Location (“Waypoint”) Waypoint Collection Press and hold the “click stick” in (~3 sec) Waypoint is stored with number for its name; Link this number to your field notes Waypoint Processing Download to GARtrip using the serial cable Save these waypoints in a file on the PC Edit the waypoints by adding descriptors Draw a map with the waypoints
GARtrip www.gartrip.de $30 per license Major Functions Basemap calibration 2-way data transfer Waypoint editing Map drawing Route assembly Track drawing
GARtrip: Editing Waypoints Make sure your waypoints are loaded. Highlight a waypoint and click Edit. Name: 6 characters max (no spaces) Description: 16 characters max
GARtrip: Calibrating a Basemap Scan (or digital photograph) an appropriate map (max 150 DPI). North up. Save the scan as a GIF file (or convert to this format). Inside GARtrip, open with Map/Calibrate Note: You need to know the GPS location of two places on the basemap. The basemap will be used as a background for your data.
Exercise: Set-up Scan or digitally photograph a campus map that will be used as a background. Save this as a GIF file on the PC. Check the GPS with GARtrip to make sure that there are no stored waypoints or tracks. Check that the GPS has adequate batteries and the setup is proper.
Exercise: Data Collection Start the GPS and make sure that it is functioning properly. Walk the perimeter of the campus, marking the corners on the GPS. You will need two of these points to calibrate the map. Go through the interior of the campus marking at least a dozen significant points. Record the importance of each point in your notes.
Exercise: Post-Processing Download the waypoints and tracks into the PC Edit the waypoints by adding short comments to each one. Group the campus boundary waypoints as one route and the significant points as another route. Save these as separate files. Generate a map using your significant points.
Exercise: Post-Processing Calibrate the map inside GARtrip using two of your perimeter points. Add your significant points to the basemap.


![Making maps, many maps! [What is GIS?]](https://cdn1.slideserve.com/3592384/making-maps-many-maps-what-is-gis-dt.jpg)