Download
1 / 2
0 likes | 10 Views
Discover the step-by-step process of professional roof installation, from inspection and material selection to precise installation and final quality checks.

E N D
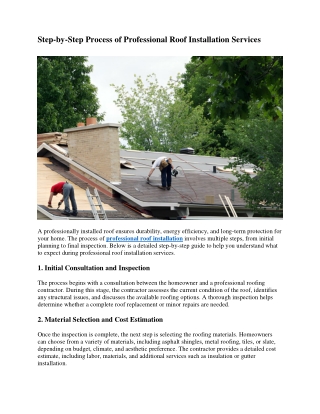
Step-by-Step Process of Professional Roof Installation Services A professionally installed roof ensures durability, energy efficiency, and long-term protection for your home. The process of professional roof installation involves multiple steps, from initial planning to final inspection. Below is a detailed step-by-step guide to help you understand what to expect during professional roof installation services. 1. Initial Consultation and Inspection The process begins with a consultation between the homeowner and a professional roofing contractor. During this stage, the contractor assesses the current condition of the roof, identifies any structural issues, and discusses the available roofing options. A thorough inspection helps determine whether a complete roof replacement or minor repairs are needed. 2. Material Selection and Cost Estimation Once the inspection is complete, the next step is selecting the roofing materials. Homeowners can choose from a variety of materials, including asphalt shingles, metal roofing, tiles, or slate, depending on budget, climate, and aesthetic preference. The contractor provides a detailed cost estimate, including labor, materials, and additional services such as insulation or gutter installation.
3. Obtaining Permits and Preparing the Site Before the installation begins, necessary permits and approvals are acquired to comply with local building codes and regulations. Once the paperwork is in order, the worksite is prepared by covering landscaping and setting up protective measures to minimize property damage during installation. 4. Removing the Old Roof If the project involves replacing an old roof, the existing roofing materials are carefully removed. The contractor ensures proper disposal of debris while inspecting the underlying structure for any signs of damage, such as rot or mold. Repairs are made to the roof deck before proceeding to the next step. 5. Installing Underlayment and Insulation To create a solid foundation for the new roof, an underlayment is installed. This waterproof layer protects against moisture penetration and enhances the roof’s longevity. Insulation may also be added to improve energy efficiency and regulate indoor temperatures. 6. Installing the Roofing Material With the underlayment in place, the primary roofing material is installed according to the manufacturer’s guidelines. Whether it’s shingles, tiles, or metal panels, the installation is done systematically to ensure proper alignment and weather resistance. Fasteners, adhesives, and sealants are applied to secure the materials in place. 7. Flashing and Ventilation System Installation Roof flashing is installed around chimneys, vents, and skylights to prevent water leaks. Proper ventilation systems, such as ridge vents or attic fans, are also installed to maintain air circulation and prevent moisture buildup. 8. Final Inspection and Cleanup Once the roof is installed, a thorough inspection is conducted to ensure everything meets industry standards and manufacturer specifications. The contractor checks for loose shingles, proper sealing, and overall stability. After passing the inspection, the worksite is cleaned, and all debris is removed. 9. Warranty and Maintenance Guidance The contractor provides warranty information and maintenance tips to help homeowners keep their roofs in excellent condition. Regular inspections and timely repairs are recommended to extend the lifespan of the roof.