Download
1 / 2
0 likes | 7 Views
Connecting your HP printer to a computer or laptop via USB is a common and straightforward process.

E N D
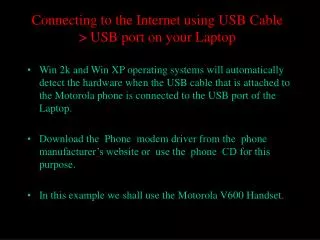
How to Connect an HP Printer to Your Computer or Laptop Using a USB Cable: A Step-by-Step Guide Connecting your HP printer to a computer or laptop via USB is a common and straightforward process. Here’s a detailed guide to help you get your printer up and running smoothly: 1. Unbox and Prepare the Printer Unbox the Printer: Begin by removing the printer from its packaging. Ensure you take out all protective materials and packaging tapes from both the outside and inside of the printer. These are usually placed to keep the printer parts secure during shipping. Install Ink Cartridges: Open the printer’s cartridge access door. Insert the ink cartridges into their designated slots, following the color-coding and instructions provided in the manual. Make sure the cartridges are securely in place. Load Paper: Place a stack of paper into the input tray. Adjust the paper guides to fit the size of the paper you’re using. This ensures that the paper is correctly aligned and prevents paper jams. 2. Connect the Printer to Your Computer/Laptop Locate the USB Port: Find the USB port on your printer. It is usually located at the back of the printer and is often labeled as “USB” or “USB-B.” The port is a square-shaped connector. Connect the USB Cable: Plug one end of the USB cable into the printer’s USB port. Plug the other end into a USB port on your computer or laptop. The USB port on your computer is typically rectangular and can be found on the sides or back of the laptop or desktop. 3. Install Printer Drivers and Software Turn on the Printer: Press the power button to turn on your printer. The printer should power up and be ready to communicate with your computer. Install Printer Drivers: For your computer to recognize and use the printer, you need to install the appropriate drivers. These drivers ensure that your printer and computer can communicate effectively. oAutomatic Installation: Many operating systems (like Windows 10/11 and macOS) will automatically detect the printer and attempt to install the necessary drivers once the USB connection is made. oManual Installation: If automatic installation doesn’t occur, you can download the latest drivers from the HP website. Go to the HP Support website and enter your printer model. Download and run the installation file, and follow the on- screen instructions. 4. Set Up the Printer
Verify Connection: Once the drivers are installed, go to your computer’s “Printers & Scanners” settings (found in the Control Panel on Windows or System Preferences on macOS). Ensure your HP printer appears in the list of available printers. Print a Test Page: To ensure everything is set up correctly, try printing a test page. This option is usually available in the printer settings menu. 5. Troubleshooting If you encounter issues: Check Connections: Ensure the USB cable is securely connected at both ends. Restart Devices: Try restarting your printer and computer. Update Drivers: Make sure you have the latest drivers from the HP website. By following these steps, you should have your HP printer connected to your computer or laptop via USB, ready to print documents and photos efficiently.