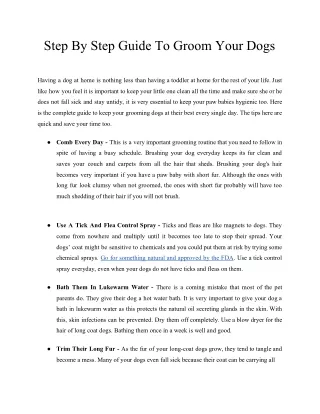
Download
1 / 12
0 likes | 14 Views
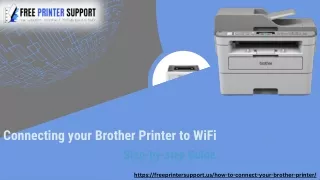
Brother printers are known for their reliability and quality, and connecting them to your WiFi network can make printing tasks seamless. Whether youu2019re a working professional or a student, knowing how to connect your Brother printer to WiFi could be very helpful for you. In this blog, Weu2019ll tell you the step-by-step process of how to connect your brother printer to Wi-Fi, so that you can start printing wirelessly immediately.

E N D
Connecting your Brother Printer to WiFi Step-by-step Guide https://freeprintersupport.us/how-to-connect-your-brother-printer/
Brother Printer to WiFi Setting up your Brother printer to connect to a wireless network is essential for convenient, cable-free printing. Whether you're using a computer, smartphone, or tablet, connecting your Brother printer to WiFi allows for seamless and efficient printing. This guide provides a comprehensive, step-by-step explanation on how to successfully connect your Brother printer to a wireless network. https://freeprintersupport.us/how-to-connect-your-brother-printer/
Ensure WiFi Compatibility and Printer Readiness Before you start the setup process, ensure that your Brother printer is compatible with wireless networks. Most modern Brother printers, such as the Brother HL, DCP, and MFC series, support WiFi. Refer to your printer’s manual to confirm. Once you confirm compatibility, place your printer in a location that is within range of your wireless router. Ensure that the printer is powered on and the wireless feature is enabled. You’ll know the printer is ready when the WiFi light or indicator on the printer’s control panel blinks. https://freeprintersupport.us/how-to-connect-your-brother-printer/
Locate Your Wireless Network Settings To connect the printer, you'll need your wireless network's SSID (the network name) and the password. These details can typically be found on a label on your router, in the router’s user manual, or via your computer's WiFi settings. https://freeprintersupport.us/how-to-connect-your-brother-printer/
Access the Printer’s Control Panel Next, access the printer’s control panel. Depending on your Brother printer model, this may involve either navigating a touchscreen menu or using physical buttons. On newer models with touchscreens, you'll likely find an option for "Settings" or "Network Settings." For printers without touchscreens, refer to your manual for the correct button sequence to access network settings. https://freeprintersupport.us/how-to-connect-your-brother-printer/
Start the Wireless Setup Wizard On the control panel, navigate to the Network Settings or WiFi Setup Wizard. From there, you will need to select WLAN or Wireless LAN Setup, which will begin the process of scanning for available wireless networks. Once the printer finds your network (listed by the SSID), select it. If your network doesn't appear on the list, try moving your printer closer to the router or restarting the printer and the router. https://freeprintersupport.us/how-to-connect-your-brother-printer/
Enter Your WiFi Password After selecting your network, you will be prompted to enter your WiFi password. Use the keypad on your printer’s control panel to type in the password. Be cautious while entering, as this part is case- sensitive, and any typo will prevent the printer from connecting. For models with touchscreens, simply tap each letter or number to enter the password. On models with a physical keypad, you may need to press each button multiple times to cycle through letters and numbers (similar to texting on older mobile phones). Once you’ve entered the password correctly, confirm your entry. The printer will attempt to connect to the WiFi network. https://freeprintersupport.us/how-to-connect-your-brother-printer/
Confirm Connection Success After a few moments, the printer will display a message indicating whether the connection was successful. If the connection is successful, the WiFi light on the printer should remain solid (not blinking). At this point, the printer is successfully connected to your wireless network. To verify, print a Network Configuration or Wireless Status report from the printer’s control panel, which will confirm the connection status. If the connection fails, double-check the SSID and password to ensure they are correct. You may also need to restart your router, printer, and any devices attempting to connect. https://freeprintersupport.us/how-to-connect-your-brother-printer/
Install Printer Drivers and Software Now that your printer is connected to the WiFi network, it’s time to install the necessary drivers and software on your computer or device. Visit the Brother Support website to download the latest drivers for your printer model. The website will automatically detect your operating system and suggest the correct drivers. During installation, the setup process will prompt you to select a connection method. Choose the Wireless Network Connection option, and the installer will search for printers on your network. Select your Brother printer from the list, and follow the on-screen instructions to complete the driver installation. If you're using a smartphone or tablet, you can download the Brother iPrint&Scan app from your device’s app store. This app allows you to print directly from your mobile device without needing a computer. https://freeprintersupport.us/how-to-connect-your-brother-printer/
Test the Connection Once you’ve installed the necessary software, it’s time to test your printer’s WiFi connection. Open a document or image on your device, select Print, and choose your Brother printer from the list of available printers. If everything is set up correctly, your printer should begin printing wirelessly. Troubleshooting Tips Even with a clear process, some users may experience difficulties when connecting their Brother printer to WiFi. Here are a few common issues and solutions: Incorrect Password: Ensure the WiFi password is entered correctly, as it is case-sensitive. Printer Too Far from Router: The printer may struggle to connect if it is too far from the router. Try moving it closer to improve signal strength. Router Settings: If your router has MAC filtering enabled, you may need to add the printer’s MAC address to the router's whitelist. Restart Devices: Sometimes, restarting your printer, router, or device can resolve connection issues. https://freeprintersupport.us/how-to-connect-your-brother-printer/
Conclusion Connecting your Brother printer to WiFi can enhance your productivity by offering flexible printing options from any device on your network. With the step-by-step guide provided above, you can easily set up the wireless connection, install the necessary drivers, and enjoy hassle-free printing. Whether you're printing from a computer or mobile device, the Brother printer’s wireless capabilities make it a convenient choice for home and office environments. https://freeprintersupport.us/how-to-connect-your-brother-printer/
Thank You info@freeprintersupport.us https://freeprintersupport.us/