Download
1 / 5
50 likes | 83 Views
The Wavlink AX1800 Extender Setup is an indication of a dependable, fast WiFi extender at a time when constant connectivity is necessary. In response to the growing need for robust network coverage that can cover every nook and cranny of your living or working area, this cutting edge extender offers a solution that fills the gaps and eliminates dead zones.<br><br><br>

E N D
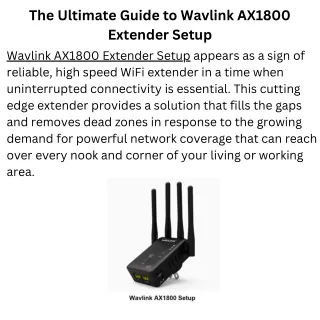
The Ultimate Guide to Wavlink AX1800 Extender Setup Wavlink AX1800 Extender Setup appears as a sign of reliable, high speed WiFi extender in a time when uninterrupted connectivity is essential. This cutting edge extender provides a solution that fills the gaps and removes dead zones in response to the growing demand for powerful network coverage that can reach over every nook and corner of your living or working area.
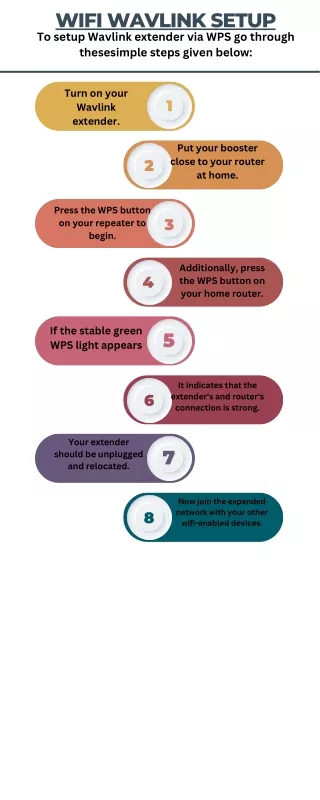
Wavlink AX1800 Setup Via manual method To ensure the strongest possible signal, place the extender within your router’s coverage area. Connect the extender to an electrical outlet and watch for the power LED to stabilize. Connect to the “Wavlink_Ext” network using the WiFi settings on your device (phone or PC). Enter “http://192.168.10.1” or “http://ap.setup” in the address bar of a web browser once it is open. If prompted, provide the default username and password, which are typically both “admin”. The setup wizard can be followed on screen. It may involve searching for open networks. Enter the WiFi password after choosing your home WiFi network from the list. Set the SSID and password for the extender or go with the settings. On your devices, you will connect to this network.
Confirm and double-check the changes you’ve made. Wait for the extender to reboot while saving the configuration. Go to your device’s WiFi settings and join the new extended network after the extender reboots. Check to see if your gadget is online and connected to the extended network. With the Wavlink AX1800 Extender Setup now concluded, your home’s Wi-Fi coverage has been successfully extended. It’s imperative to bear in mind the significance of maintaining the extender in a position where it can receive a strong signal from your primary router. This strategic placement is crucial for ensuring optimal performance.
Wavlink AX1800 Extender Setup: WPS method Plug your Wavlink AX1800 extender into a power outlet within the range of your existing WiFi router. Turn on the extender using its power button if available. Wait for the LED lights to stabilize. Locate the WPS button on your extender. It’s usually labeled as “WPS” or depicted by two arrows in a circular formation. Press the WPS button on your WiFi router. This initiates the WPS process on the router. Quickly press the WPS button on your Wavlink AX1800 extender, and in response, the LED indicators might blink or change colors to indicate a successful connection. This convenient process allows for swift establishment of the connection.
Give the extender some time to establish a connection with the router. The LED lights should stabilize, showing a successful link. For optimal performance, place the extender midway between your router and the WiFi dead zones. On your WiFi device (phone, laptop, etc.), scan for available networks, and subsequently connect to the new extended network. Often identified with a name like “YourRouterName_EXT,” this network is a testament to the extension’s success. If prompted, enter the WiFi password for the extended network, which typically mirrors your router’s WiFi password. This alignment simplifies the process for user convenience. Move to the areas where you had weak WiFi coverage before and check if the signal is stronger and stable.